Collector
Overview
To collect data with a collector, you need two elements:
Collector plugin
This is an element that defines the specifications of what resources to collect from the Cloud provider, and how to display the collected data on the screen.
Since each provider has a different structure and content of data, a collector completely relies on Collector plugin to collect resources.
For detailed information on this, see here.
Service account
To collect resources, you need to connect to an account on the Cloud provider.
Service Account is your account information to link to your provider's account.
A collector accesses the provider account through the service account created for each provider.
For detailed information on this, see here.
Create a collector
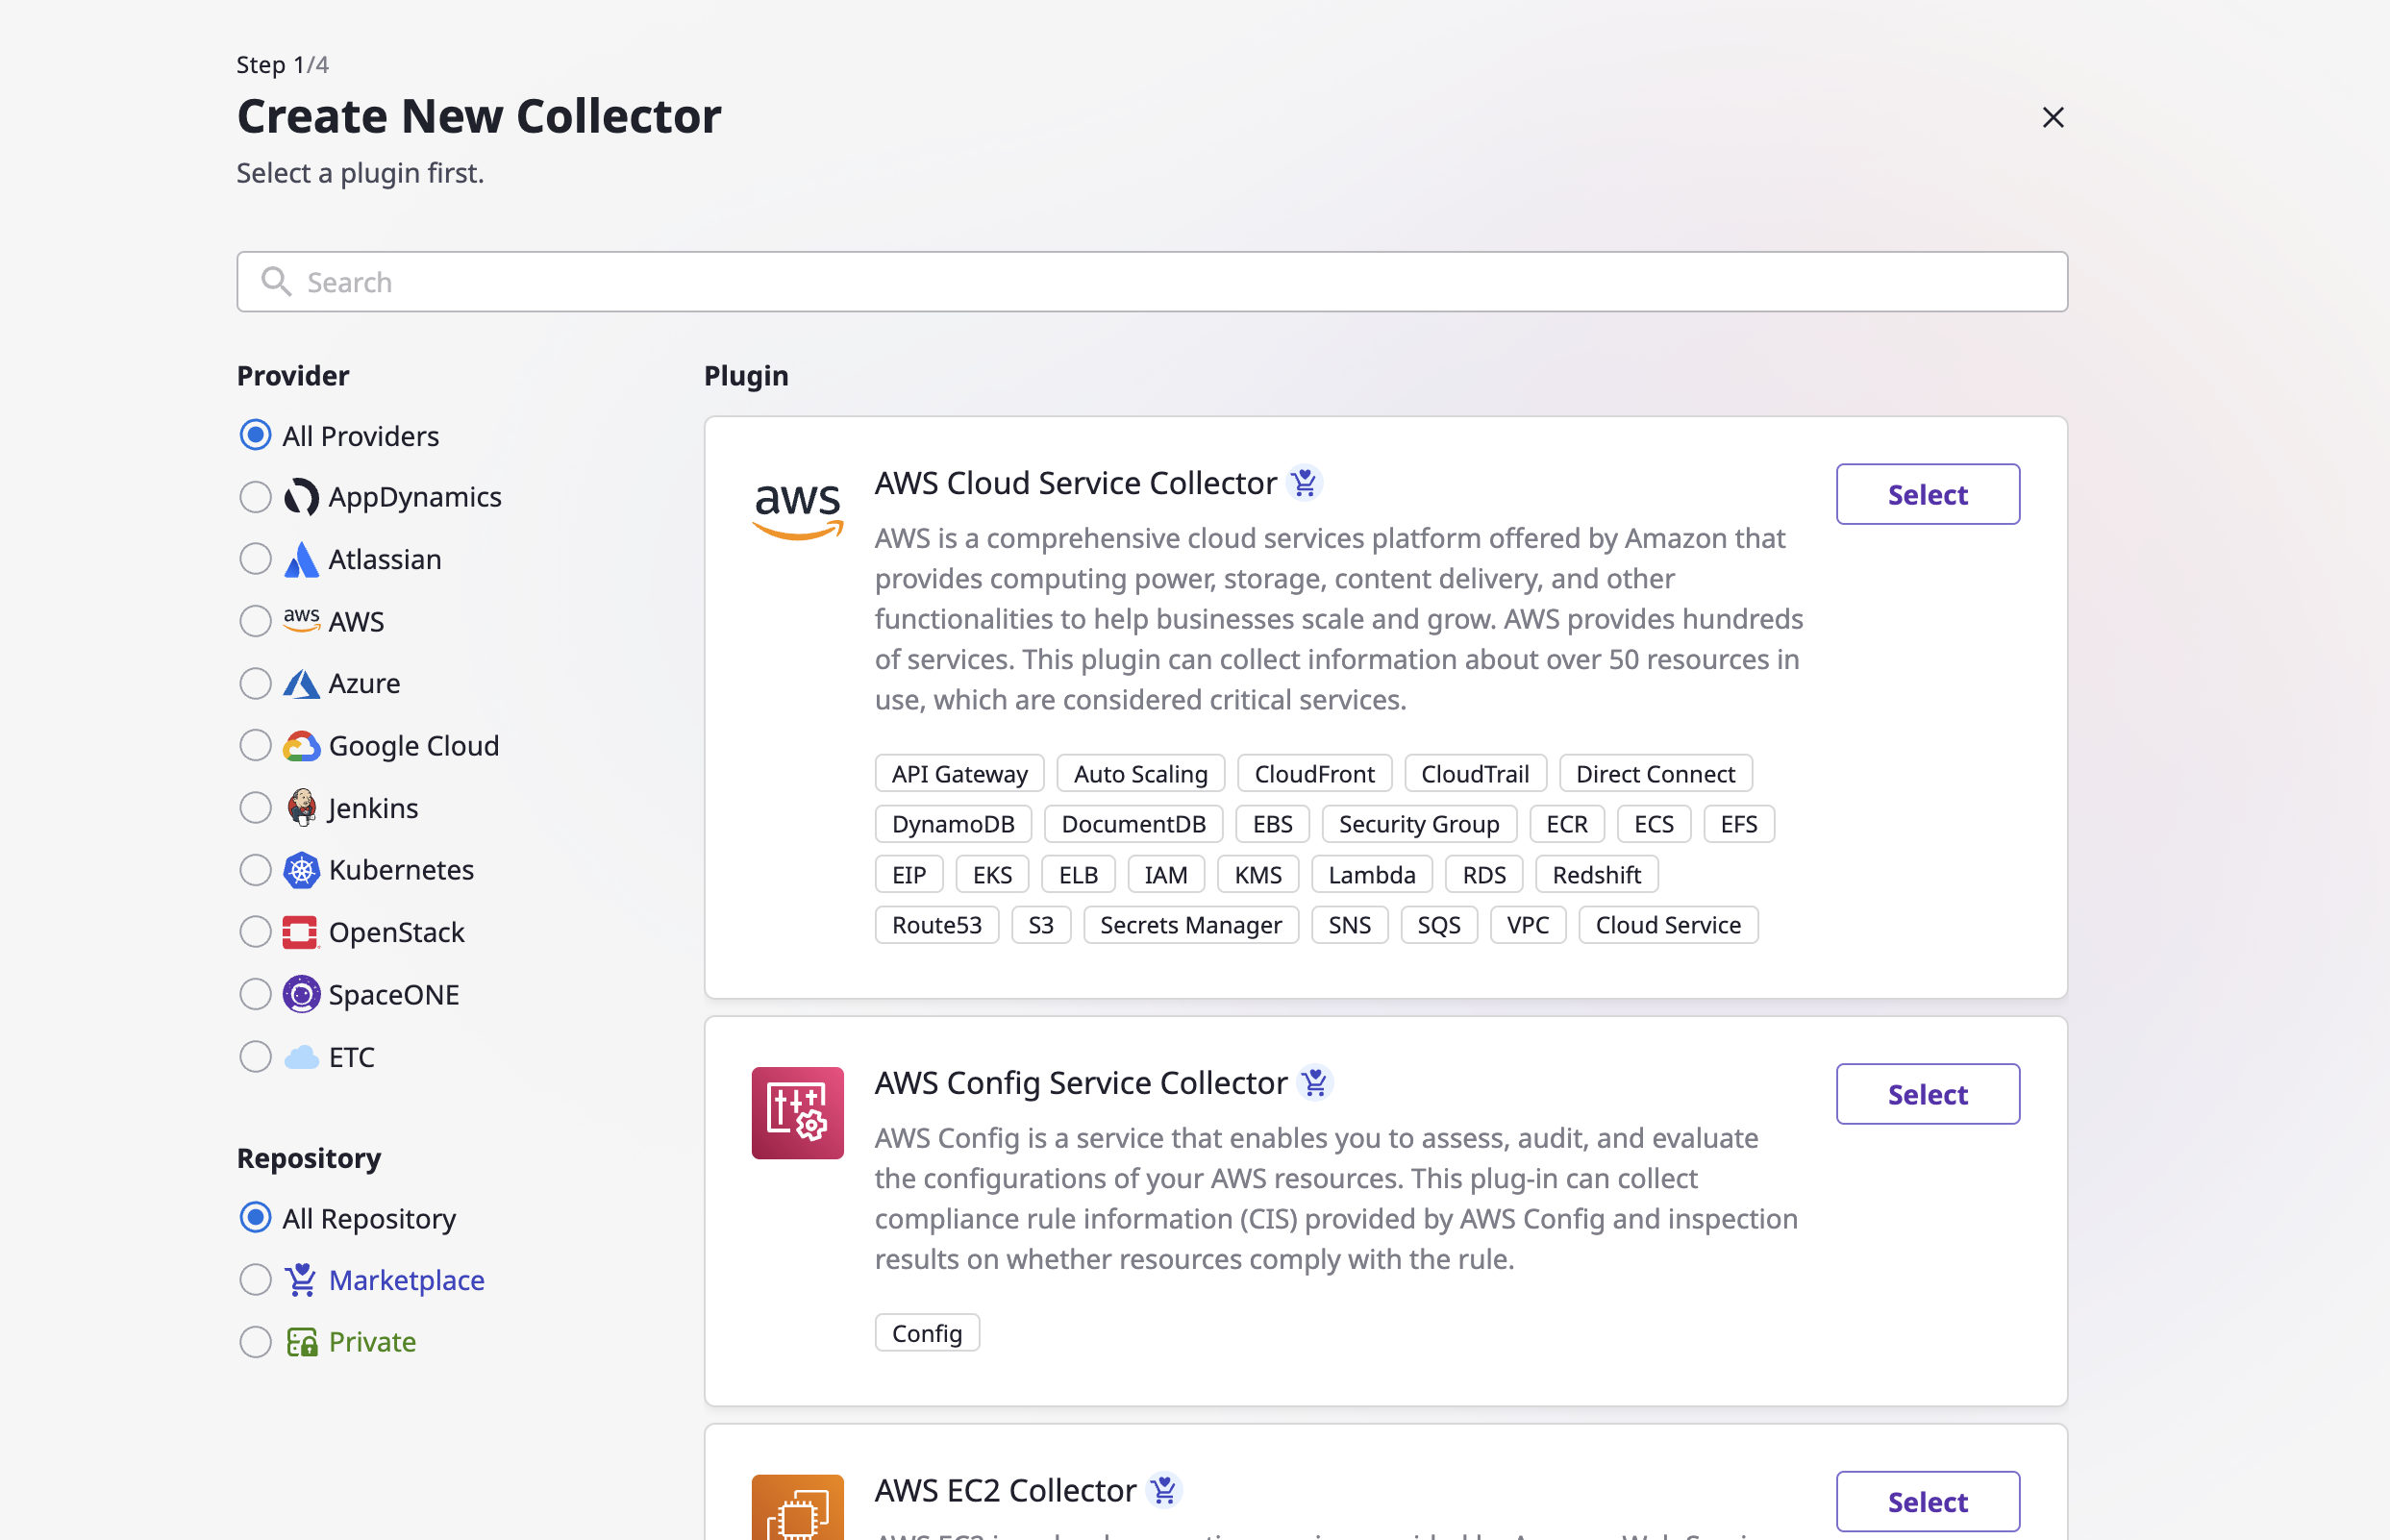
(1) Click the [+ Create] button at the top left.
(2) Follow the steps on the "Create New Collector" page.
(2-1) On the Plugin List page, find a required collector plugin and click the [Select] button.
(2-2) Enter the name and version of the collector and click the [Continue] button.
(Depending on the collector, it can be required to select a specific cloud provider.)
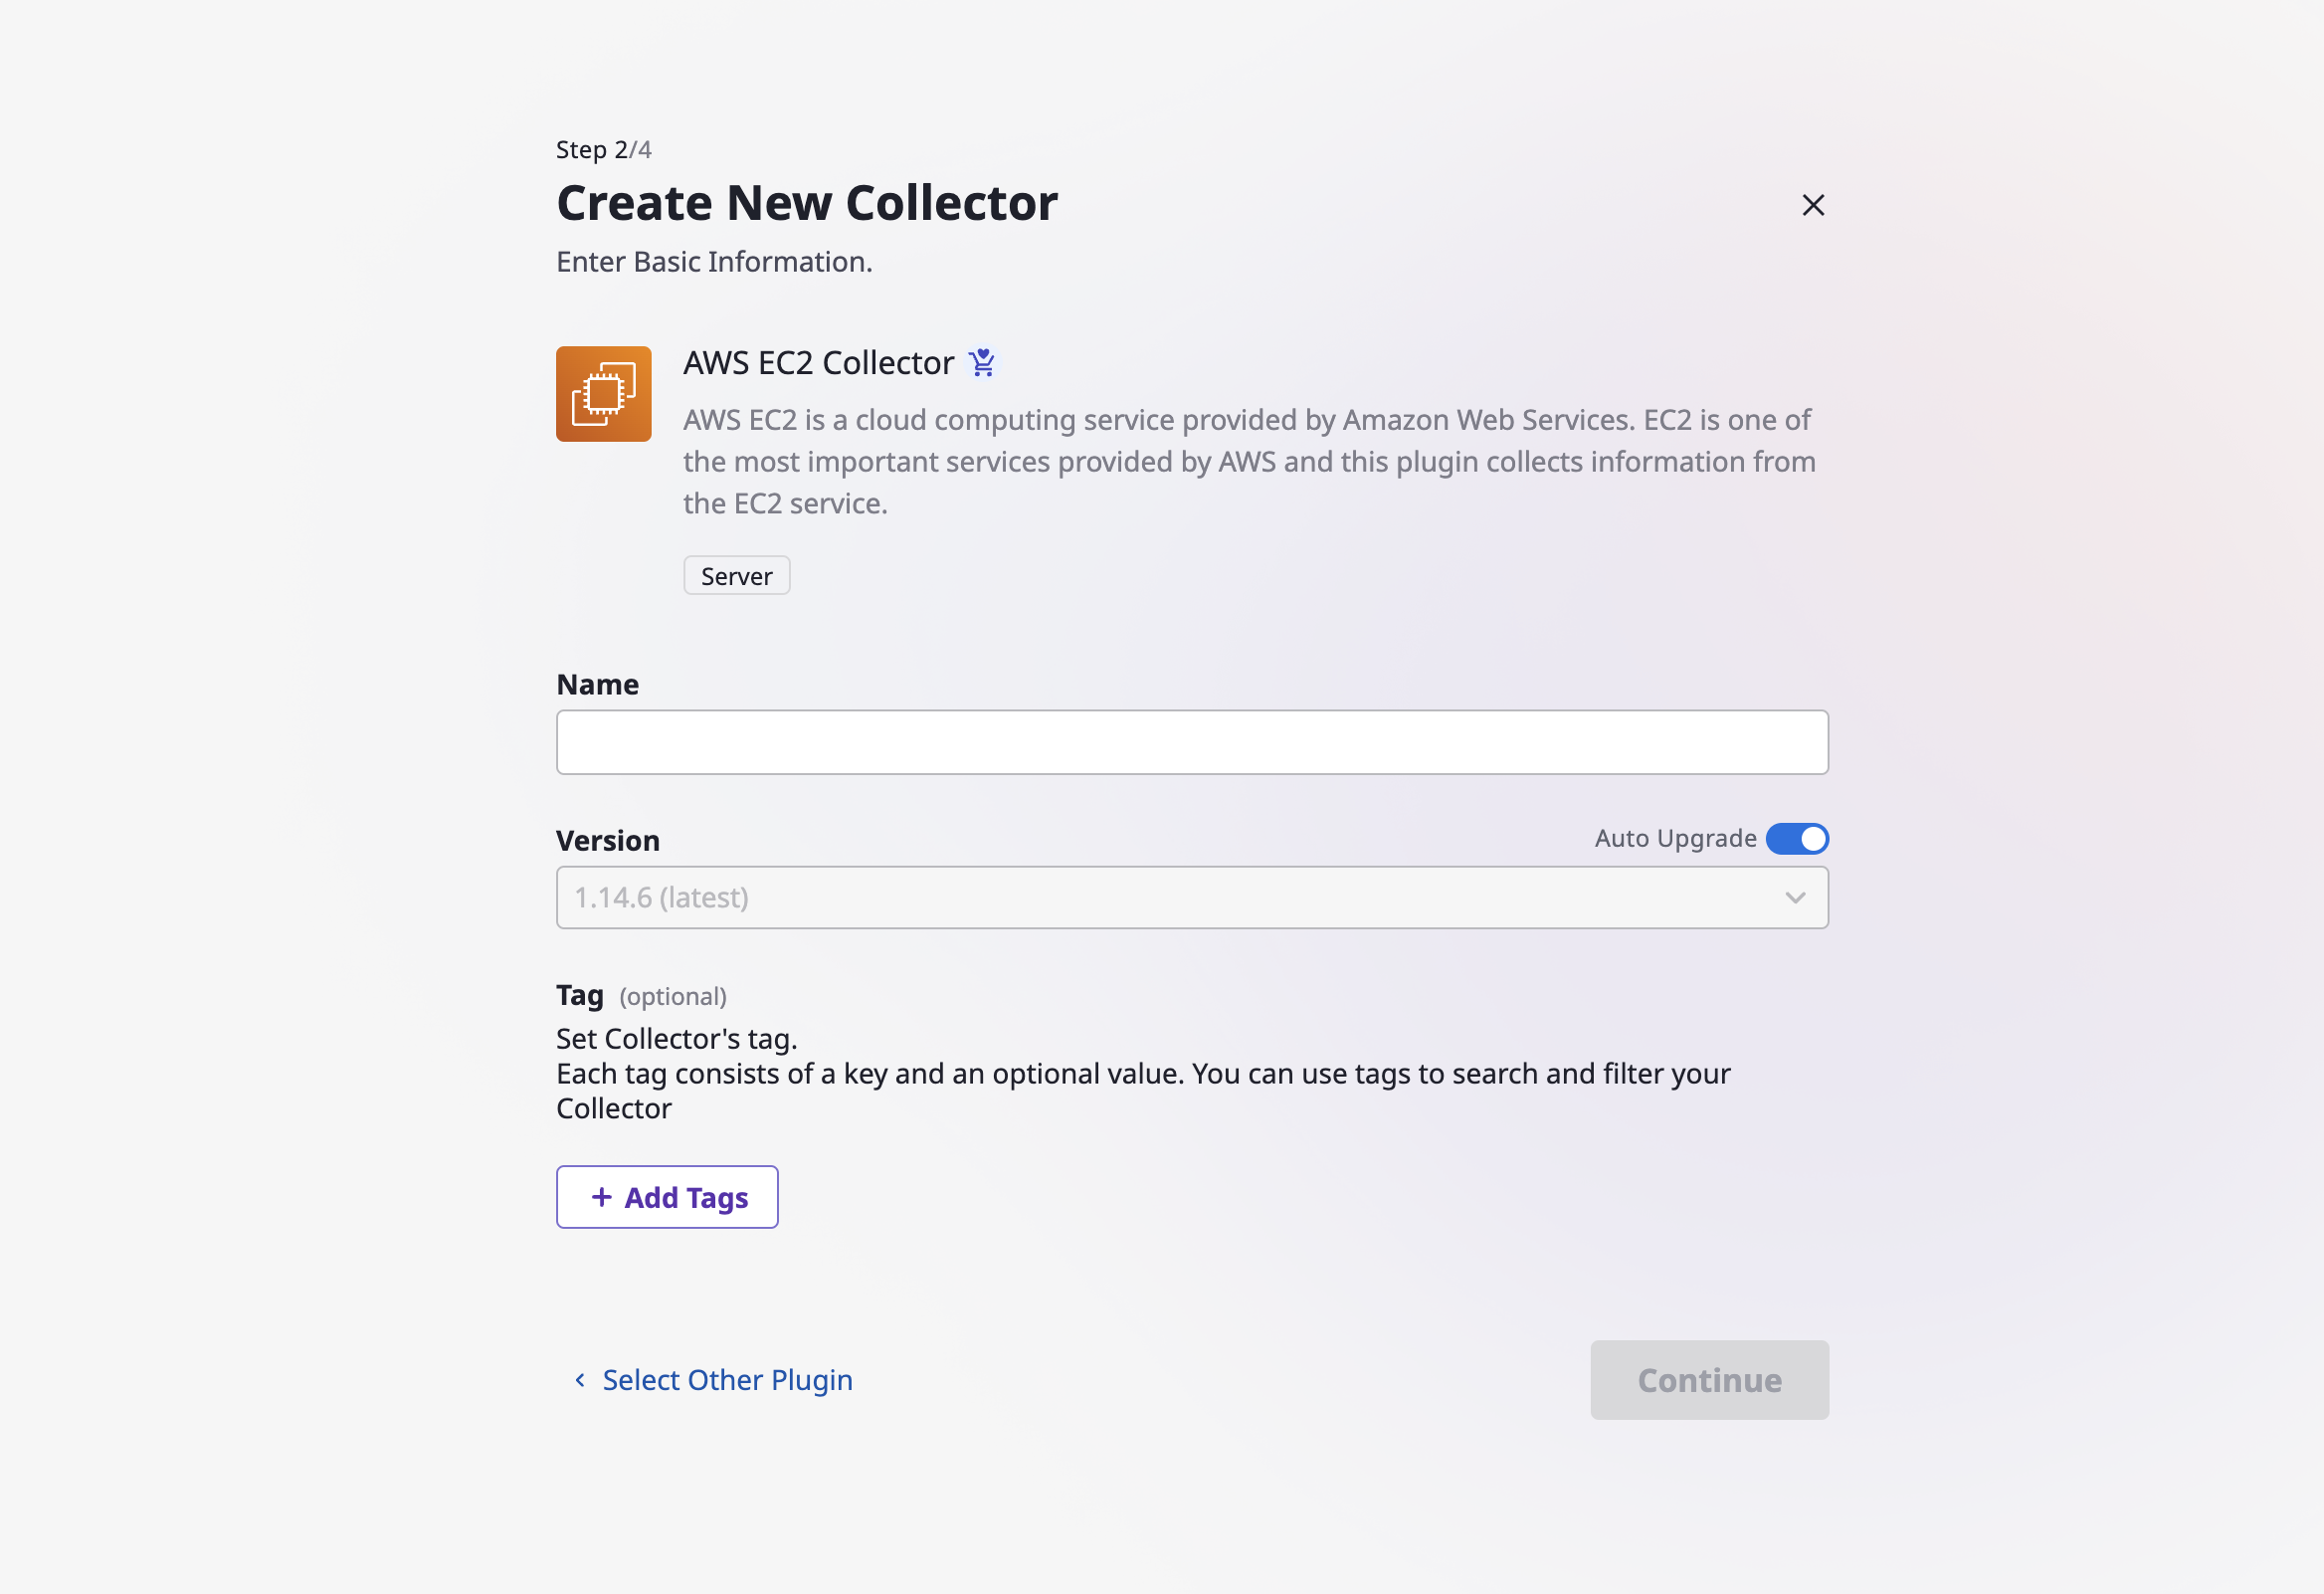
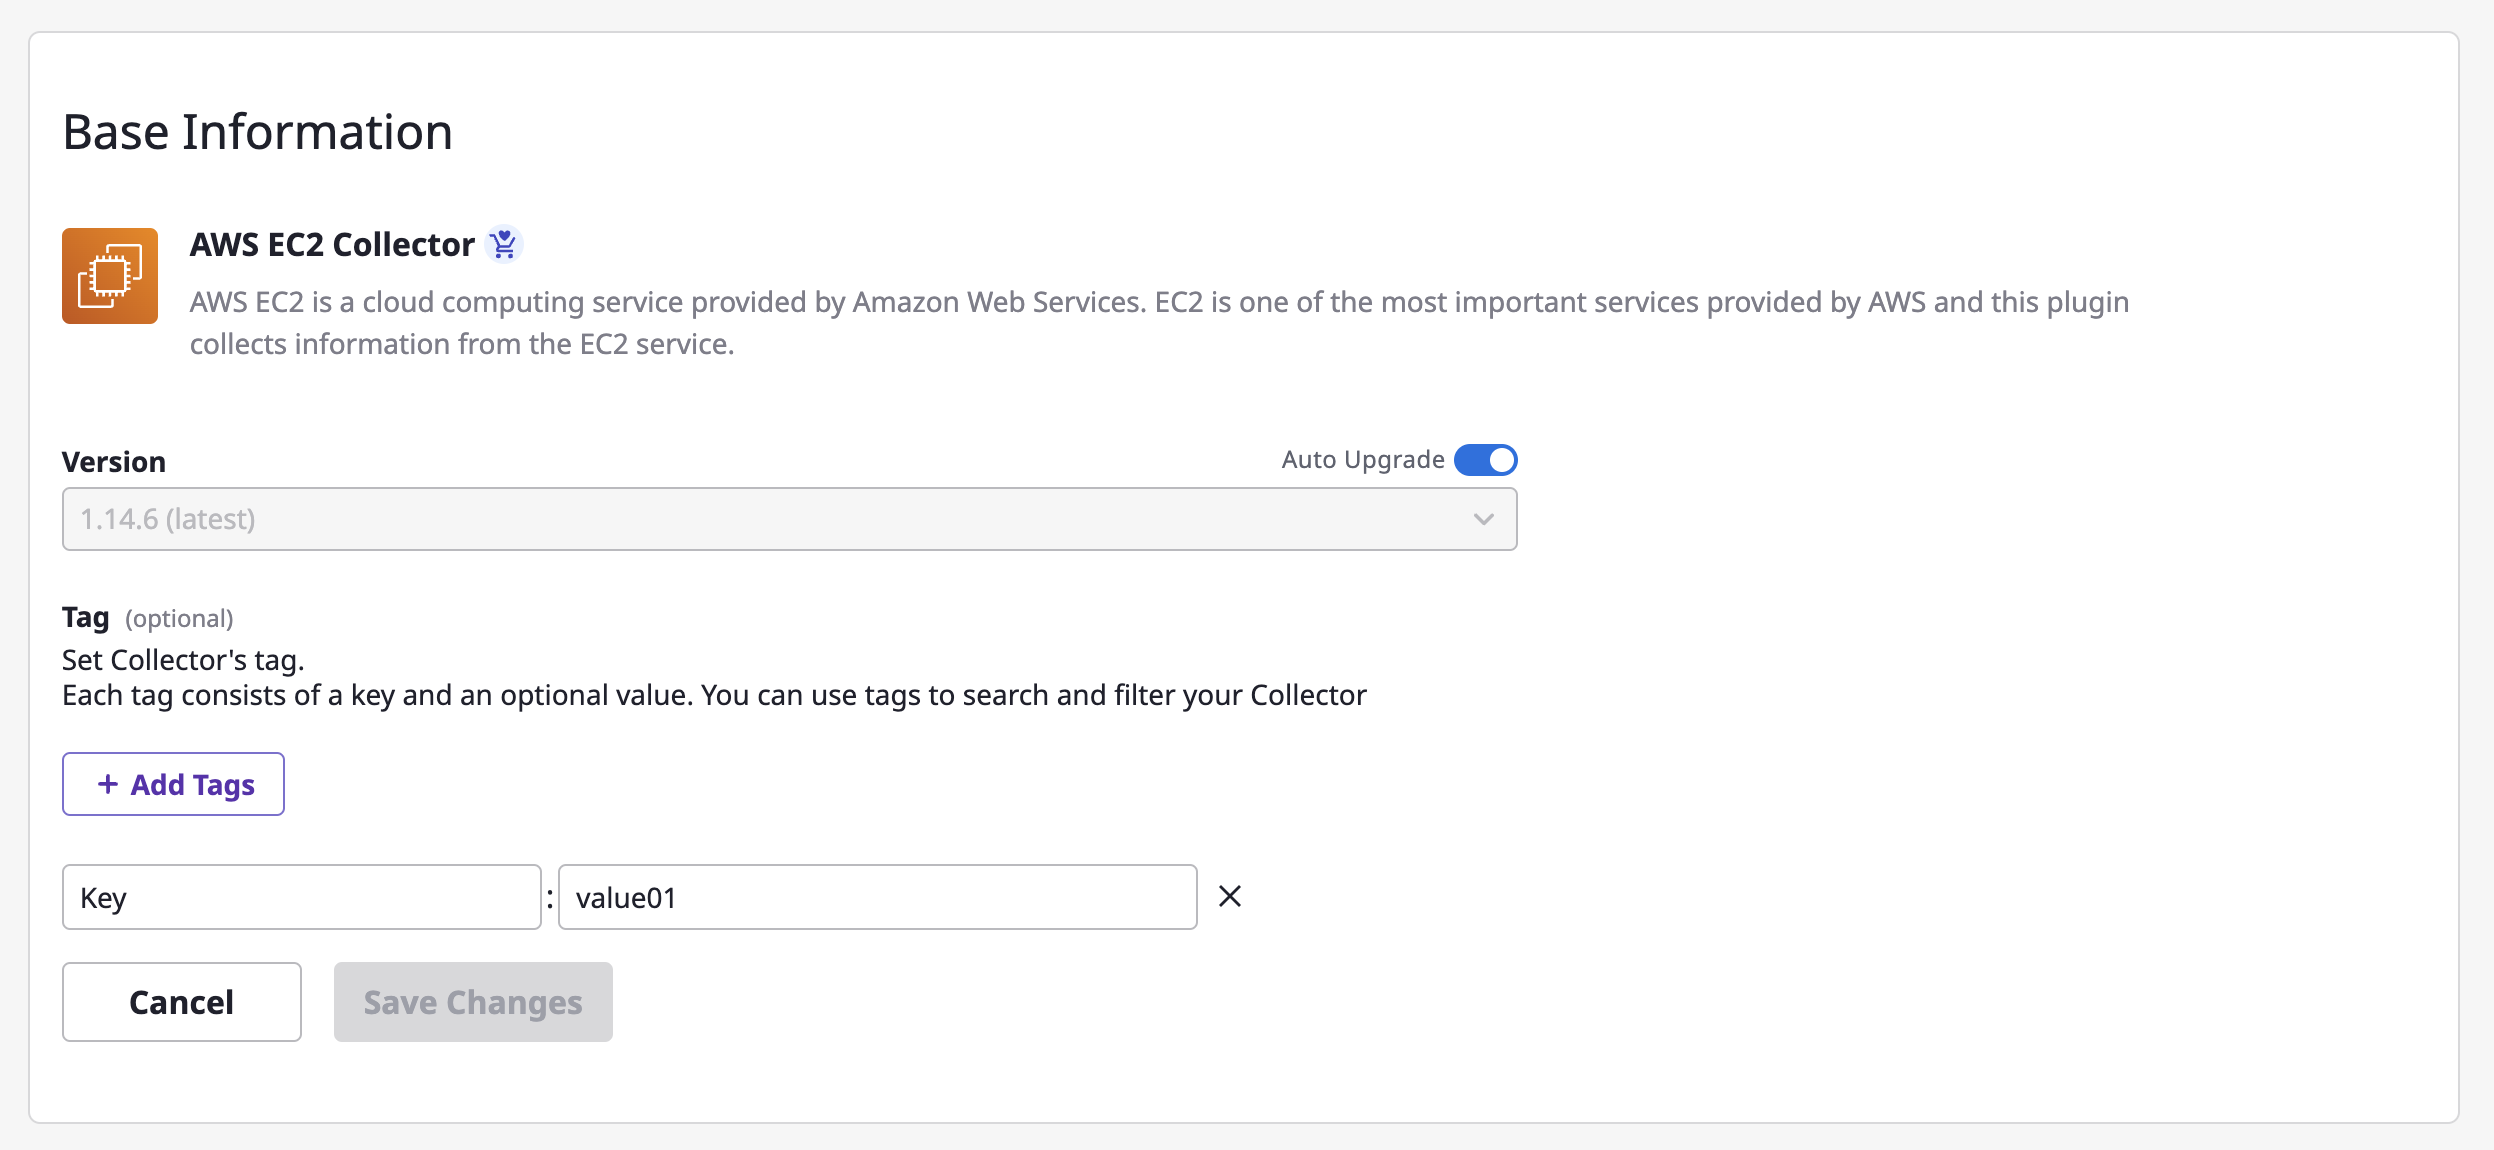
Version and auto upgrade
Version refers to the version of the previously selected collector plugin, which can be chosen by disabling auto upgrade. In this case, the data is always collected with the specified version of the plugin.
On the other hand, if you enable auto upgrade, your data will always be collected with the latest version of the plugin.
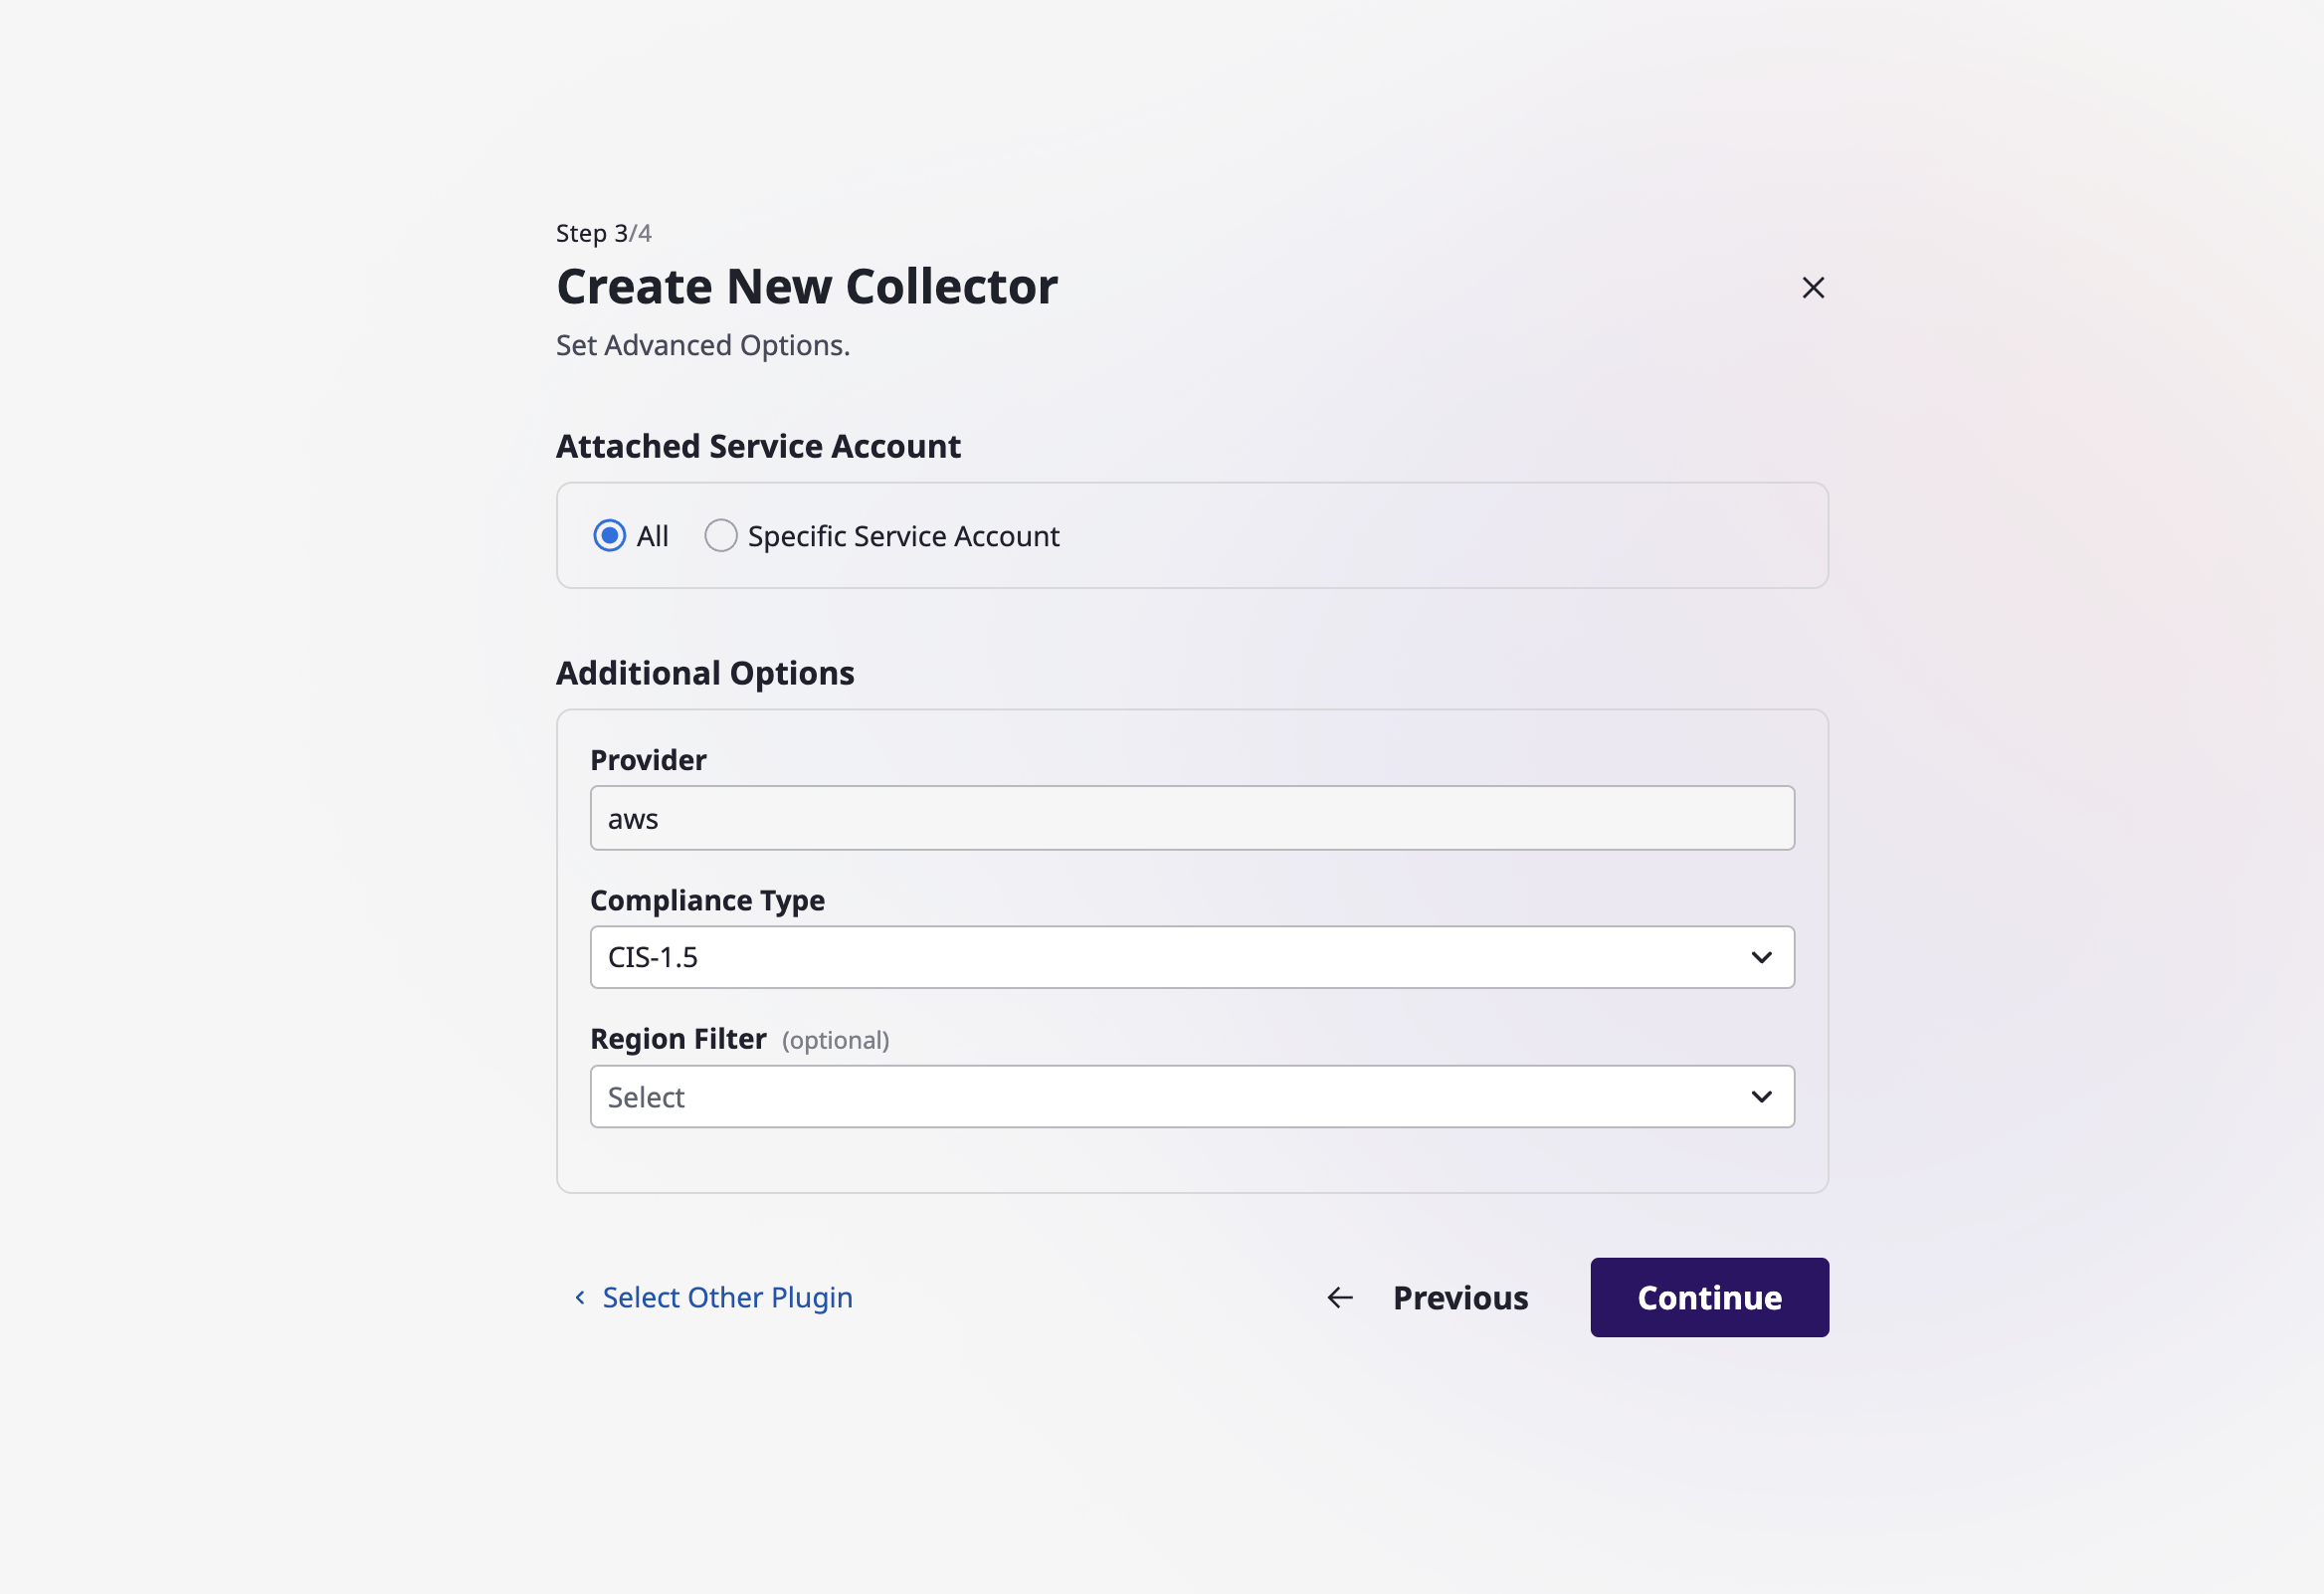
(2-3) Select additional options for the collector and click the [Continue] button.
(2-3-1) Service Account: Select either "All" or Specific Service Accounts. If you choose "All," the service accounts associated with the provider related to the collector will be automatically selected for data collection.
(2-3-2) Additional Options: Depending on the collector, there may or may not be additional options to select.
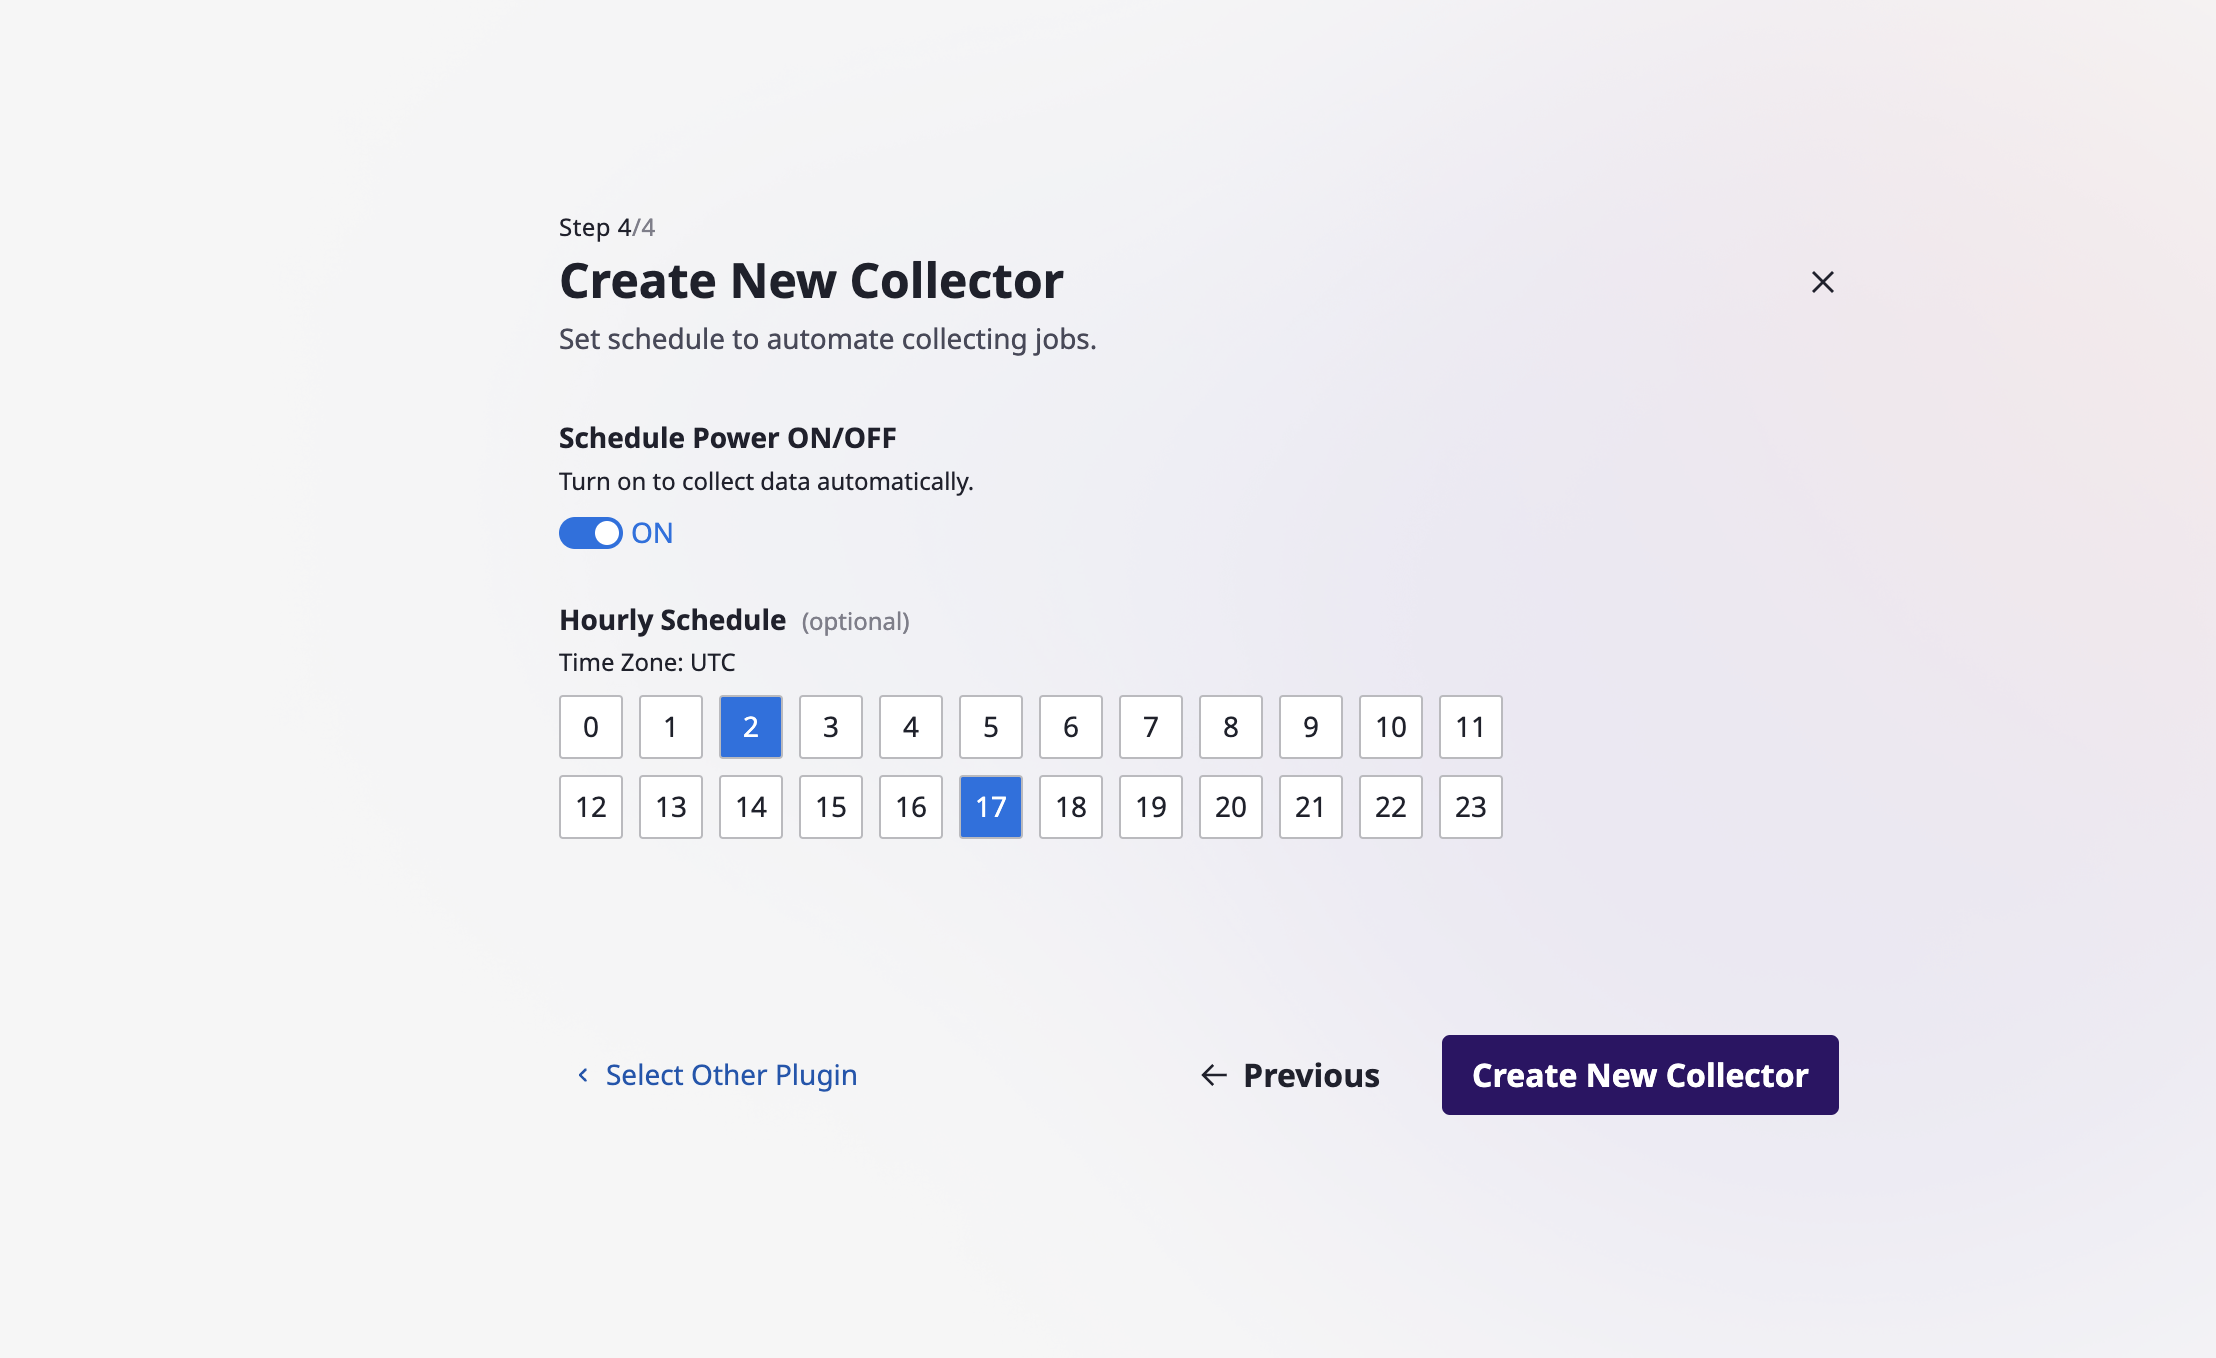
(2-4) You can set up a schedule to automatically perform data collection (optional). Once you have completed all the steps, click the [Create New Collector] button to finalize the collector creation.
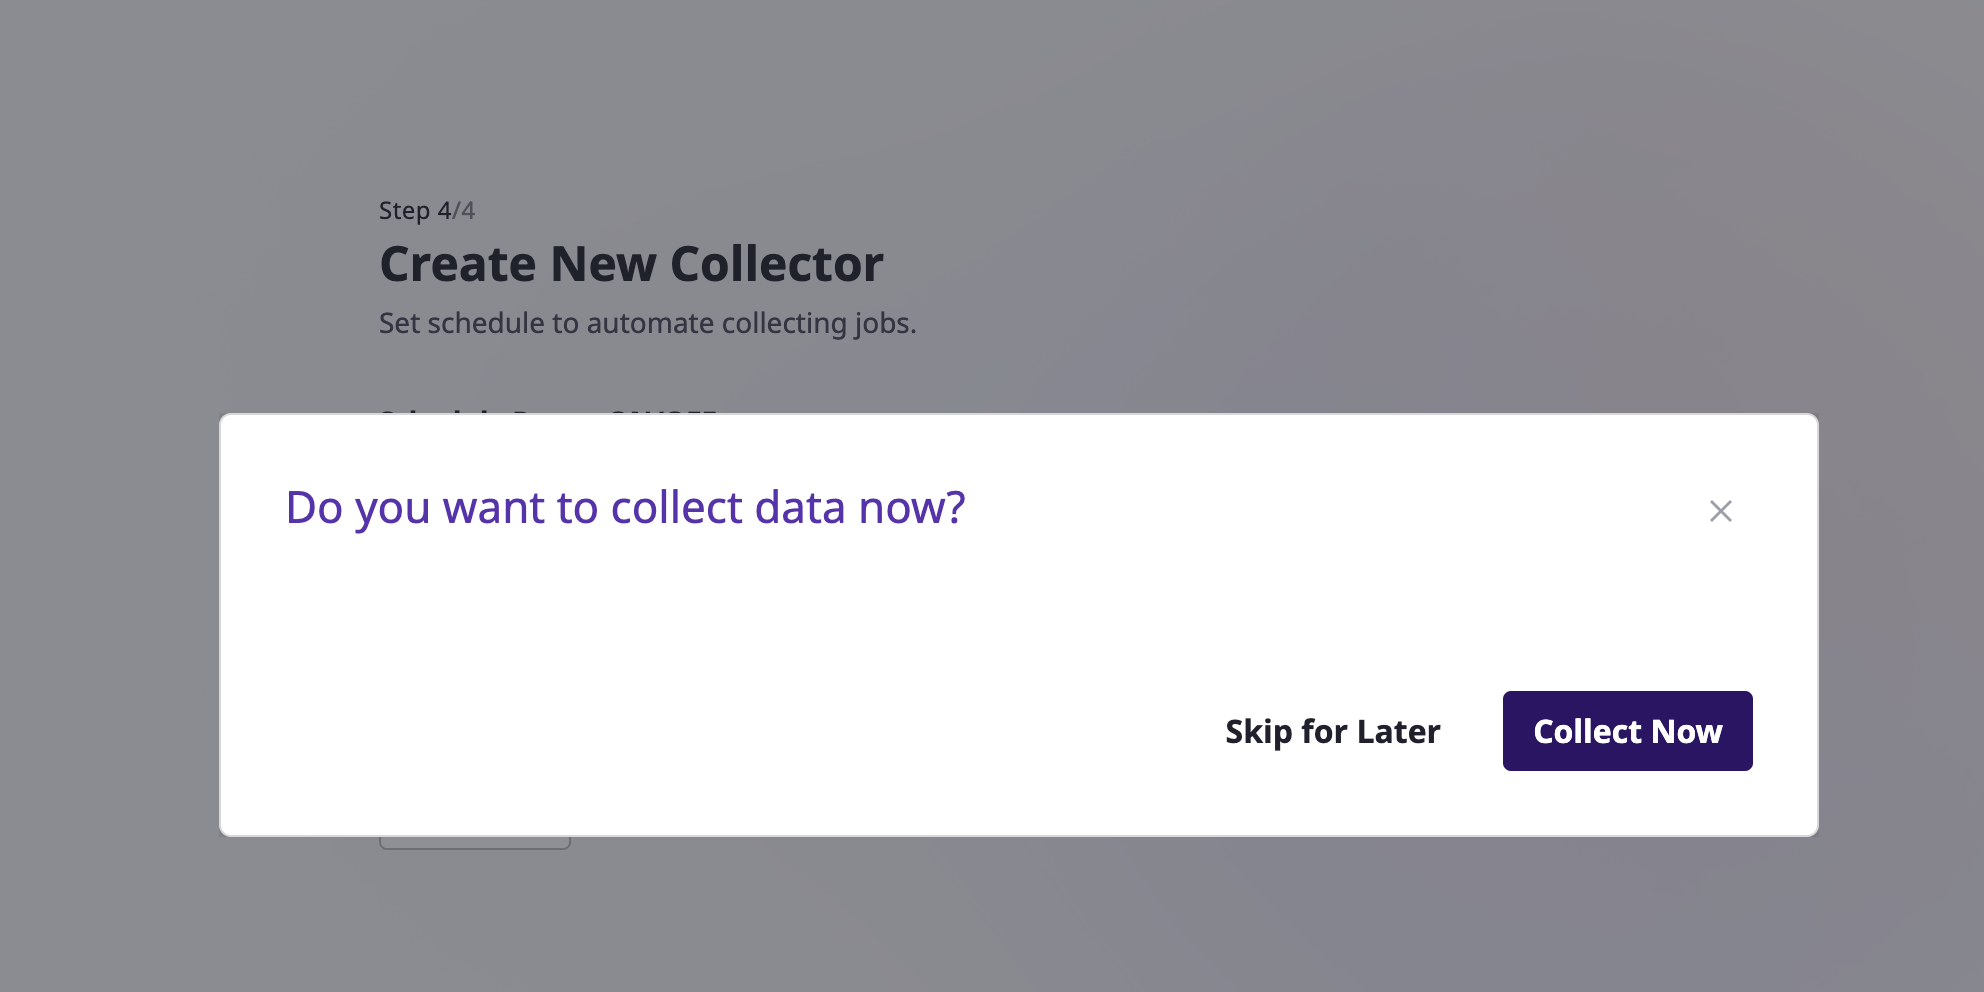
(2-5) Once collector is created, you can collect data immediately.
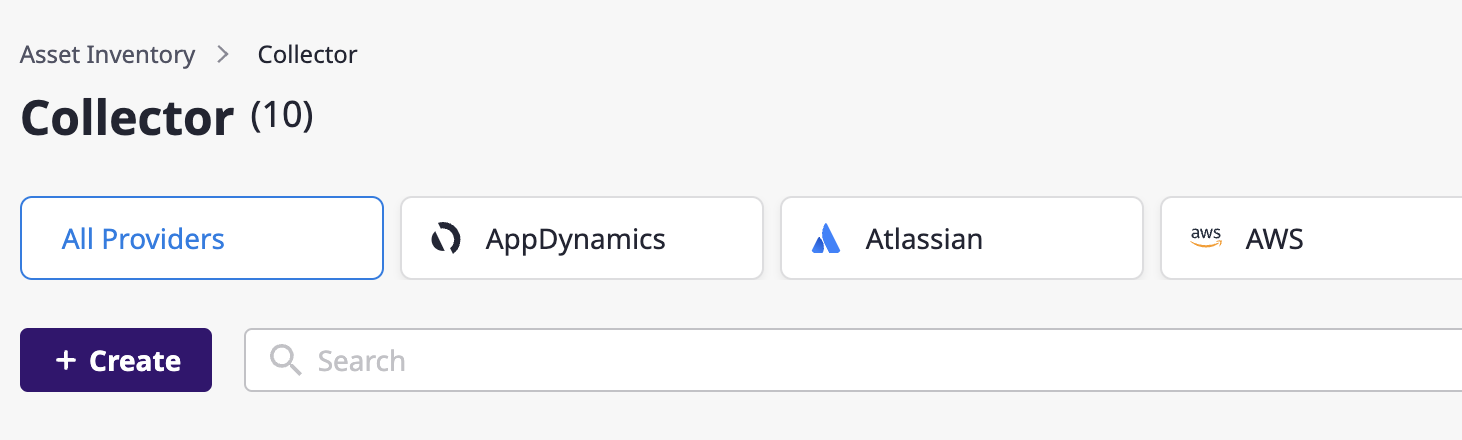
Get a list of collectors
You can view a list of all collectors that have been created on the collector page.
Advanced search allows you to filter the list by elaborate criteria. For a detailed explanation, see here.

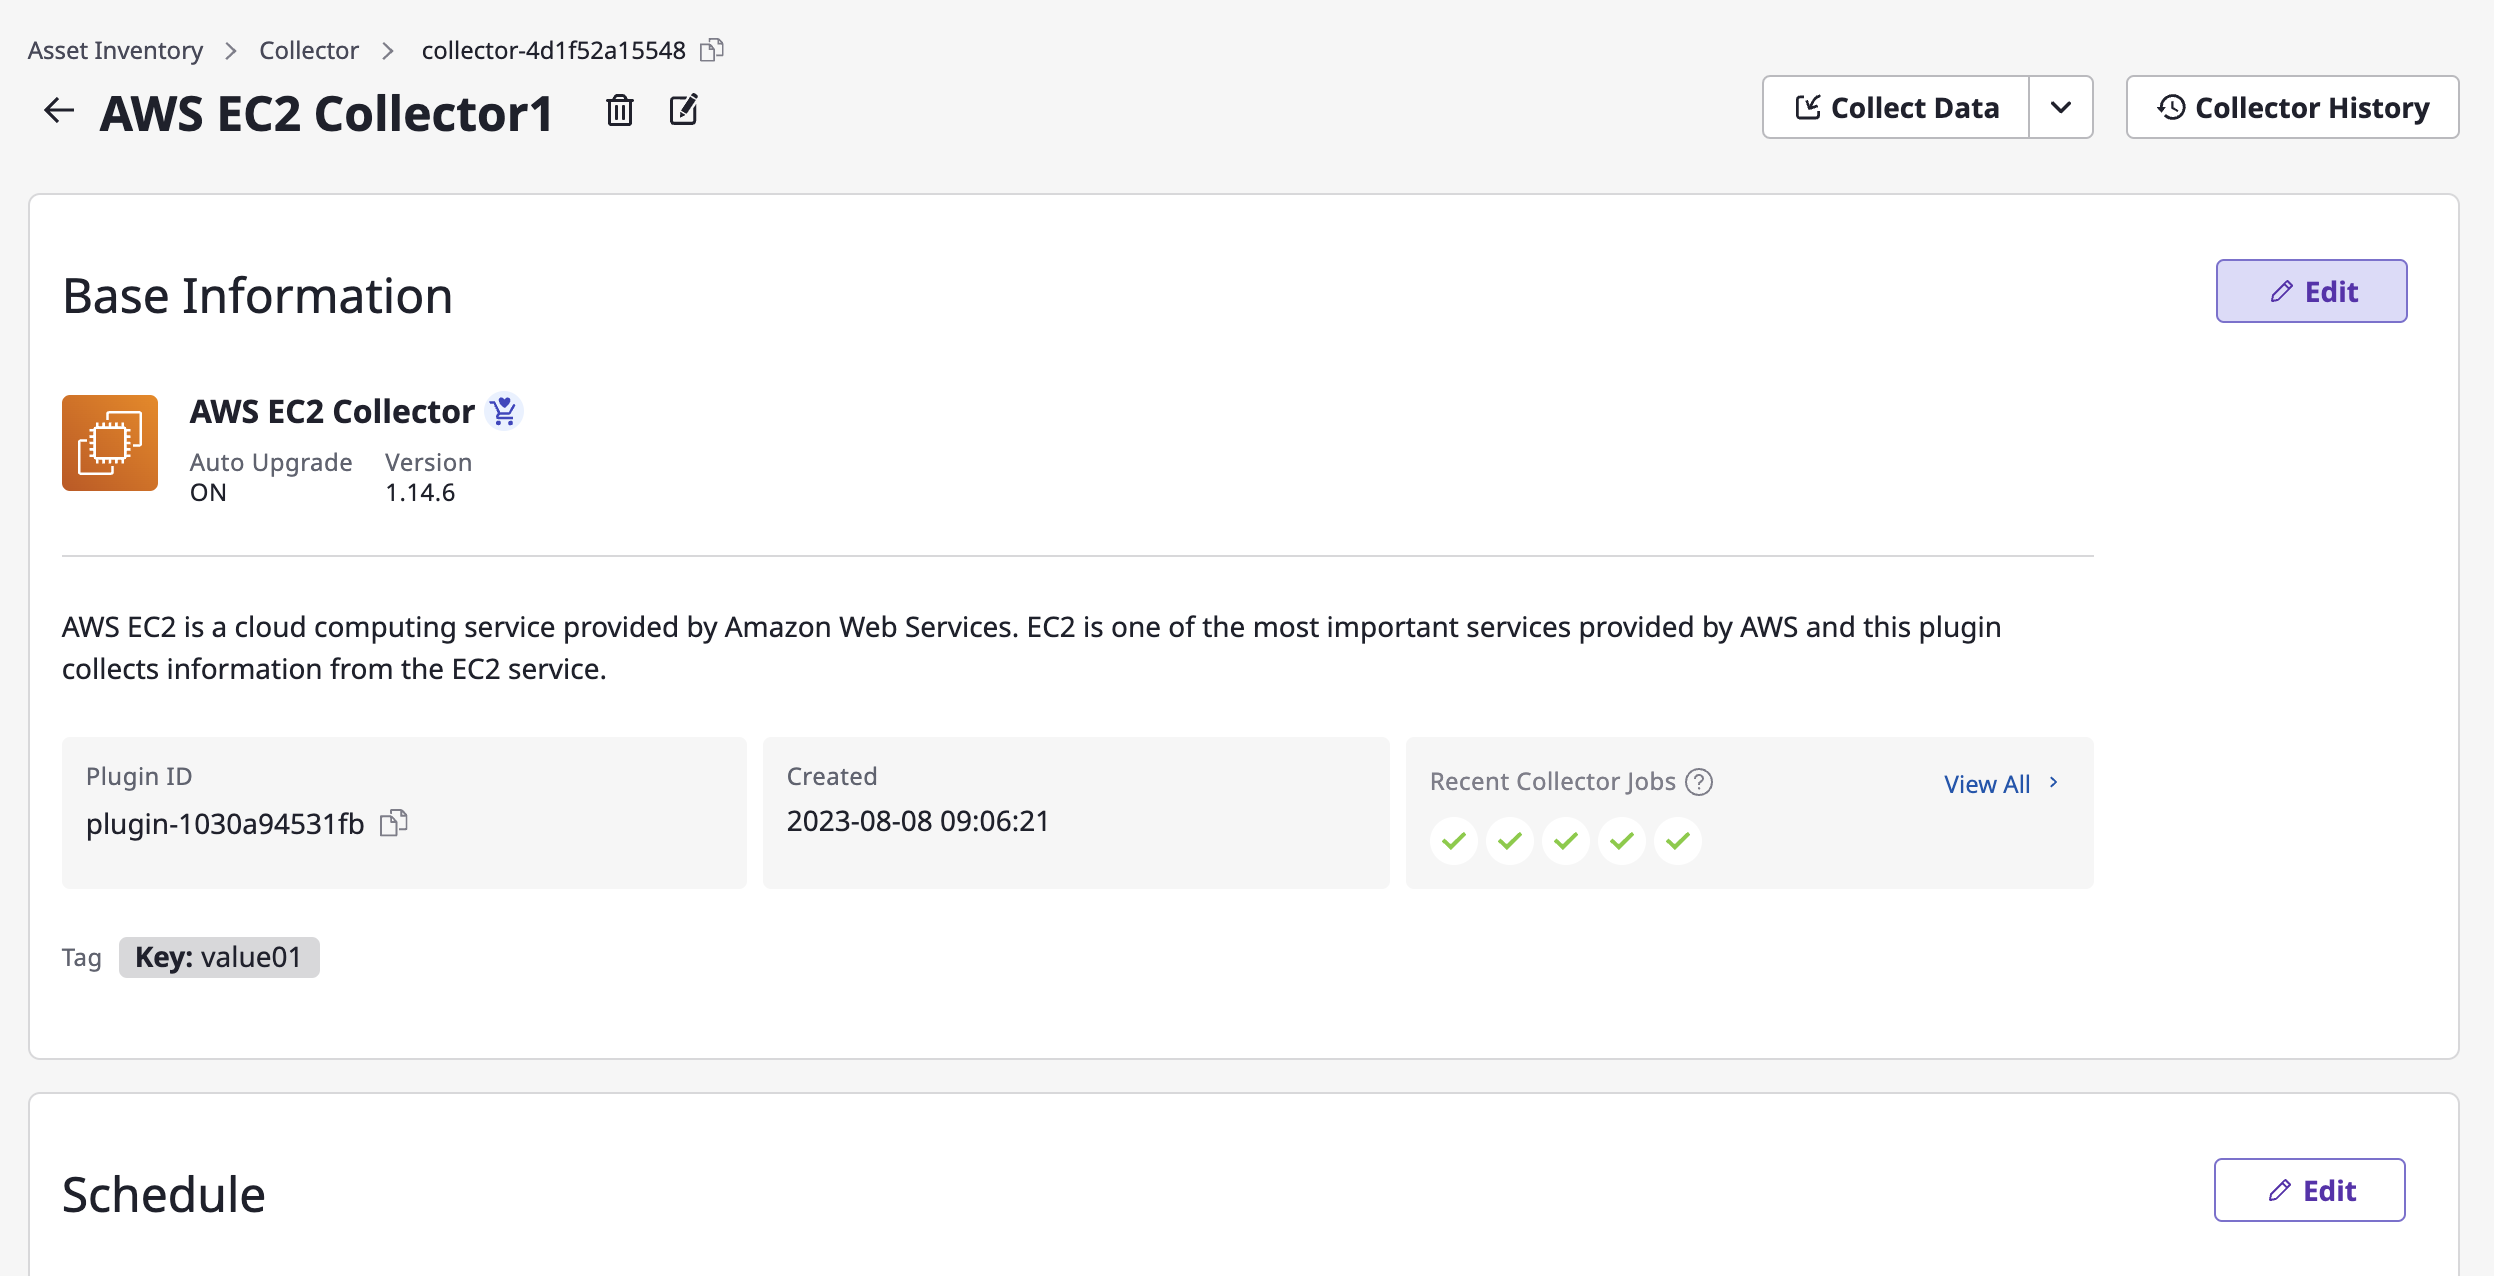
View/Edit/Delete collector
(1) View Details
(1-1) Select a specific collector card from the list to navigate to its detailed page.
(1-2) You can view the basic information, schedule, additional options, and attached service accounts.
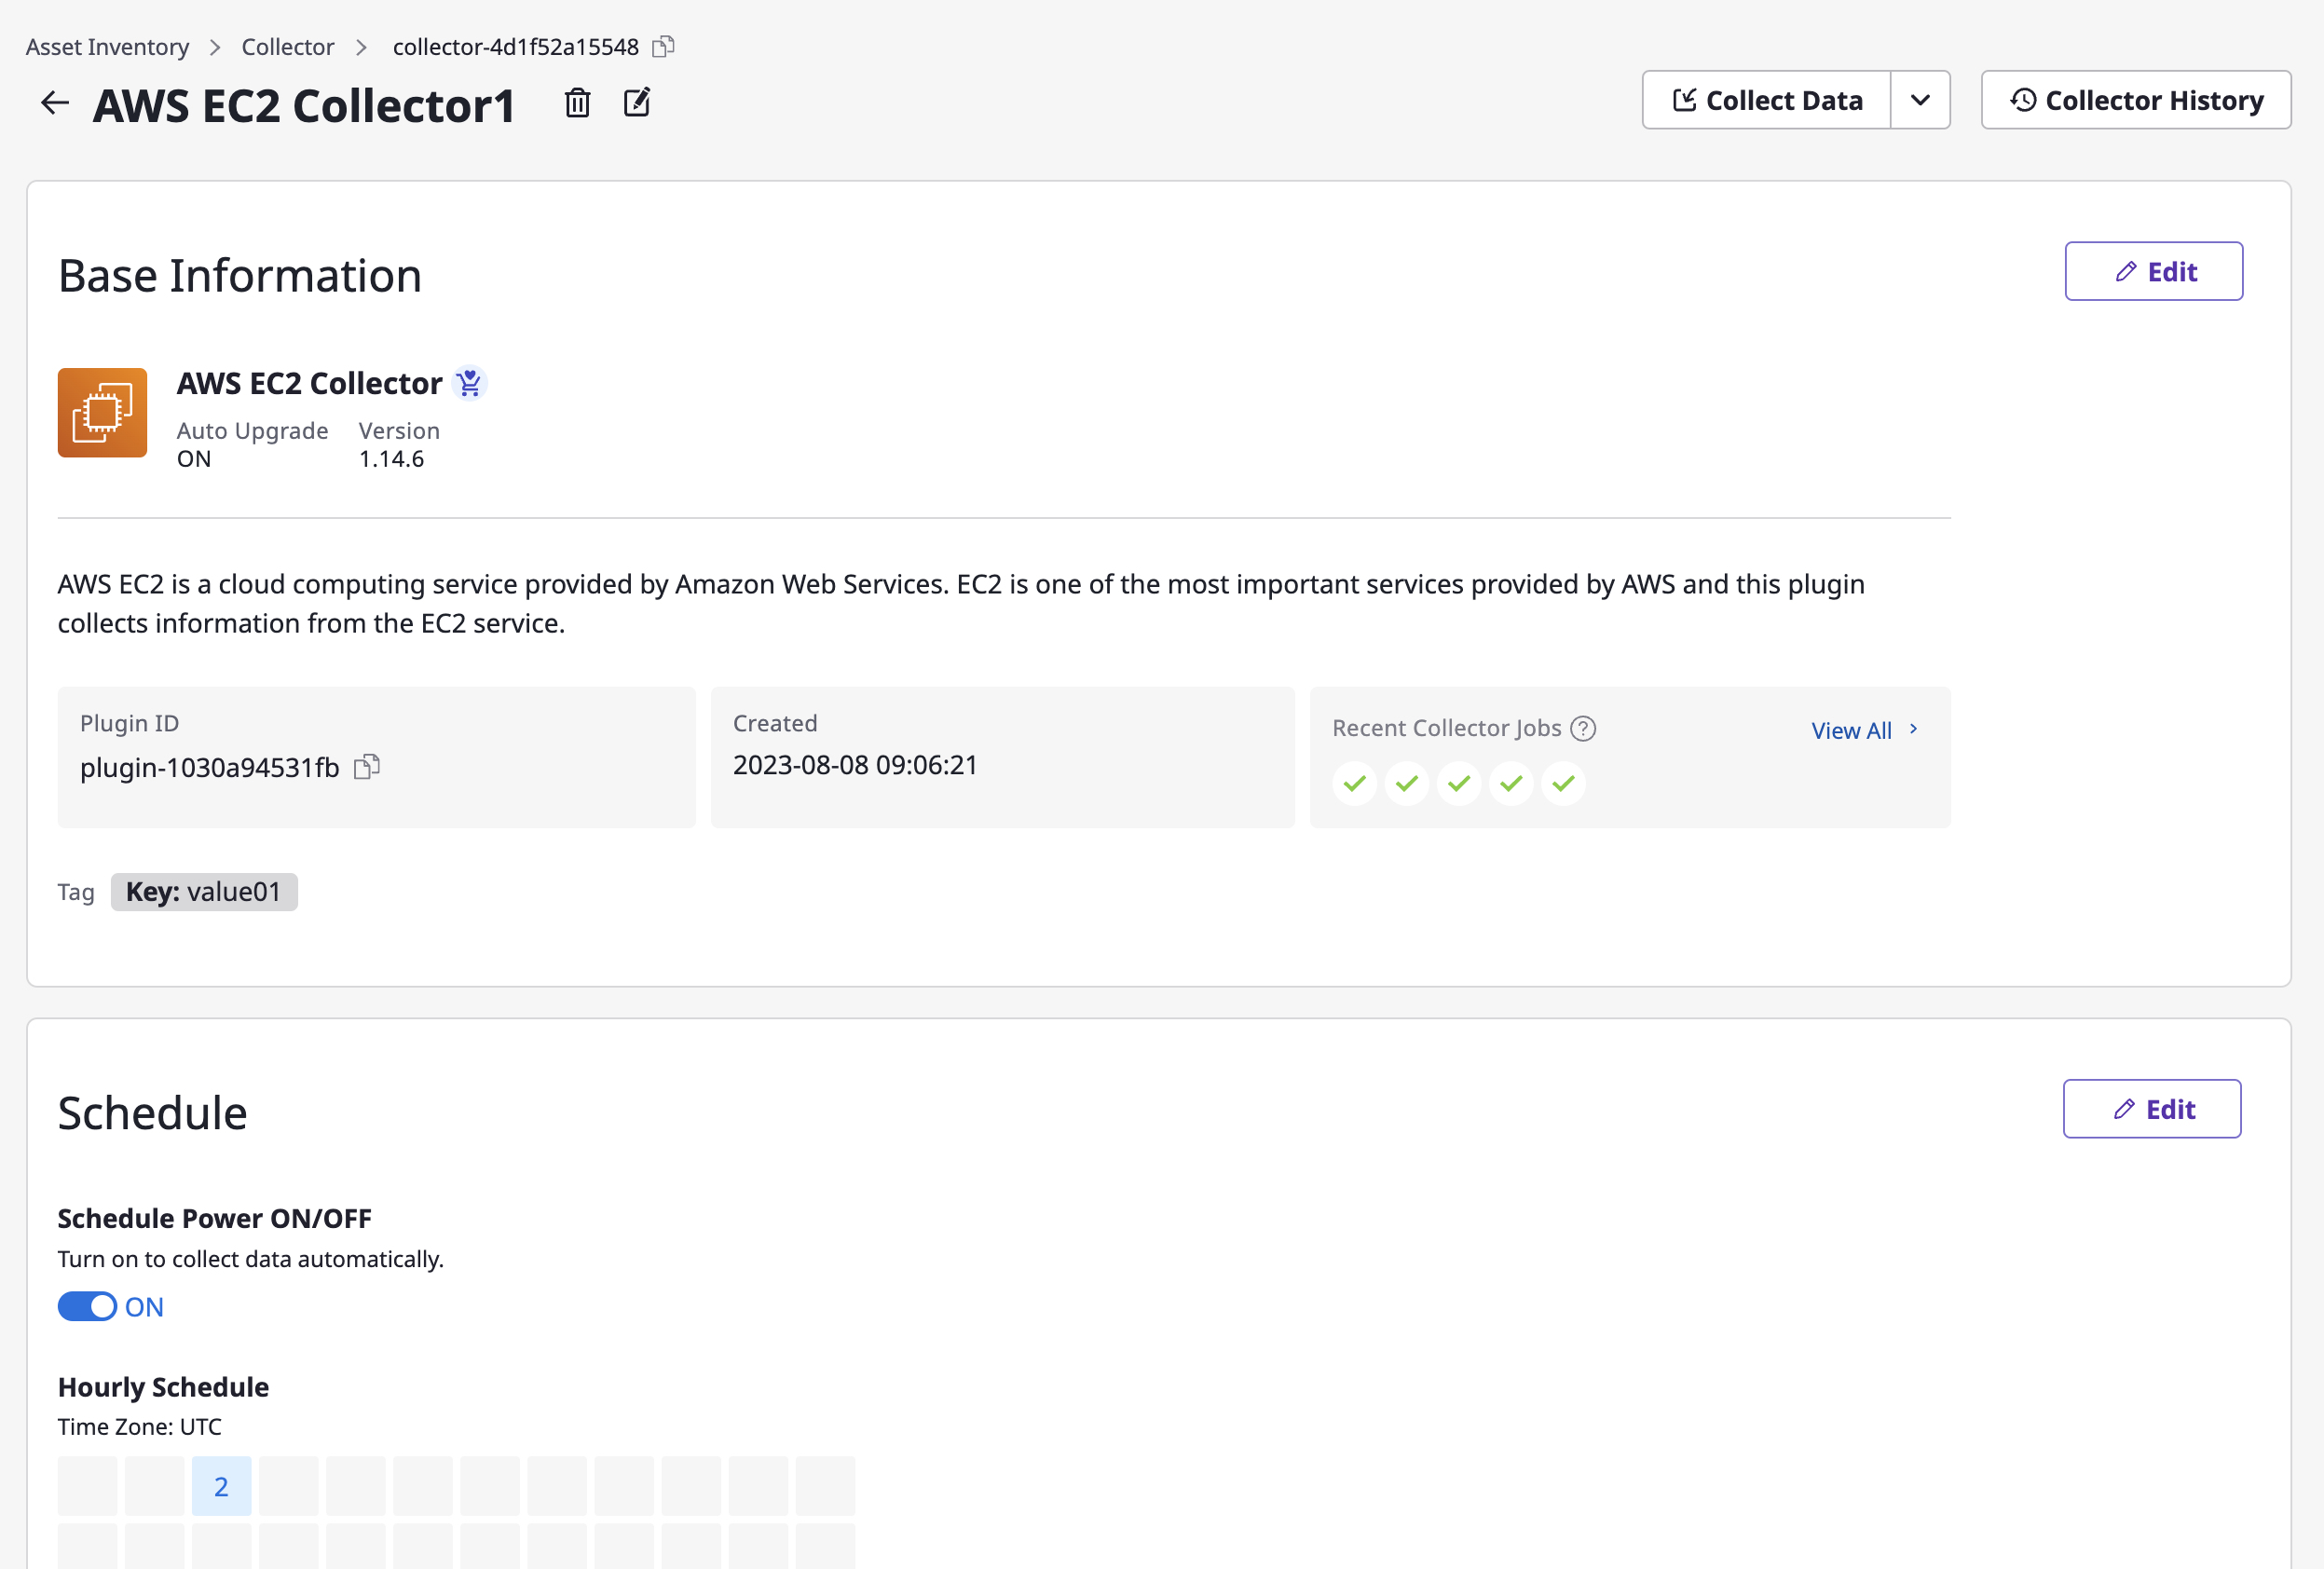
(2) Edit or Delete
(2-1) Click on the [Edit] icon at the top and modify the collector name.

(2-2) If you need to edit details such as base information, schedule, additional options or service accounts, click the [Edit] button in each area.
(2-3) After making the changes, click the [Save Changes] button to complete the modification.
(2-4) If you need to delete a collector, click the [Trash] icon on the top.

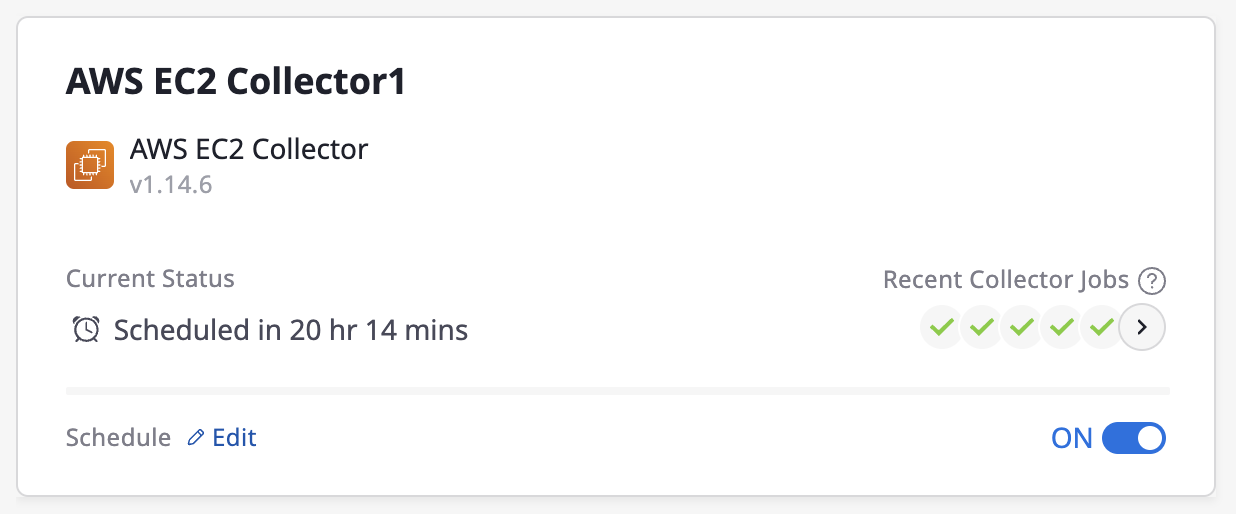
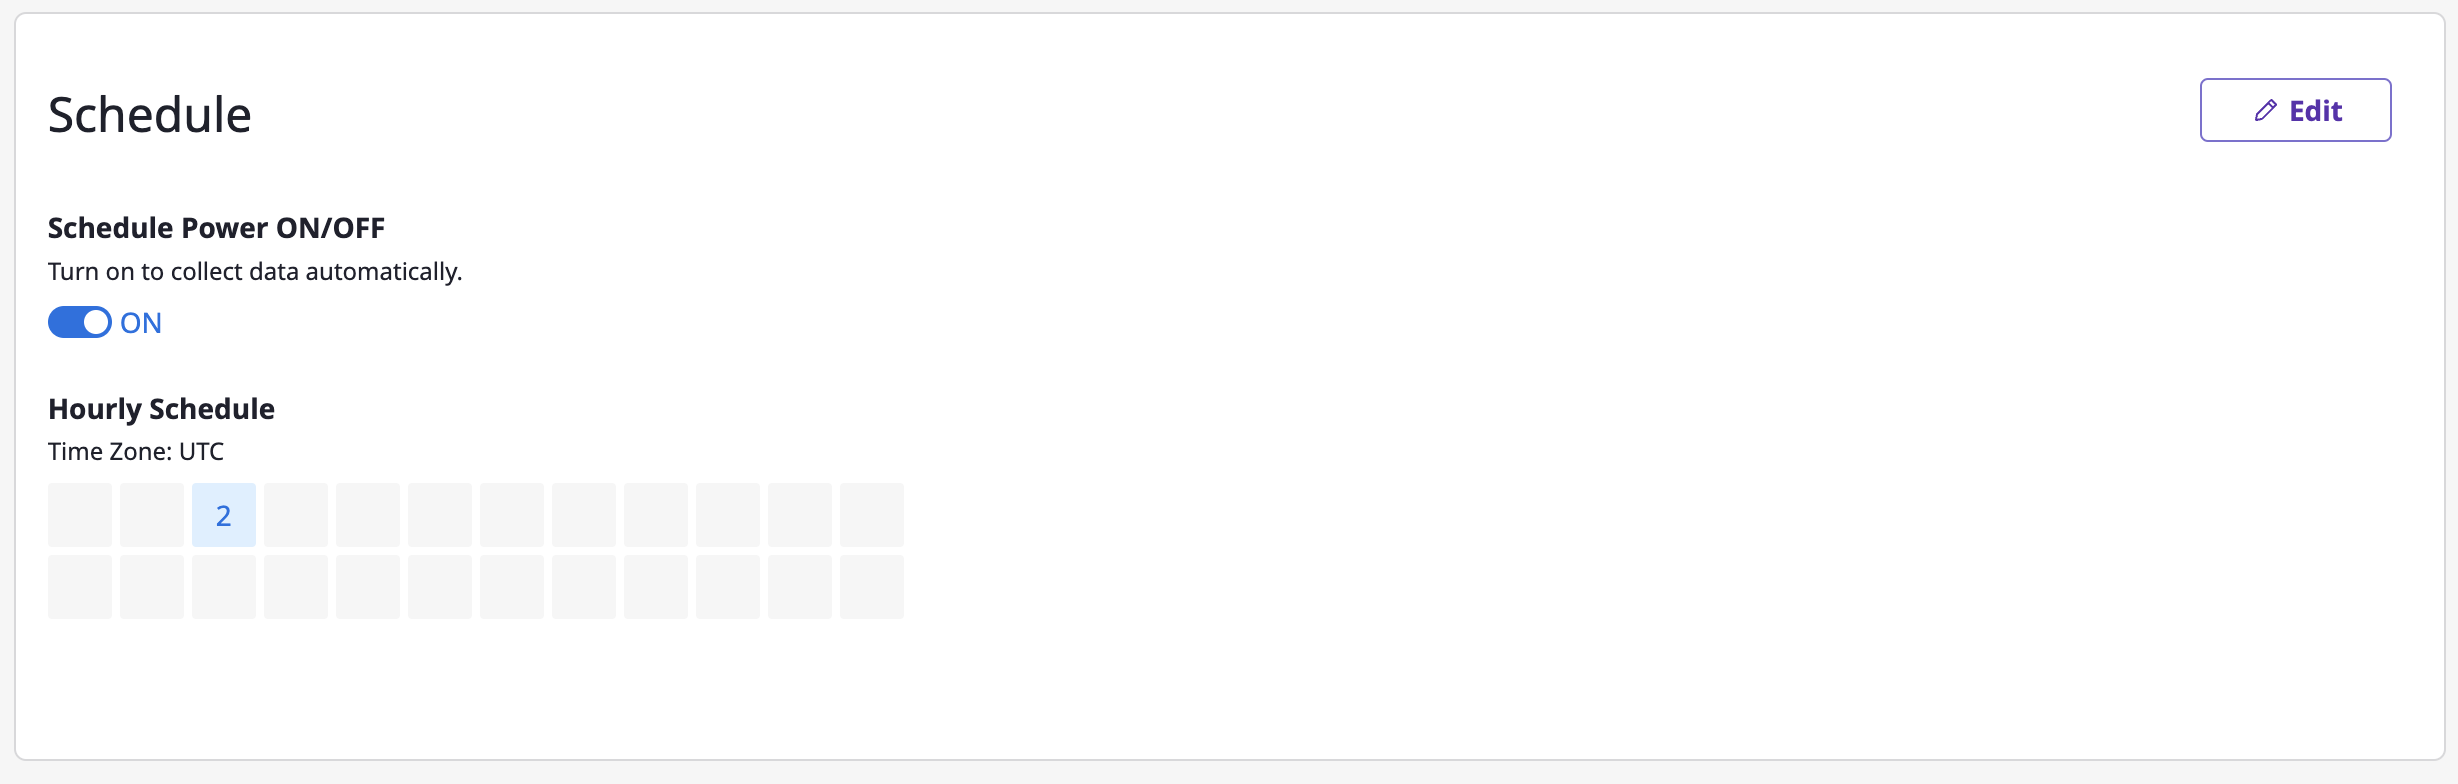
Set up automated data collection
After creating a collector, you can still modify the automated data collection schedule for each individual collector.
(1) In the collector list page, you can enable or disable automated data collection for each collector by using the schedule toggle button(Switch On/Off) in the collector card section. You can quickly set and modify the frequency by clicking the [Edit] button.
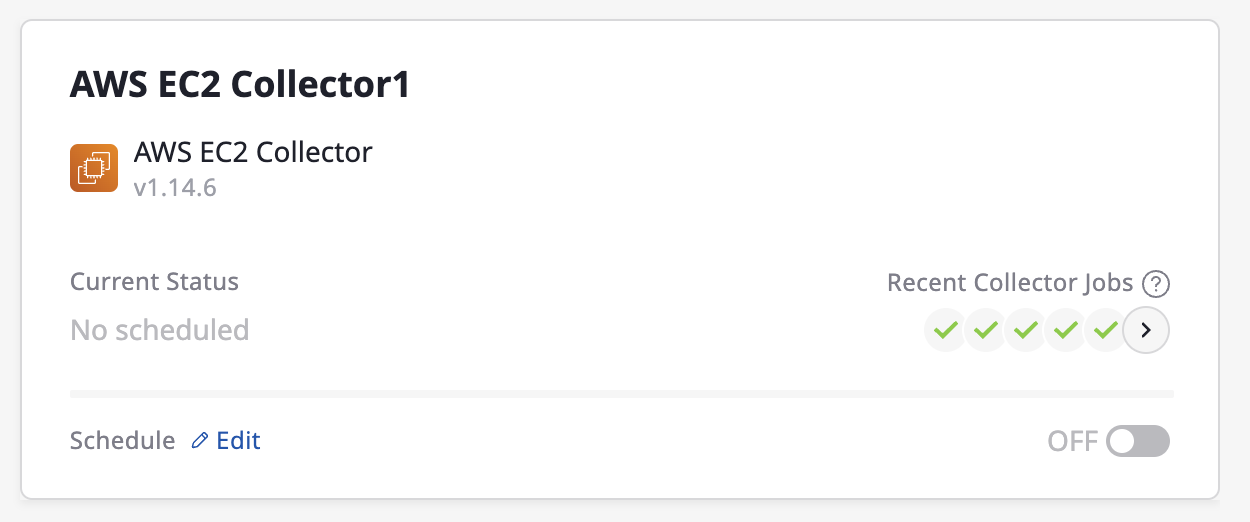
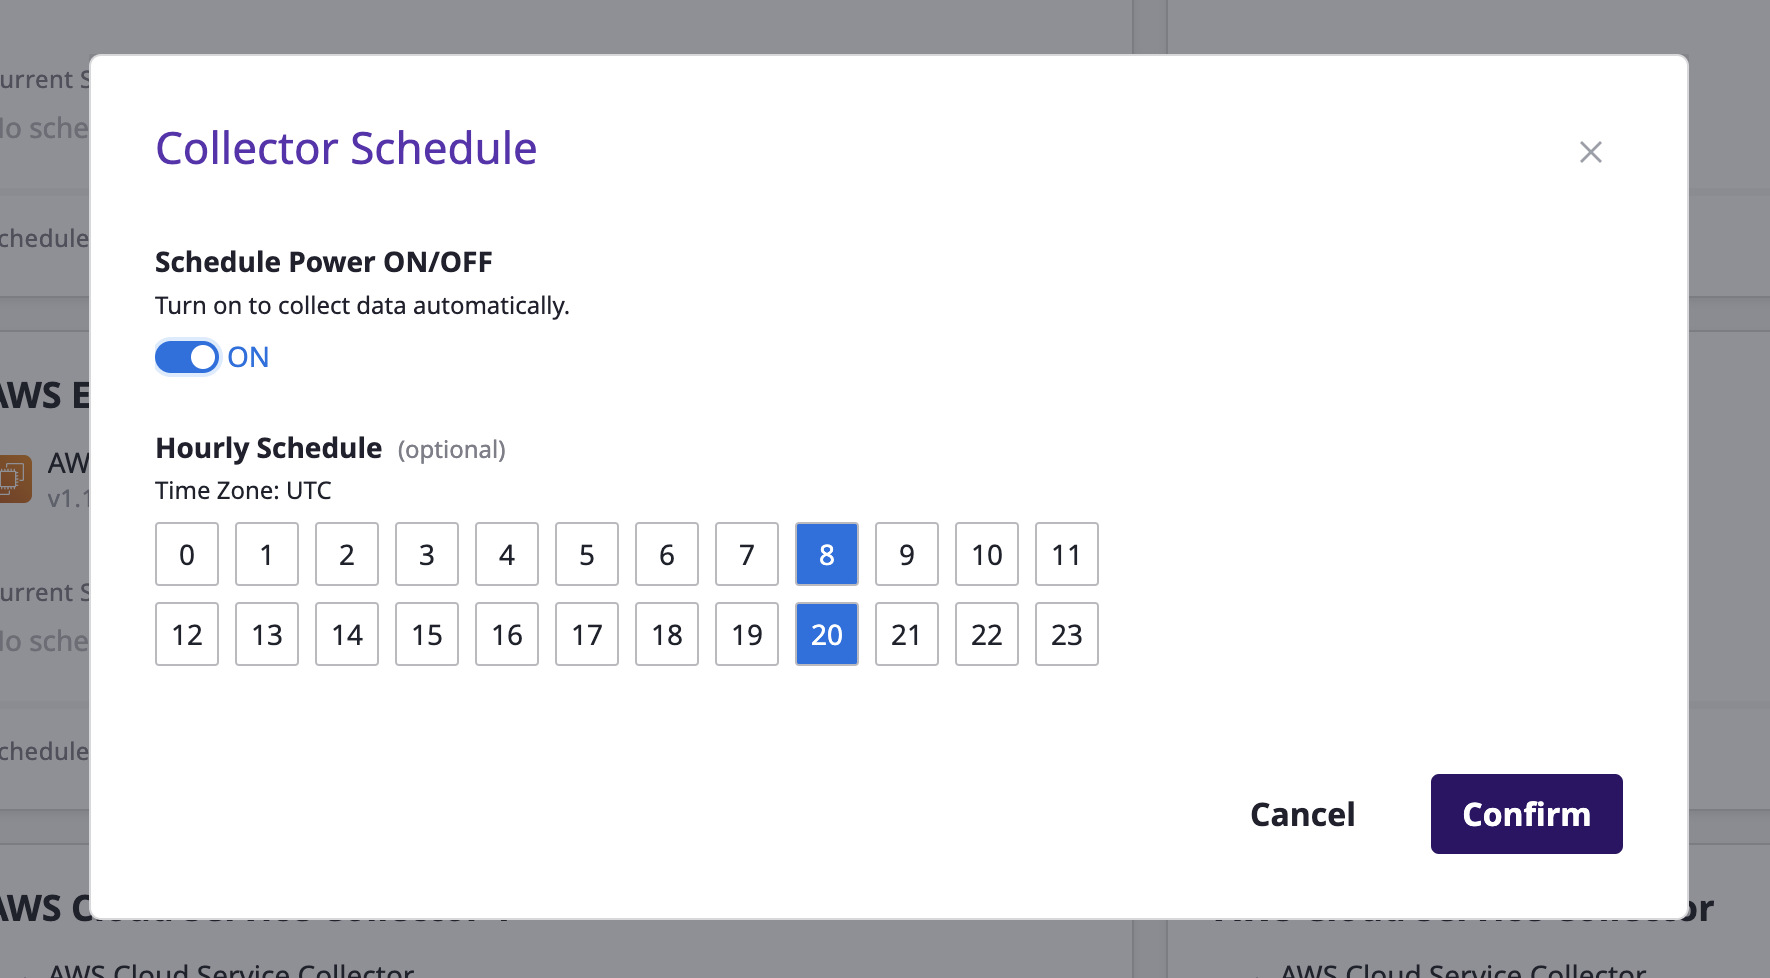
(2) You can also navigate to the detailed page of each collector and change the schedule.
Start data collection immediately
You can collect data on a one-time basis without setting up automated data collection.
It allows data collection to take place even when the collector does not have an automated data collection schedule.
Data collection works in two ways:
Collect data for all attached service accounts
Collector needs account information from a Provider for data collection, which is registered through Service account.
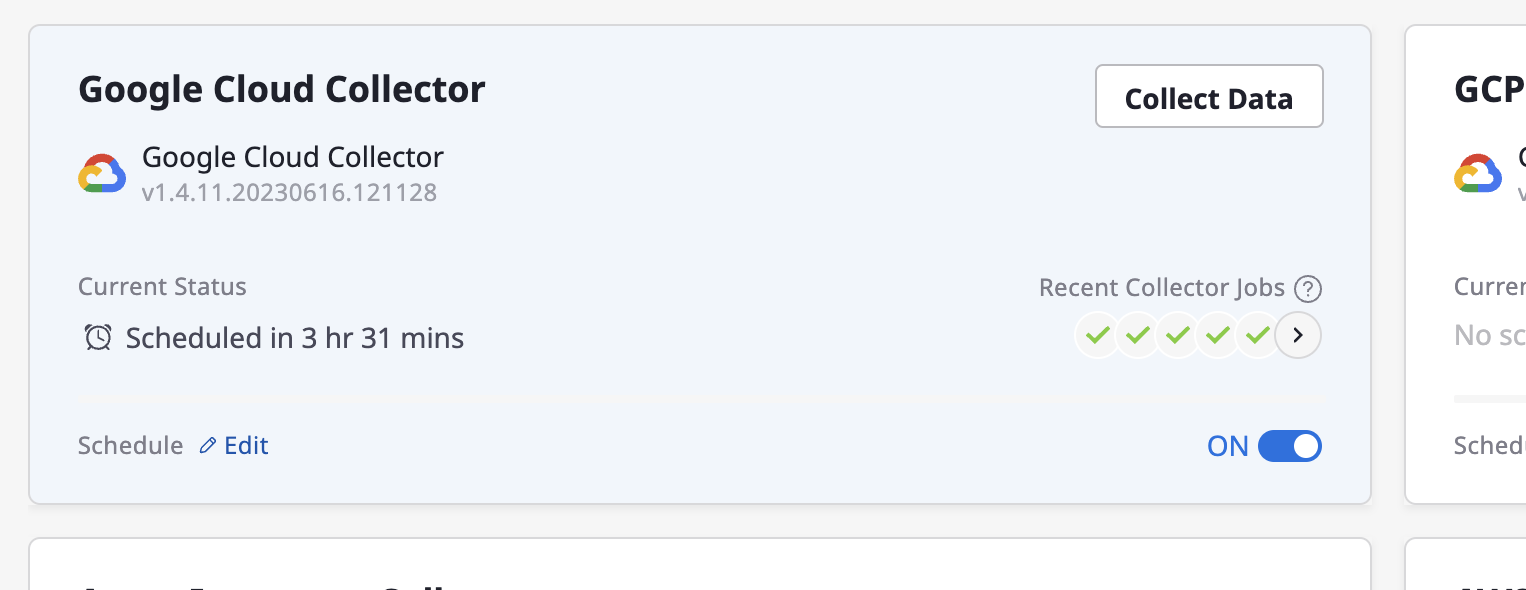
(1) Click on [Collect Data]
(Collector list Page) Hover over the collector card area for data collection, and then click the [Collect Data] button.
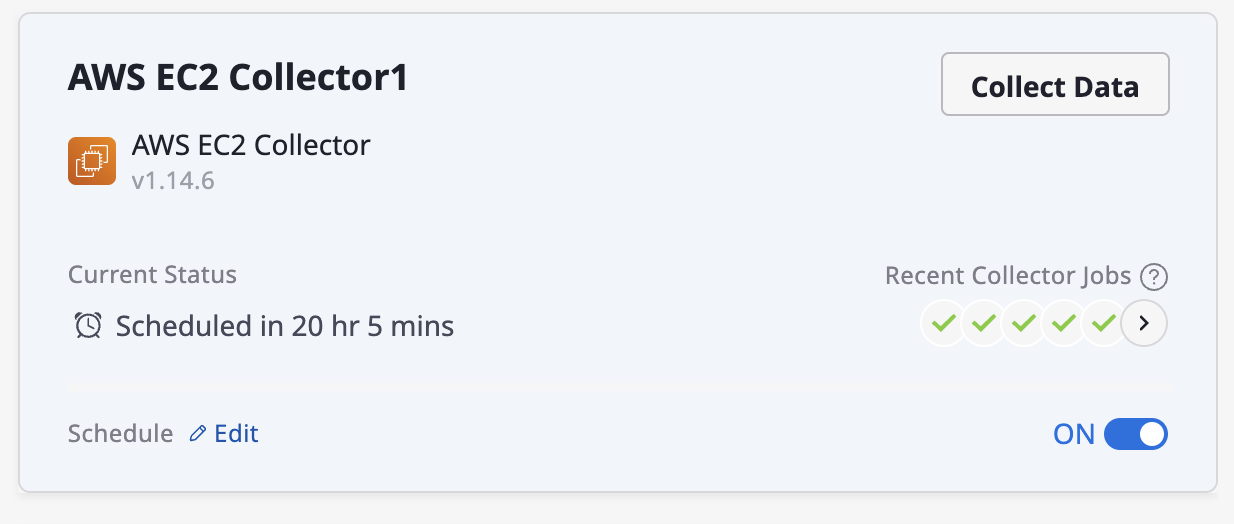
(Collector Detail Page) Click the [Collect Data] button located in the top right corner of the detailed page.


(2) Proceed with data collection.
(2) Whether or not the collector has completed a data collection can be checked in Collector history. You can click the [View details] link of a selected collector to go to that page.
Collect data for a single service account
When collecting data with a collector, you may only collect data from a specific cloud provider’s account.
(1) Select a collector from the collector list page, and go to detail page.
(2) You can find the list of attached service accounts on the bottom of detail page.
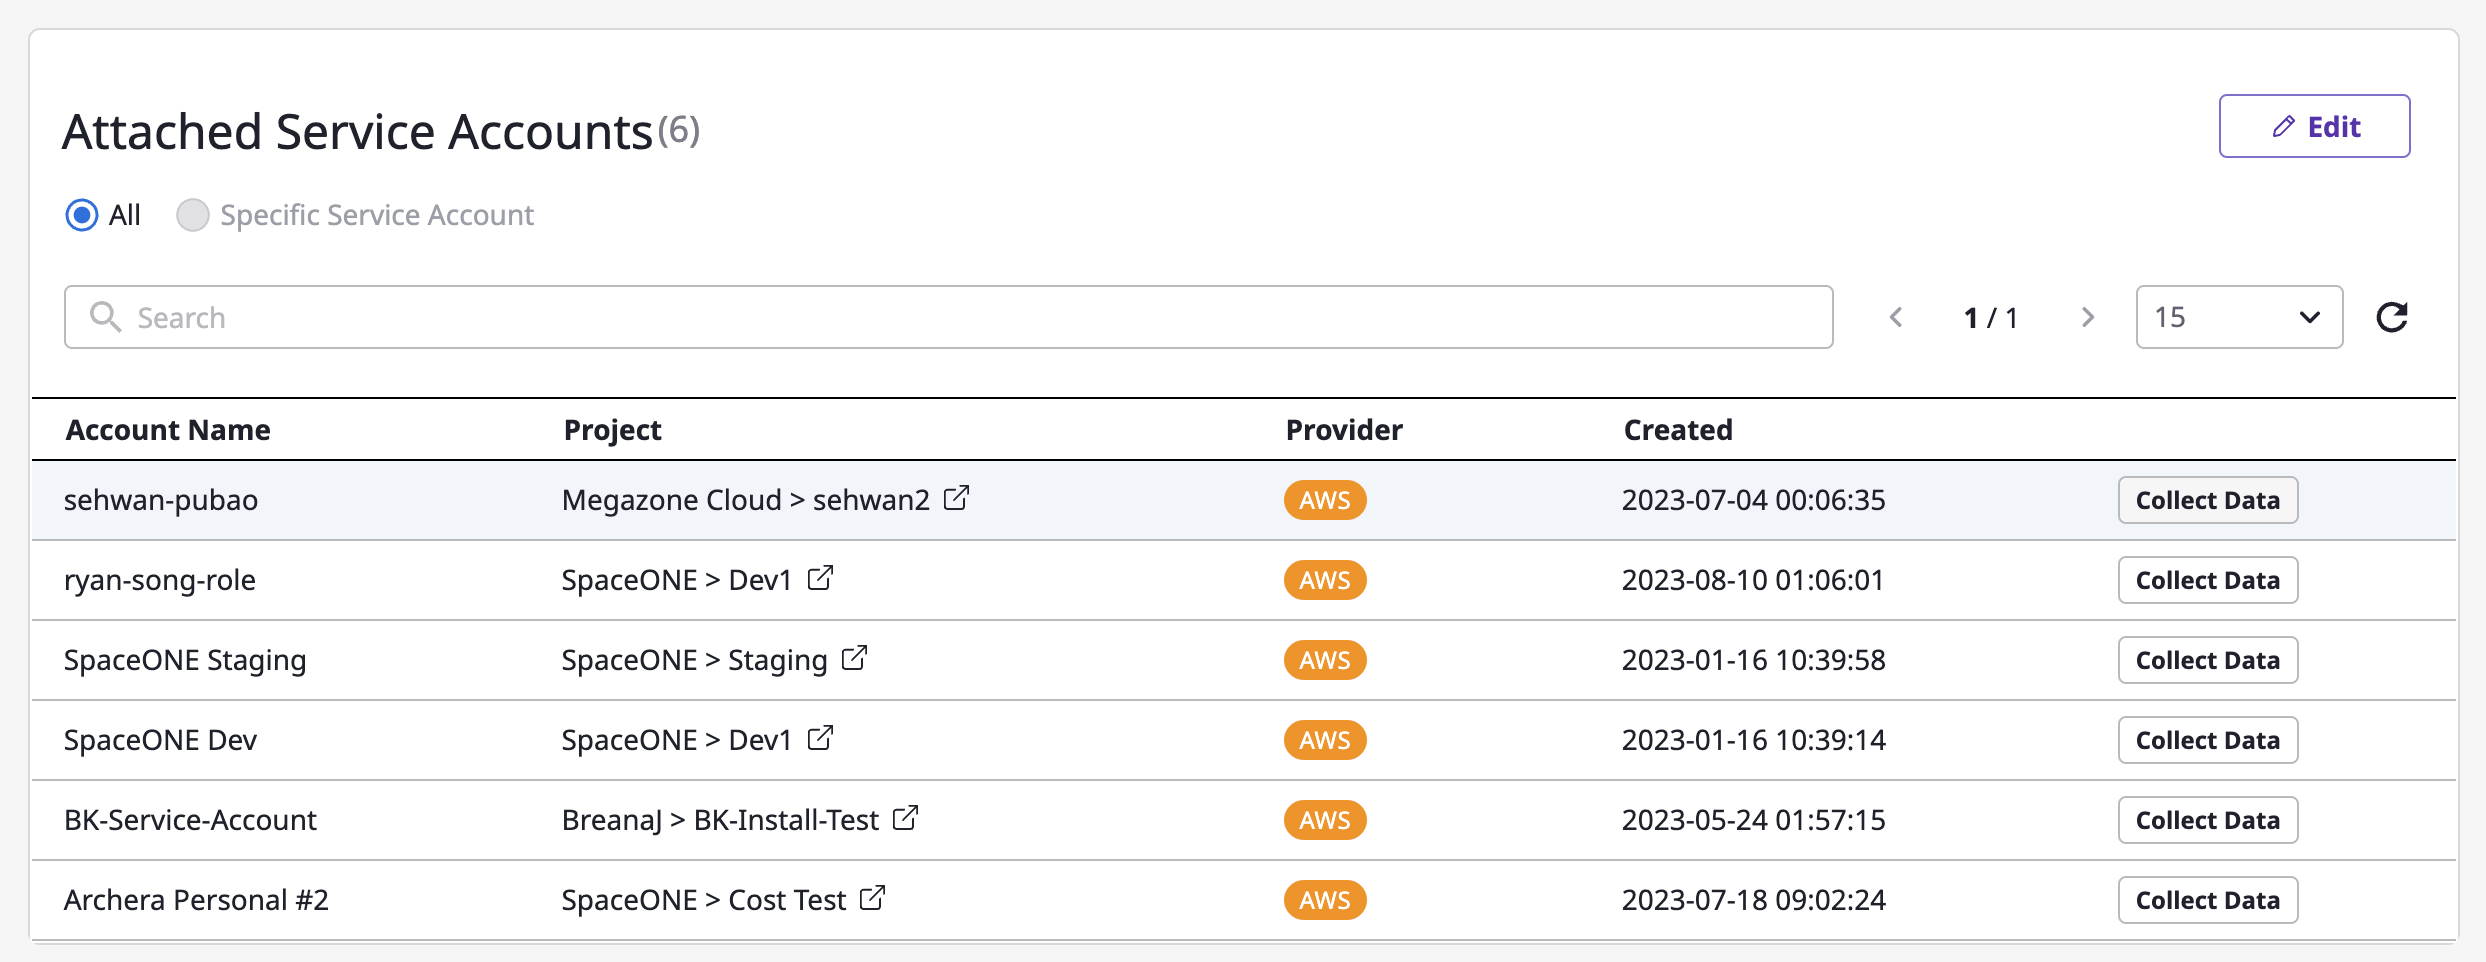
Service account
Service account has access information for the provider account required for data collection.
If no information can be found here, this means there is no account information for accessing the provider, and as a result, no data collection occurs even when the collector is running.
Therefore, to collect data with a collector, you must first register the account information of the provider in the [Service account] menu.
(3) In order to start data collection, Click the [Collect Data] button on the right side of the service account for which you want to collect data.
Checking data collection history
You can check your data collection history on the Collector history page.
You can go to the collector history page by clicking the [Collector history] button at the top of the collector page.

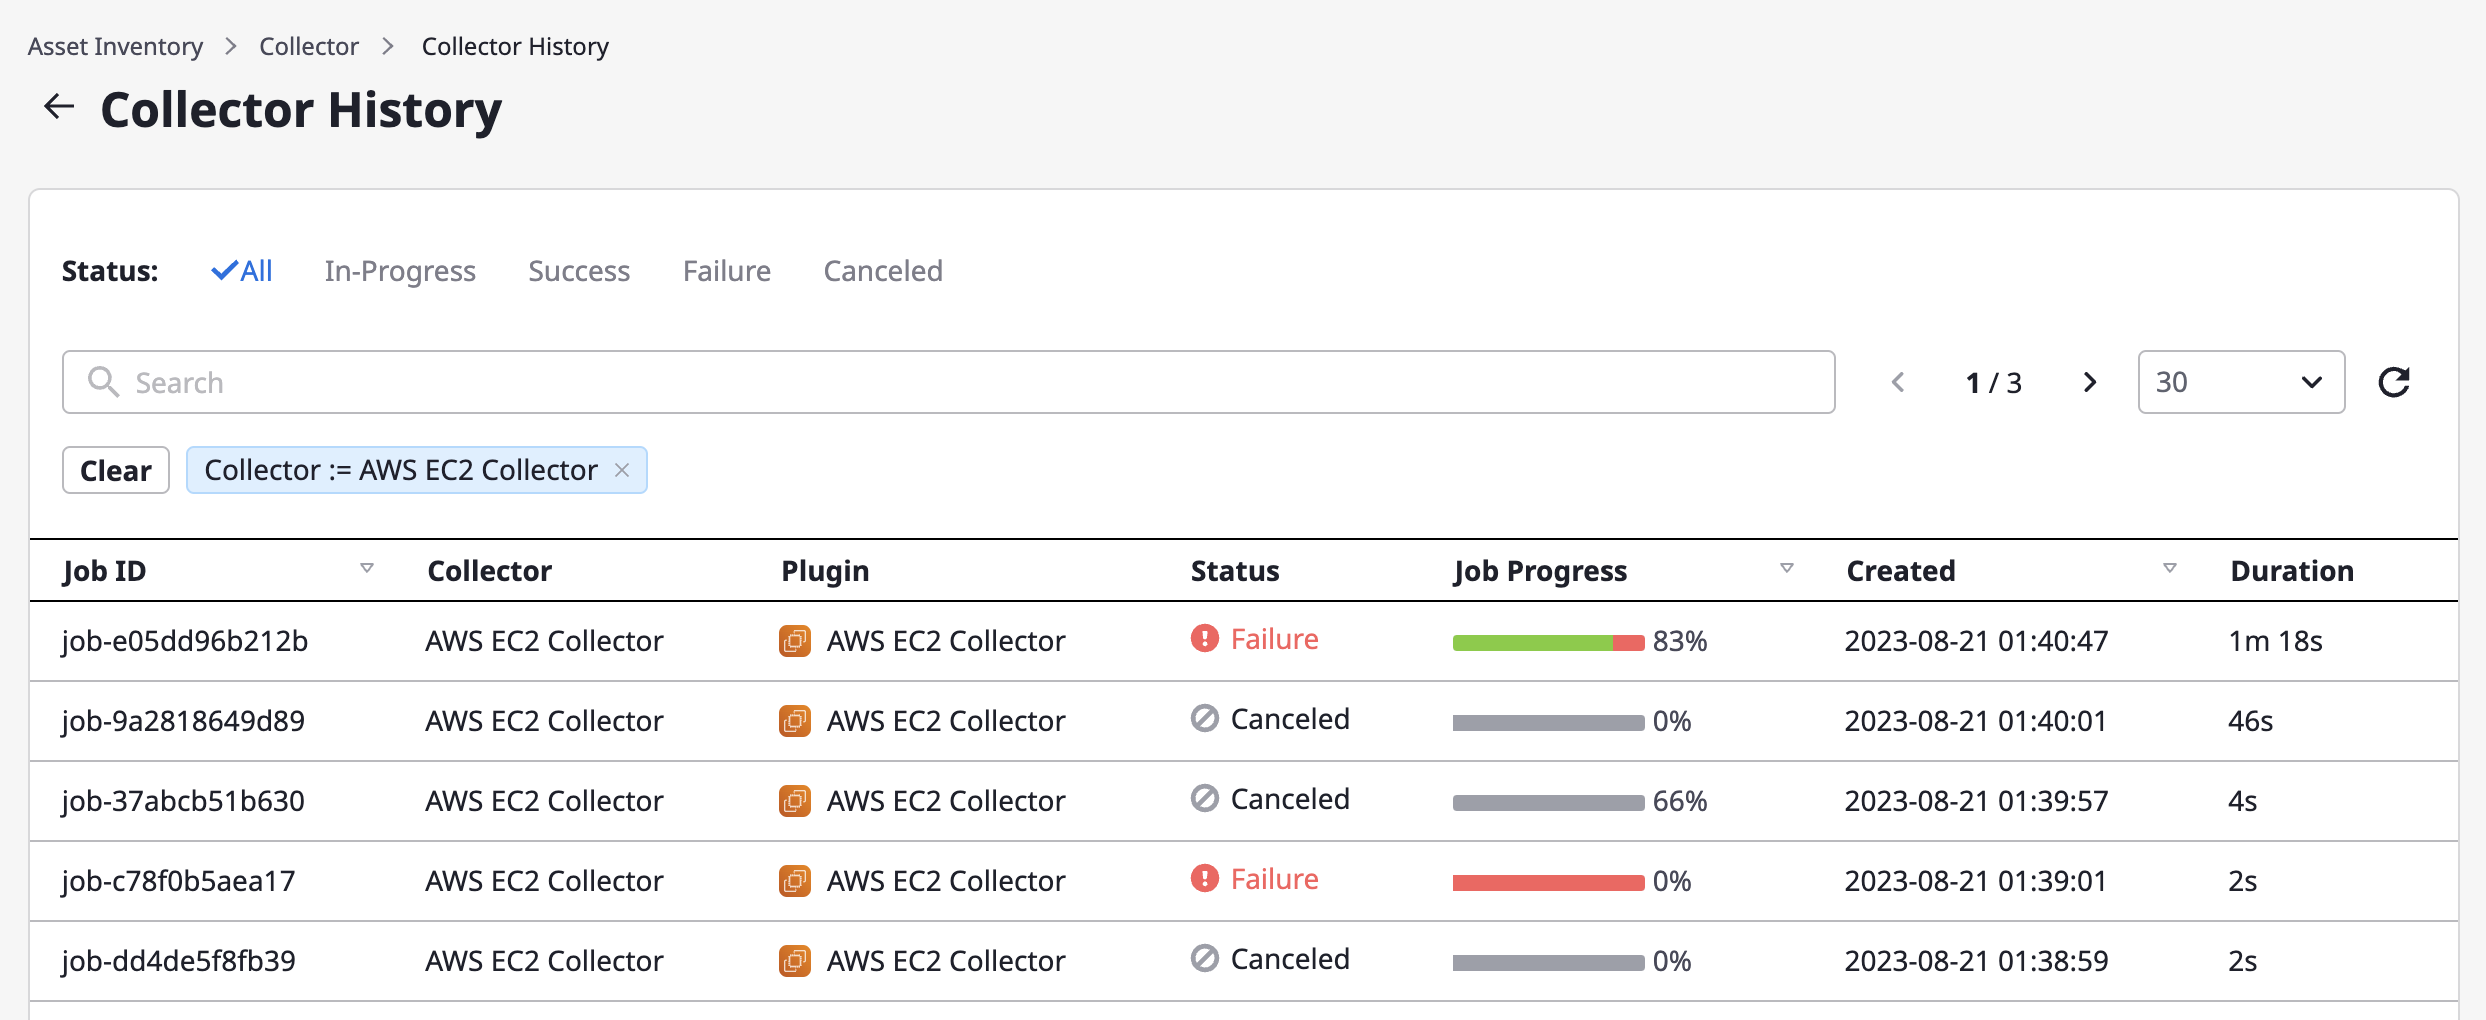
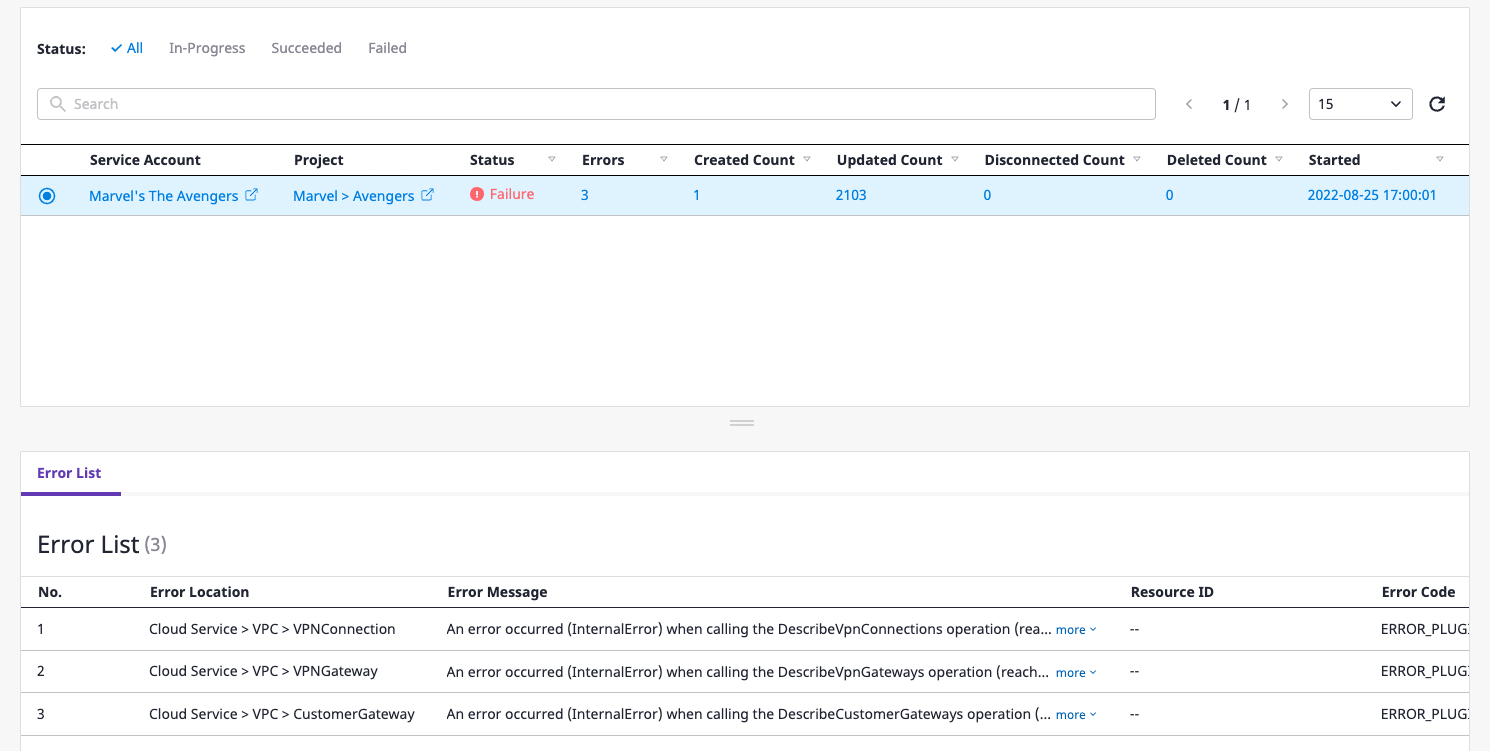
Checking the details of data collection history
If you select a collection history from the list of data collections above, you will be taken to the collection history details page.
You can check data collection status, basic information, and Collection history by service account.
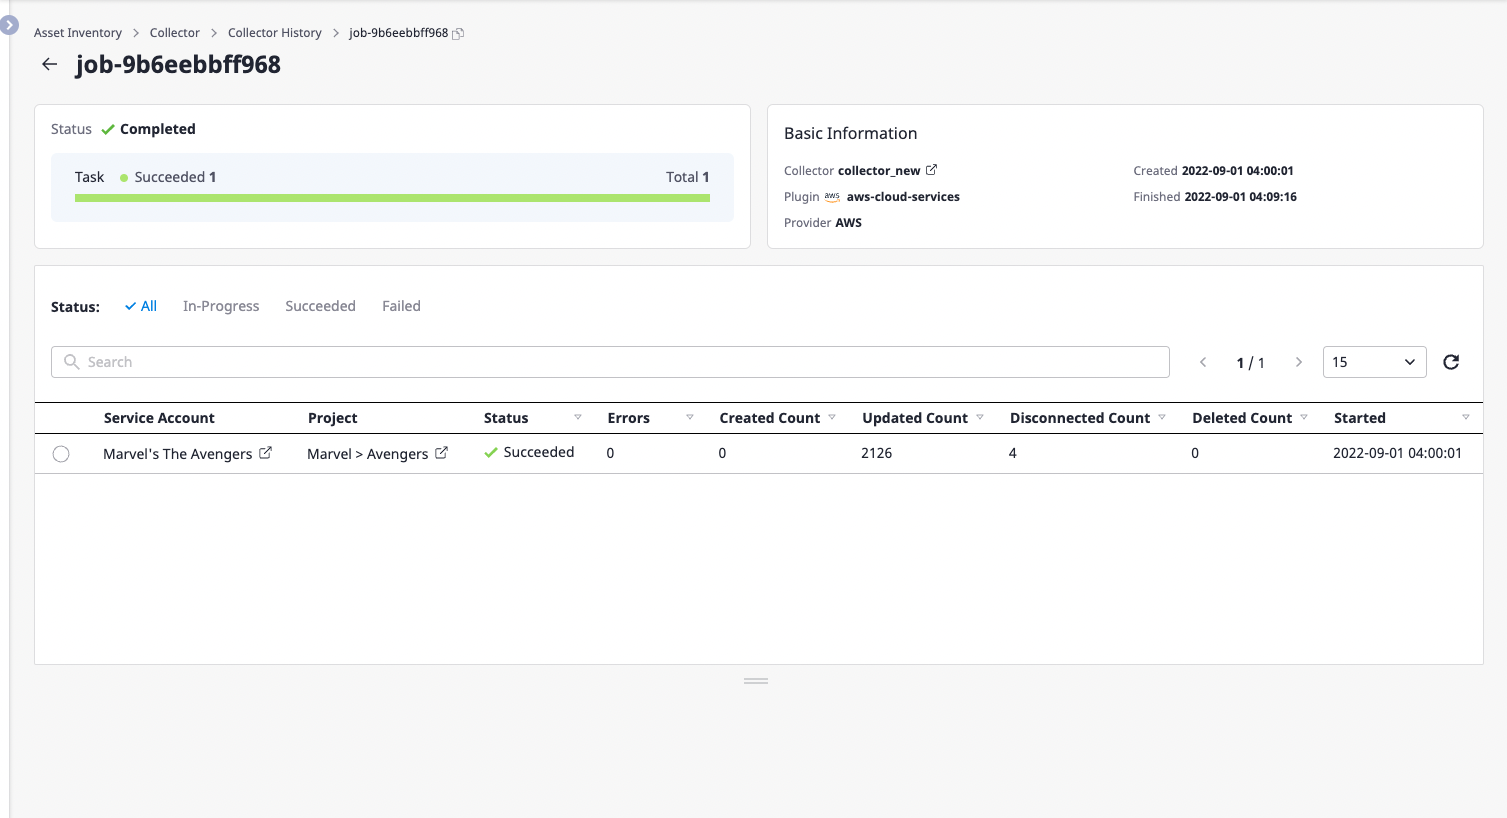
Checking collection history for each service account
When you run the collector, each collection is performed for each associated service account.
Here you can find information about how the collection was performed by the service account.
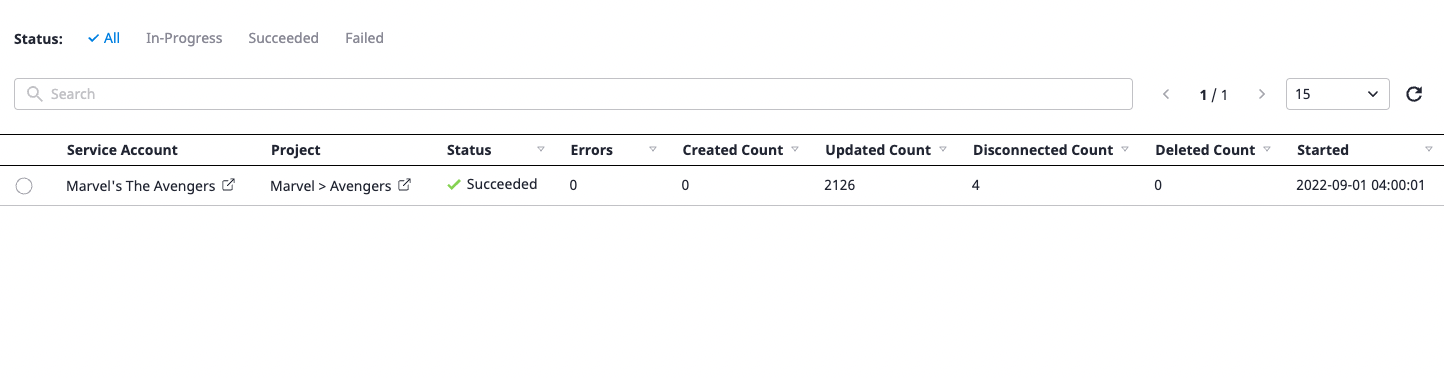
Key field Information
- Created Count: The number of newly added resources
- Updated Count: The number of imported resources
- Disconnected Count: The number of resources that were not fetched
- Deleted Count: Number of deleted resources (in case of a resource failing to fetch multiple times, it is considered deleted.)
Check the content of collection errors
(1) Select the item you want to check for error details from a list of collections for each account.
(2) You can check the details of errors in the [Error list] tab below.