Alert
State
Alerts have one of the following states:
| State | Description |
|---|---|
| OK | State in which an alert has been assigned and is being processed |
| Created | State in which alert was first registered |
| Resoled | State in which the contents of alerts such as faults, inspection, etc., have been resolved |
| Error | State in which an event has been received through webhook connections but alerts were not normally registered due to error |
Urgency
There are two types of urgent alerts in Cloudforet: high and low.
Whereas in the case of the Manual creation of alerts, it is created as one of two types, high and low, in the case of automatic creation through webhook connections, urgency is measured according to Severity.
Severity
Severity indicates the intensity of the risk of an event coming from a typical external monitoring hook.
There are five severity levels: critical, error, warning, info,andnot_available,` and, when creating alerts from them, Cloudforet sets the urgency level based on the following criteria:
• High : critical, error, and not available
• Low: warning and info
Creating alerts
Alerts can be created in two ways:
- Manual creation: create an alert manually in the Cloudforet console.
- Auto generation: create a webhook and receives events from an external monitoring service connected to the webhook. And it automatically generates an alert by purifying the received event message.
Creating an alert manually from a console
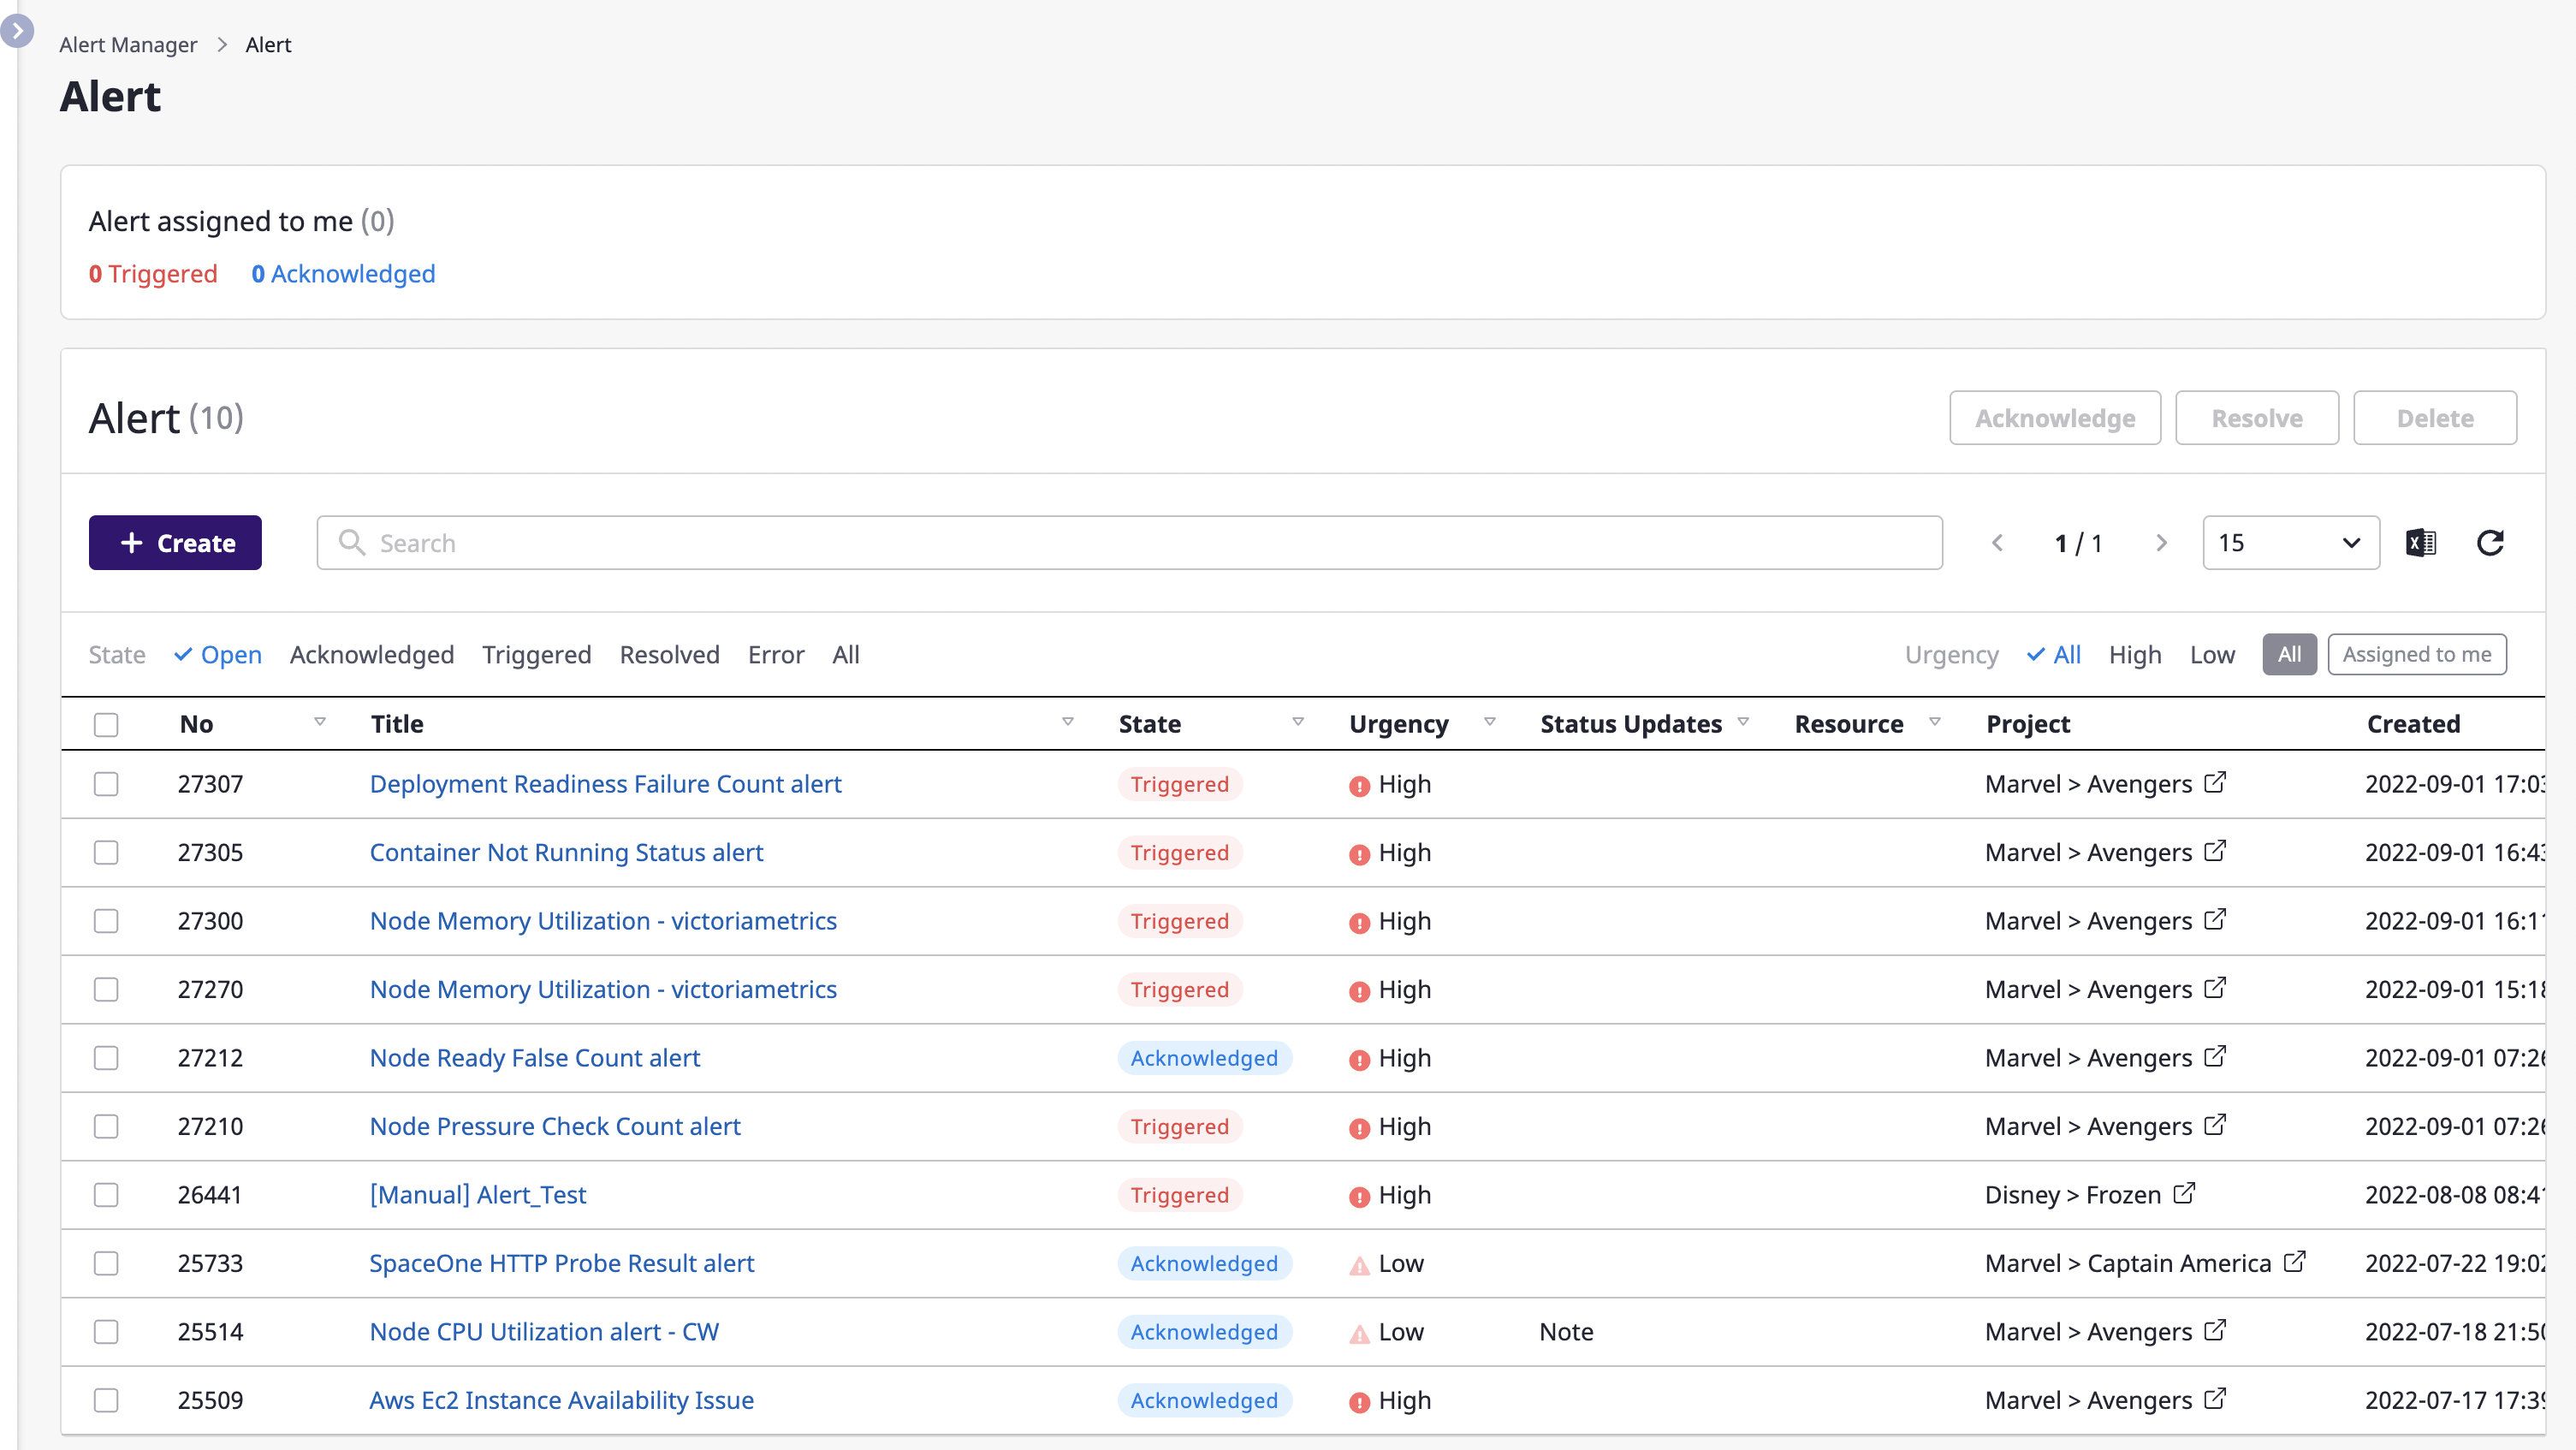
(1) Go to the [Alert manager > Alerts] page and click the [Create] button.
(2) When the [Create alert] modal dialog opens, fill in the input form.
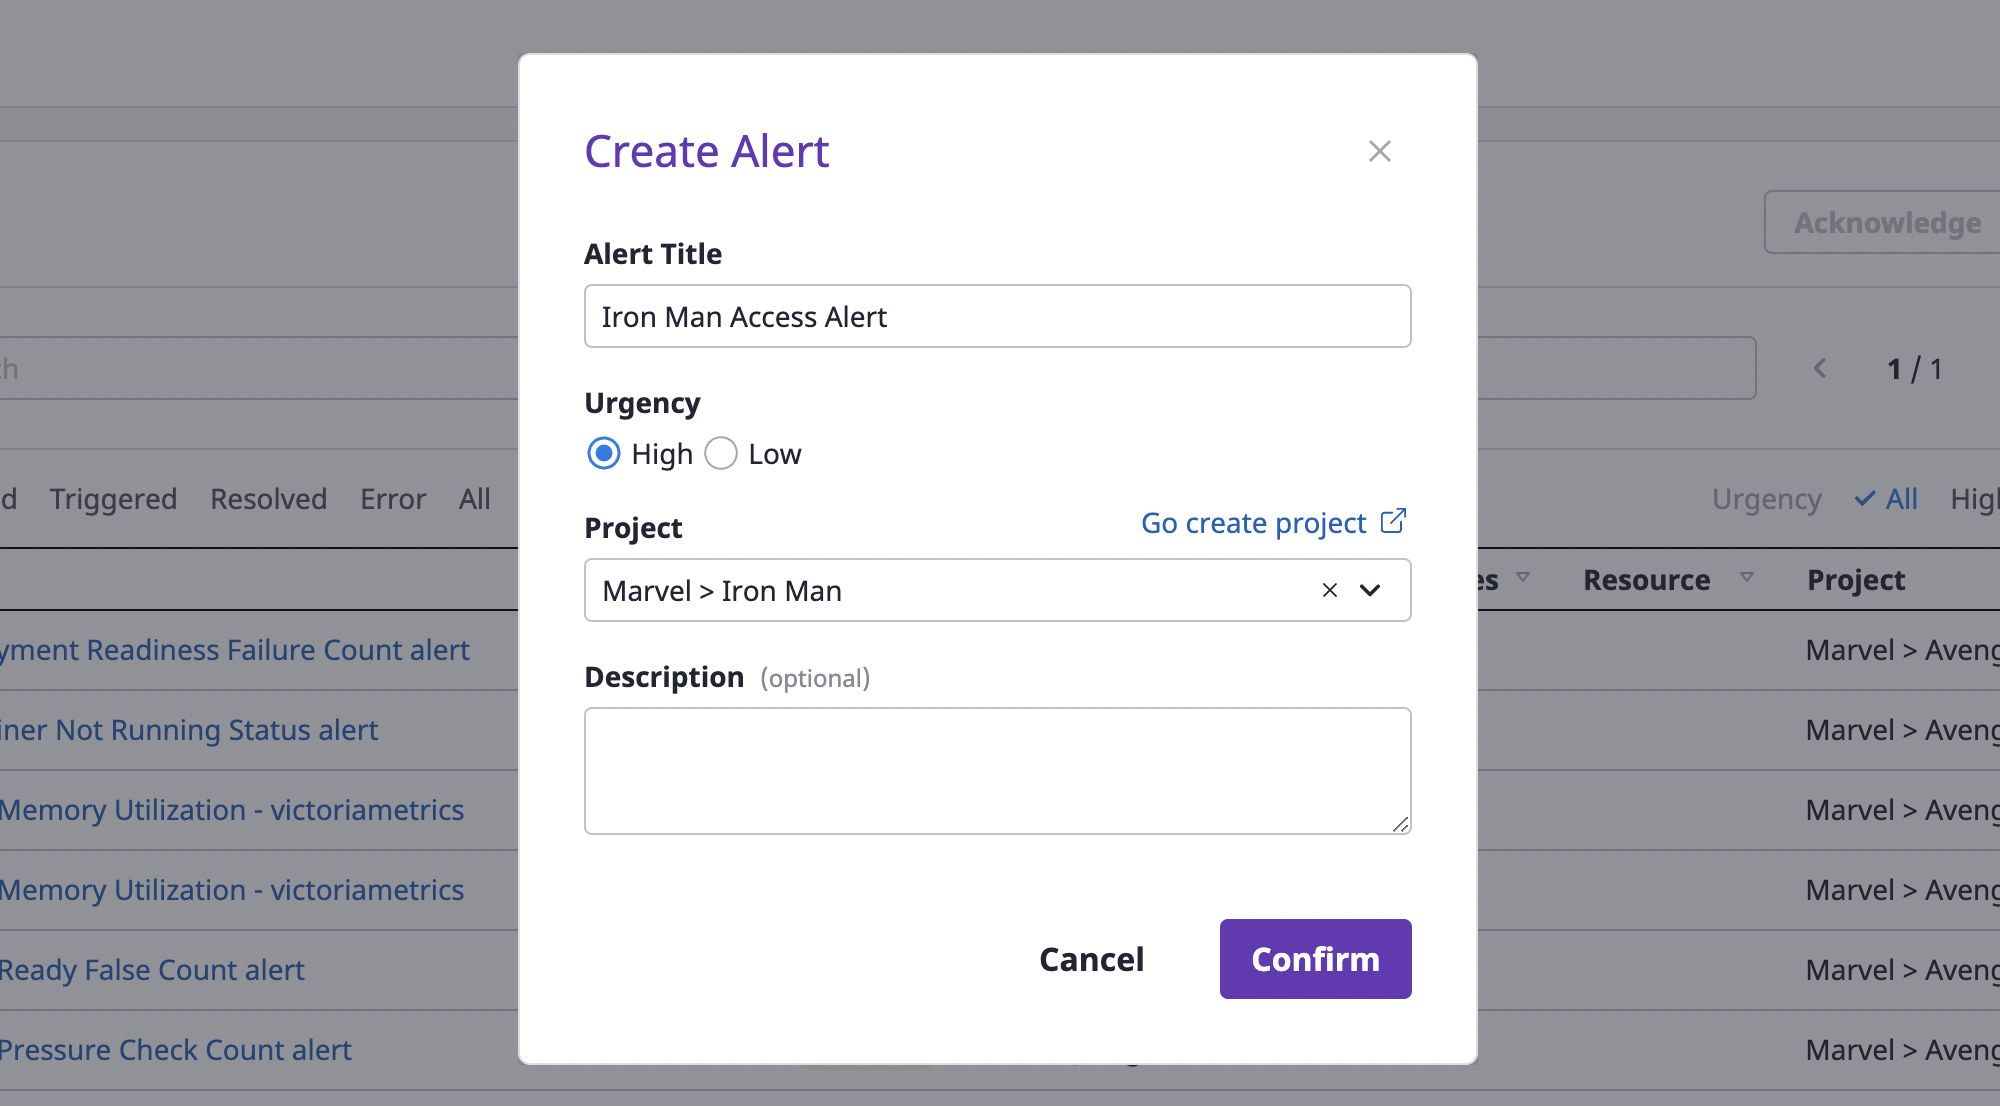
(2-1) Enter an [Alert title] and select [Urgency].
(2-2) Designate the project for which the alert occurred.
(2-3) Write [Comment] if an additional explanation is needed.
(3) Click the [OK] button to complete alert creation.
Connecting to an external monitoring service to receive alerts
When an external monitoring service is connected, an event message occurring in the service is automatically generated as an alert.
To receive alerts from the external monitoring, Webhook creation and Connection settings are required.
Webhook creation is performed in the Cloudforet console, but Connection settings must be done directly in the Cloud Service console that provides external monitoring services.
For more on how to connect an external monitoring service, see here.
Creating a webhook
To receive event messages from an external monitoring service, you need to create a webhook.
Webhooks can be created on the project detail page.
(1) Go to the [Alerts] tab of the project detail page and select the [Webhook] tab.
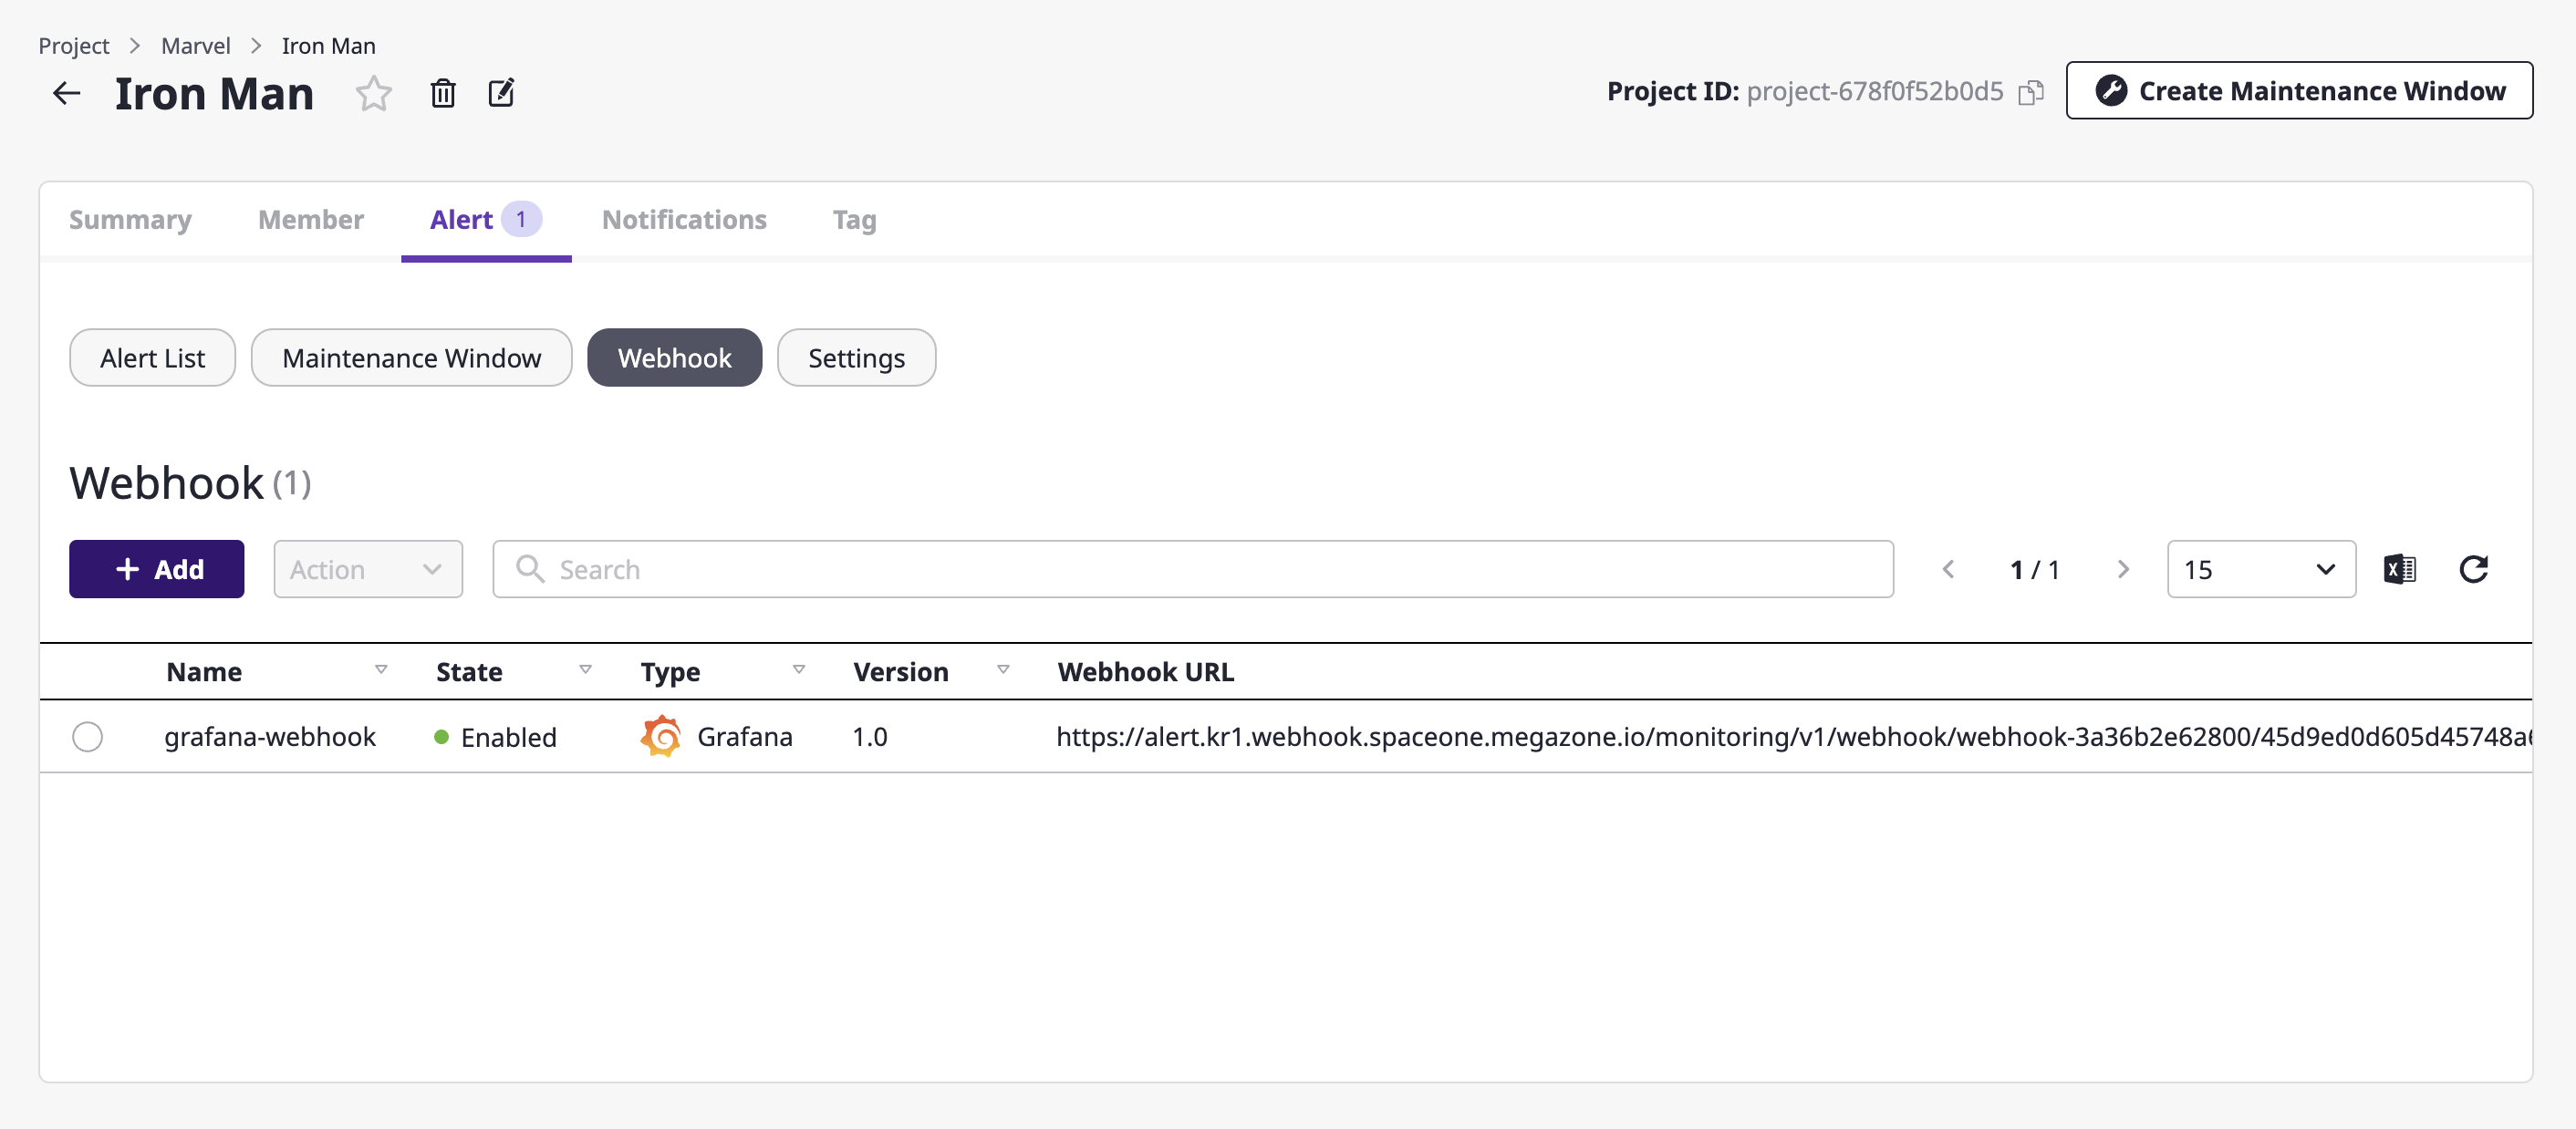
(2) Click the [Add] button.
(3) Write a name in an [Add webhook] modal dialog and select the plug-in of the external monitoring service to be connected.
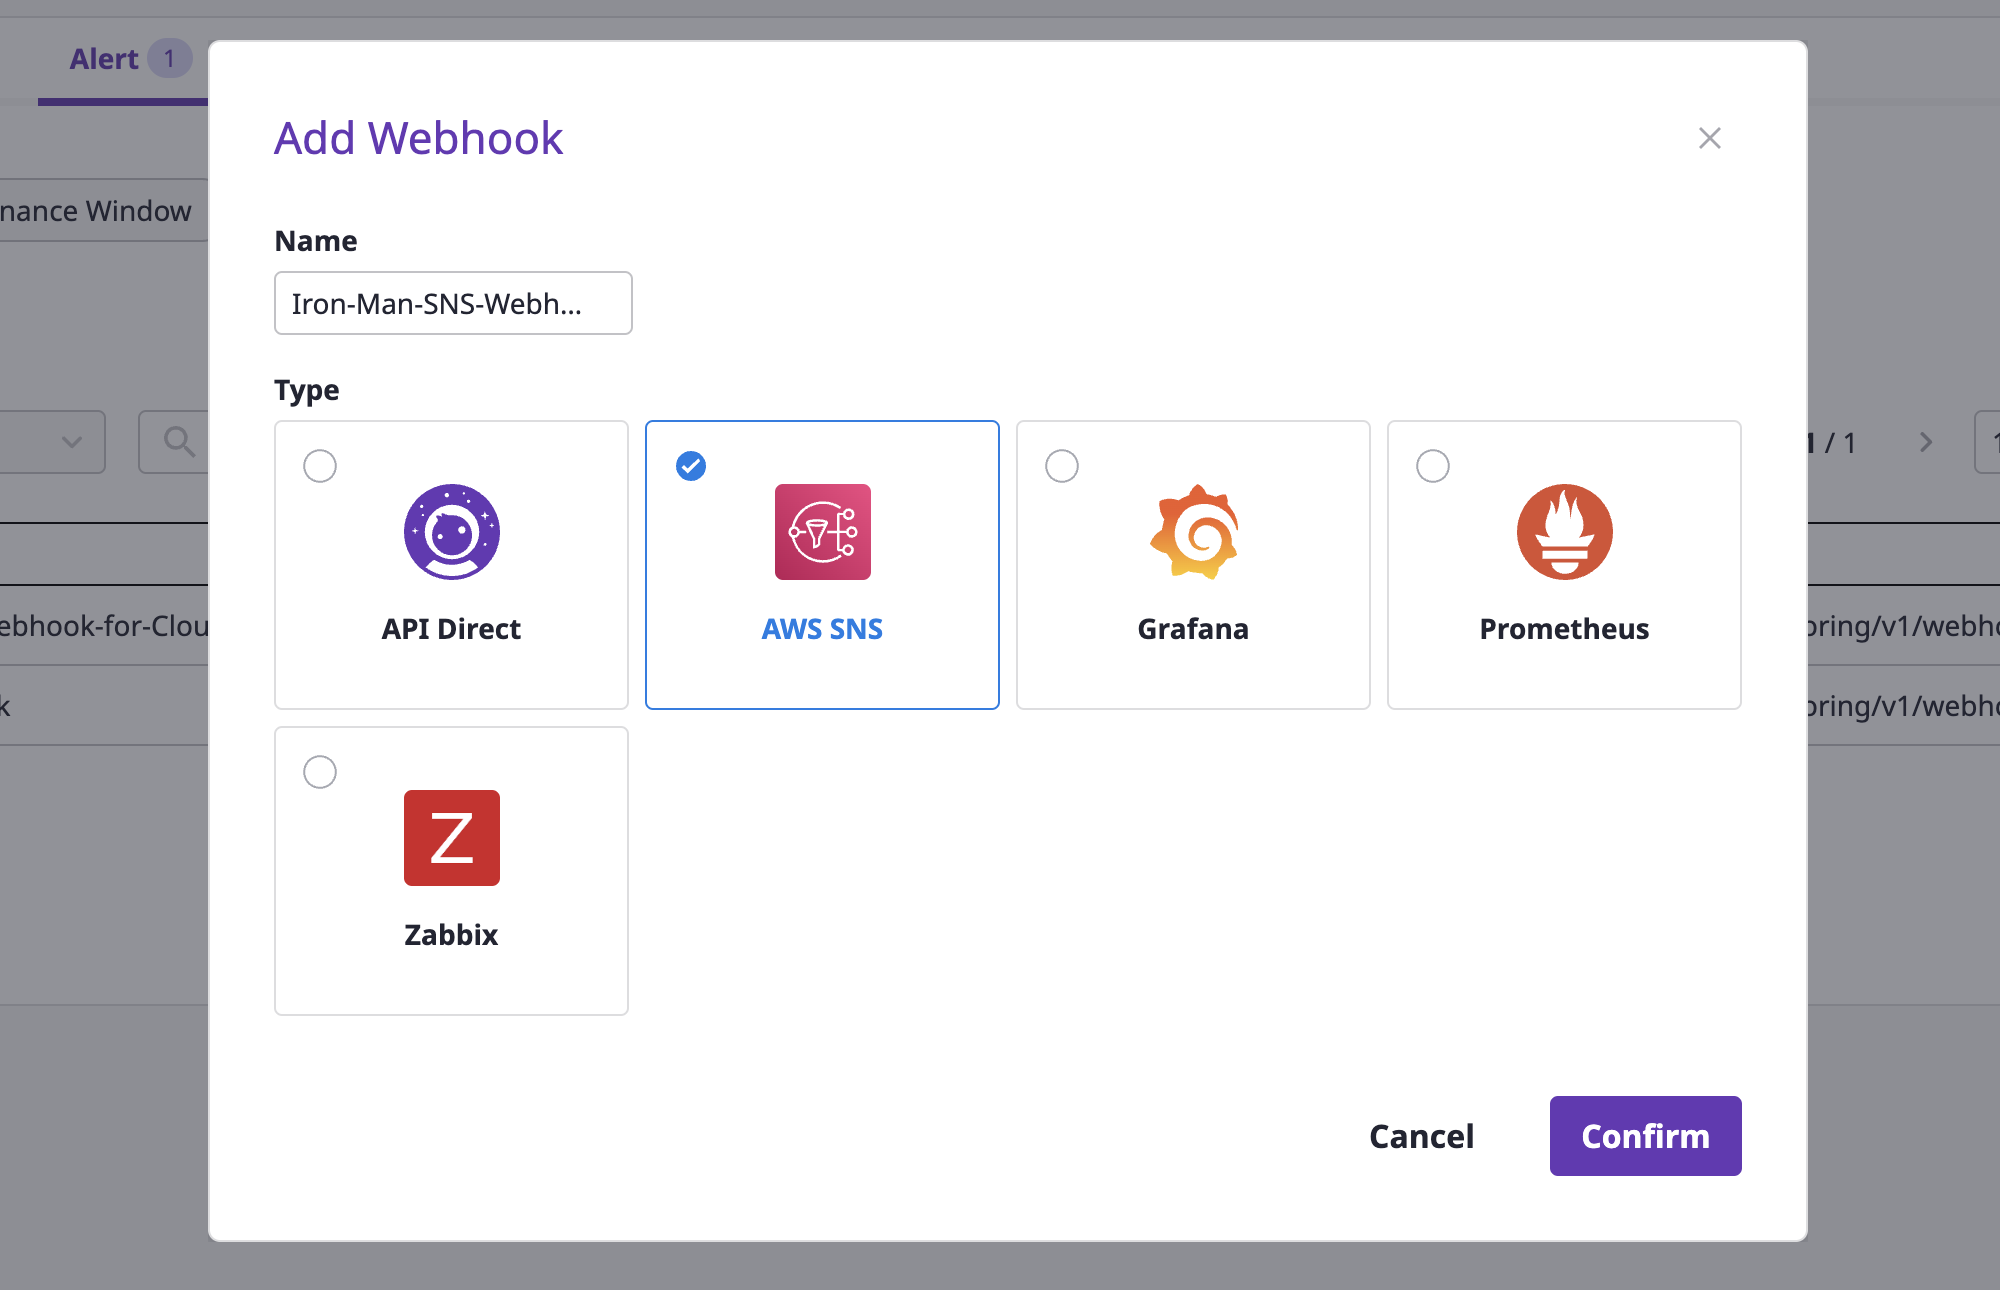
(4) Click the [OK] button to complete set up.
Using Alerts
Let's take a brief look at various ways to use the alert features in Cloudforet.
- Notifications channel: set up how and when to send alerts to which users.
- Escalation policy: apply step-by-step rules to effectively forward received alerts to project members.
- Event rules: events received through webhooks are generated as Alerts according to the circumstances.
- Maintenance period: register regular and irregular system task schedules to guide tasks and block Alerts that occur between tasks.
Getting a list of alerts
You can view alerts from all projects on the [Alert manager > Alerts] page.
You can search for alerts or change the state of an alert.
Searching for alerts
You can enter a search term to see a list of alerts that match your criteria and click the title of an alert you want to check on an alert detail page.
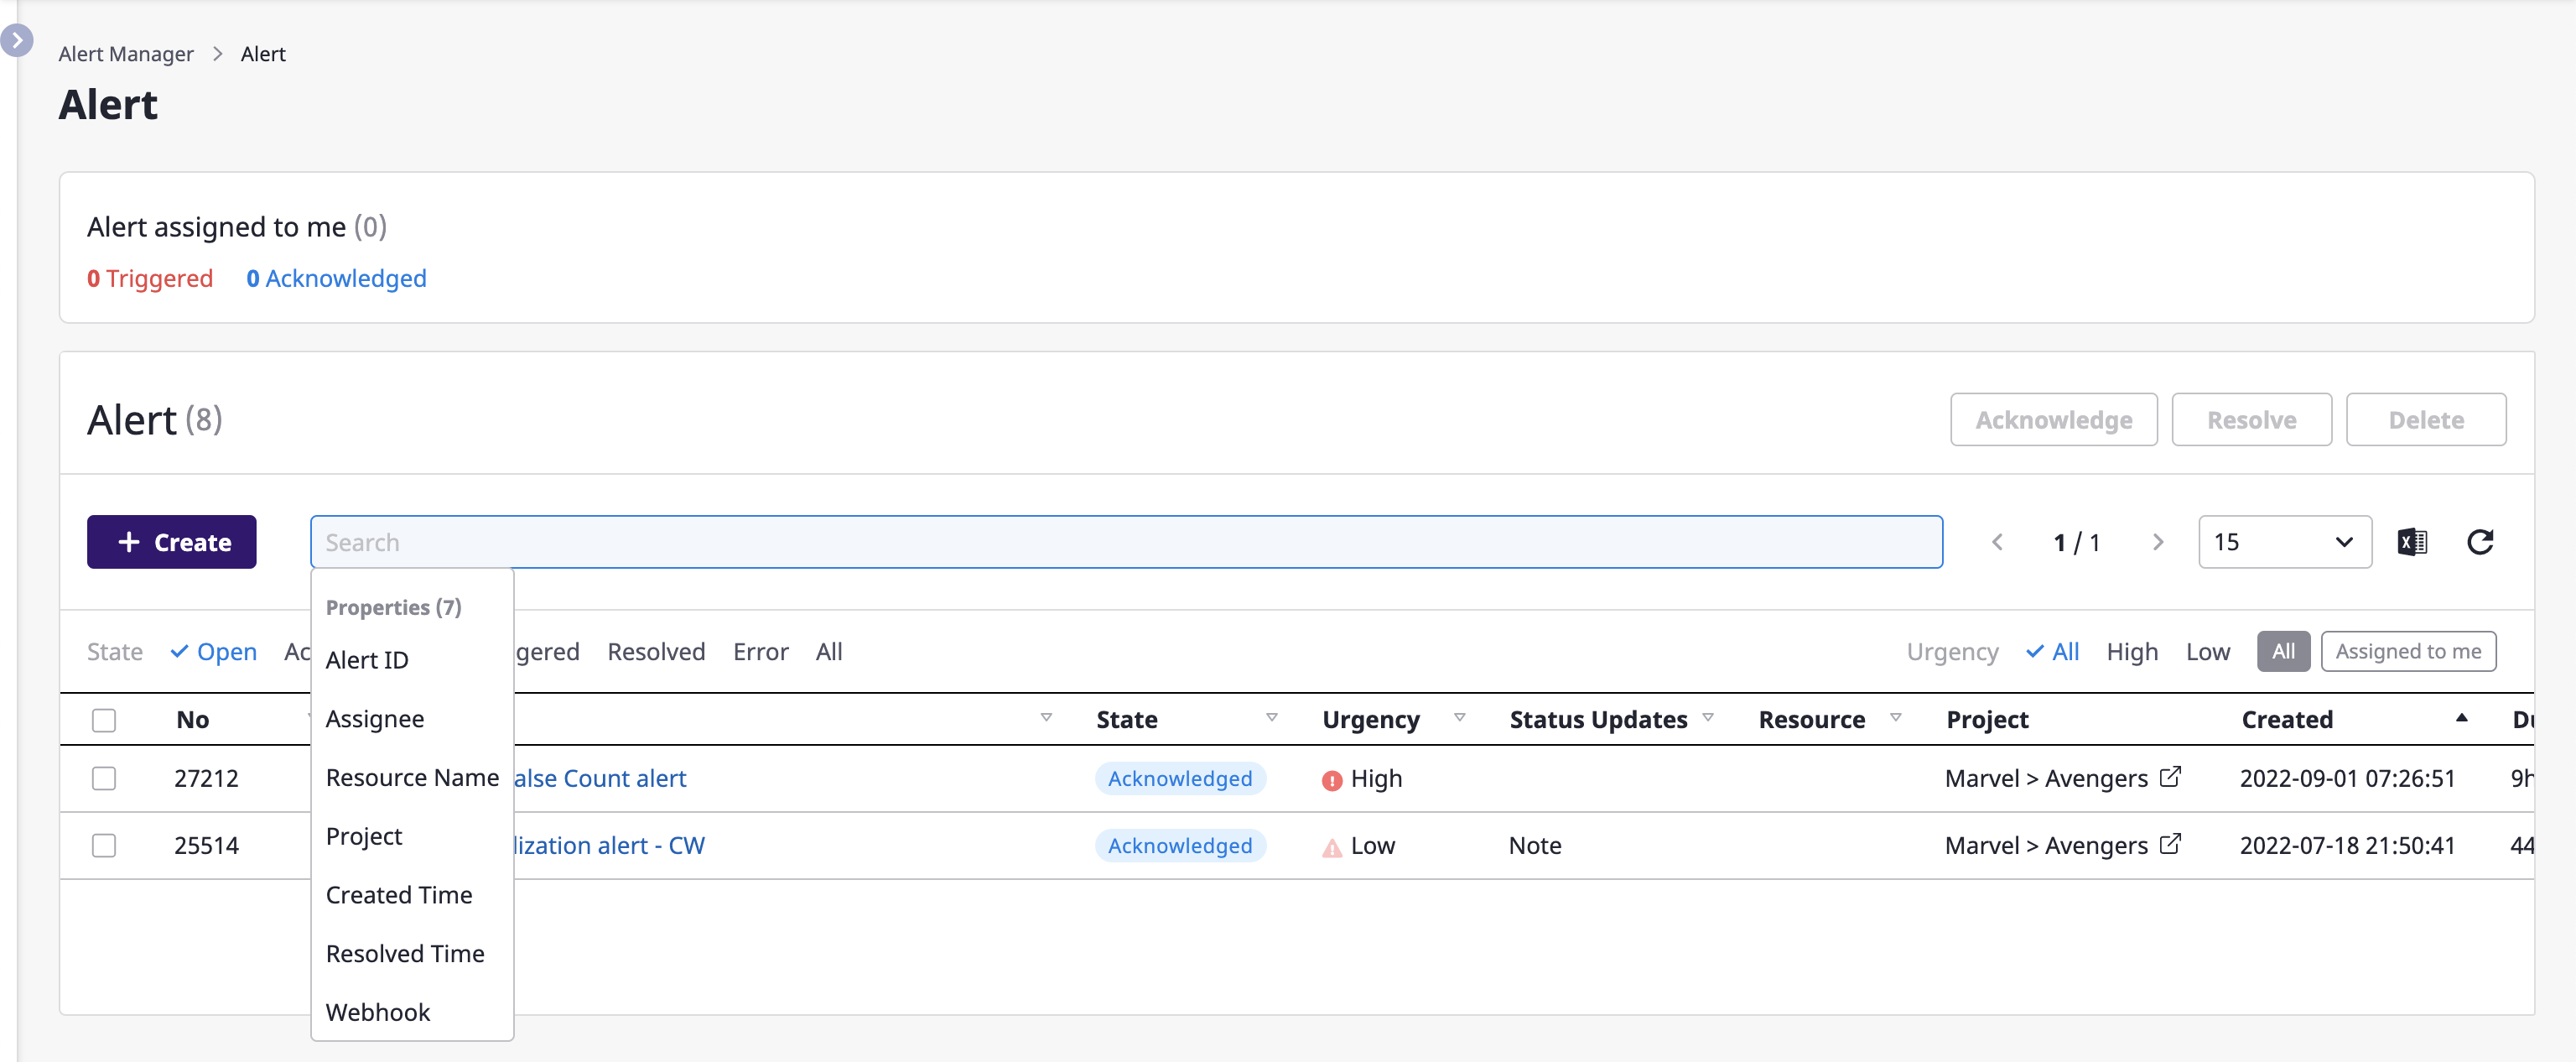
Also, the built-in filtering feature makes it convenient to filter alerts.
For a detailed description on advanced search, see here.
Changing alert state in lists
You can edit an alert state right from the list.
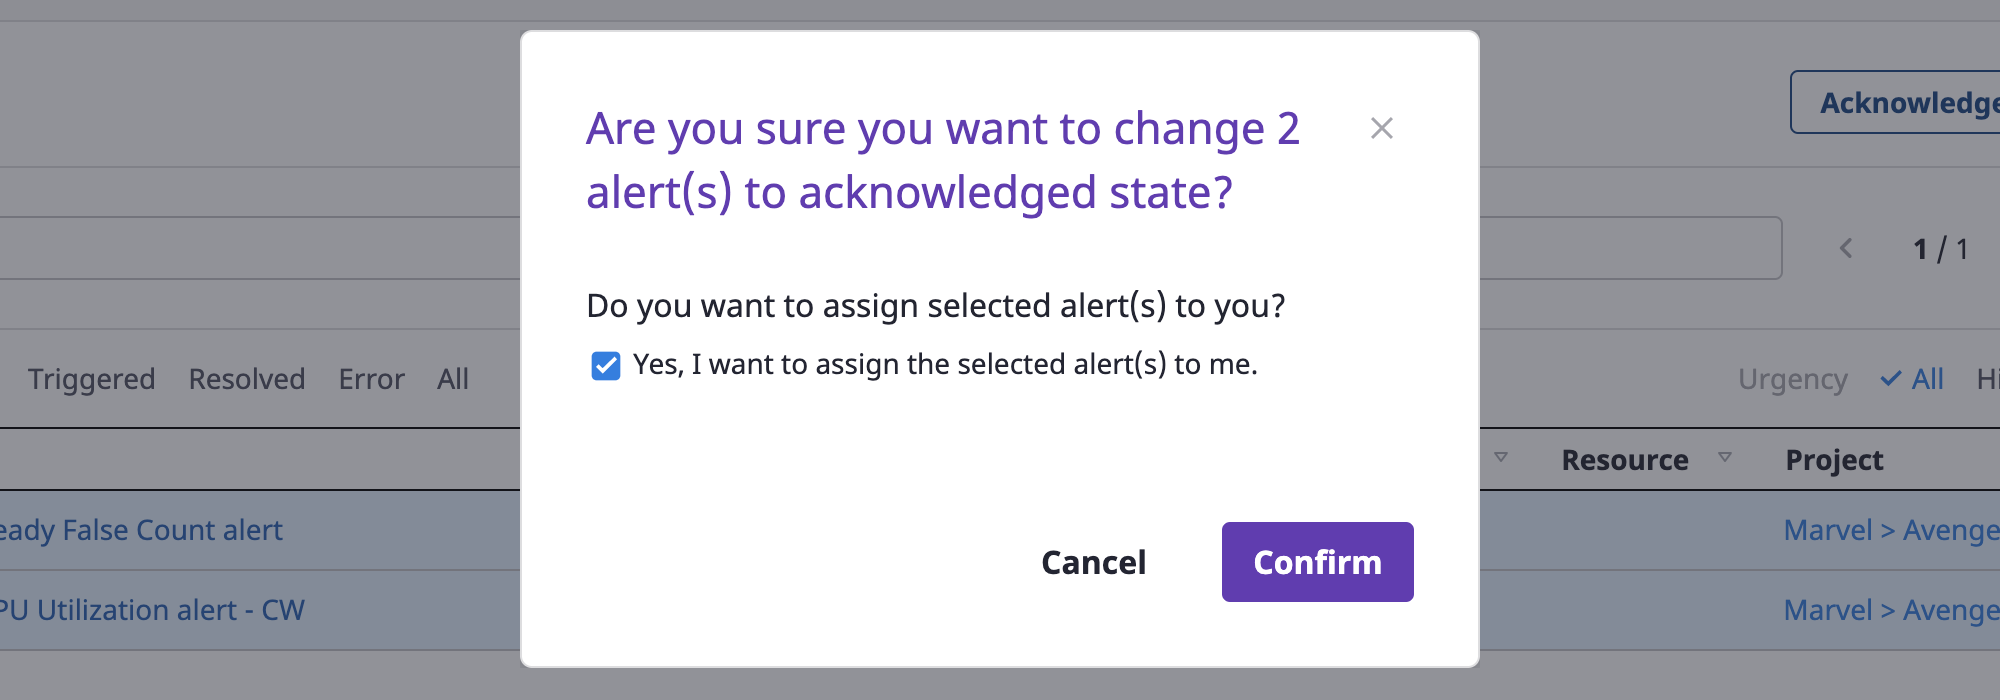
(1) Select an alert to edit the state, and click the desired button from among [OK], [Resolved], and [Delete] in the upper right corner.
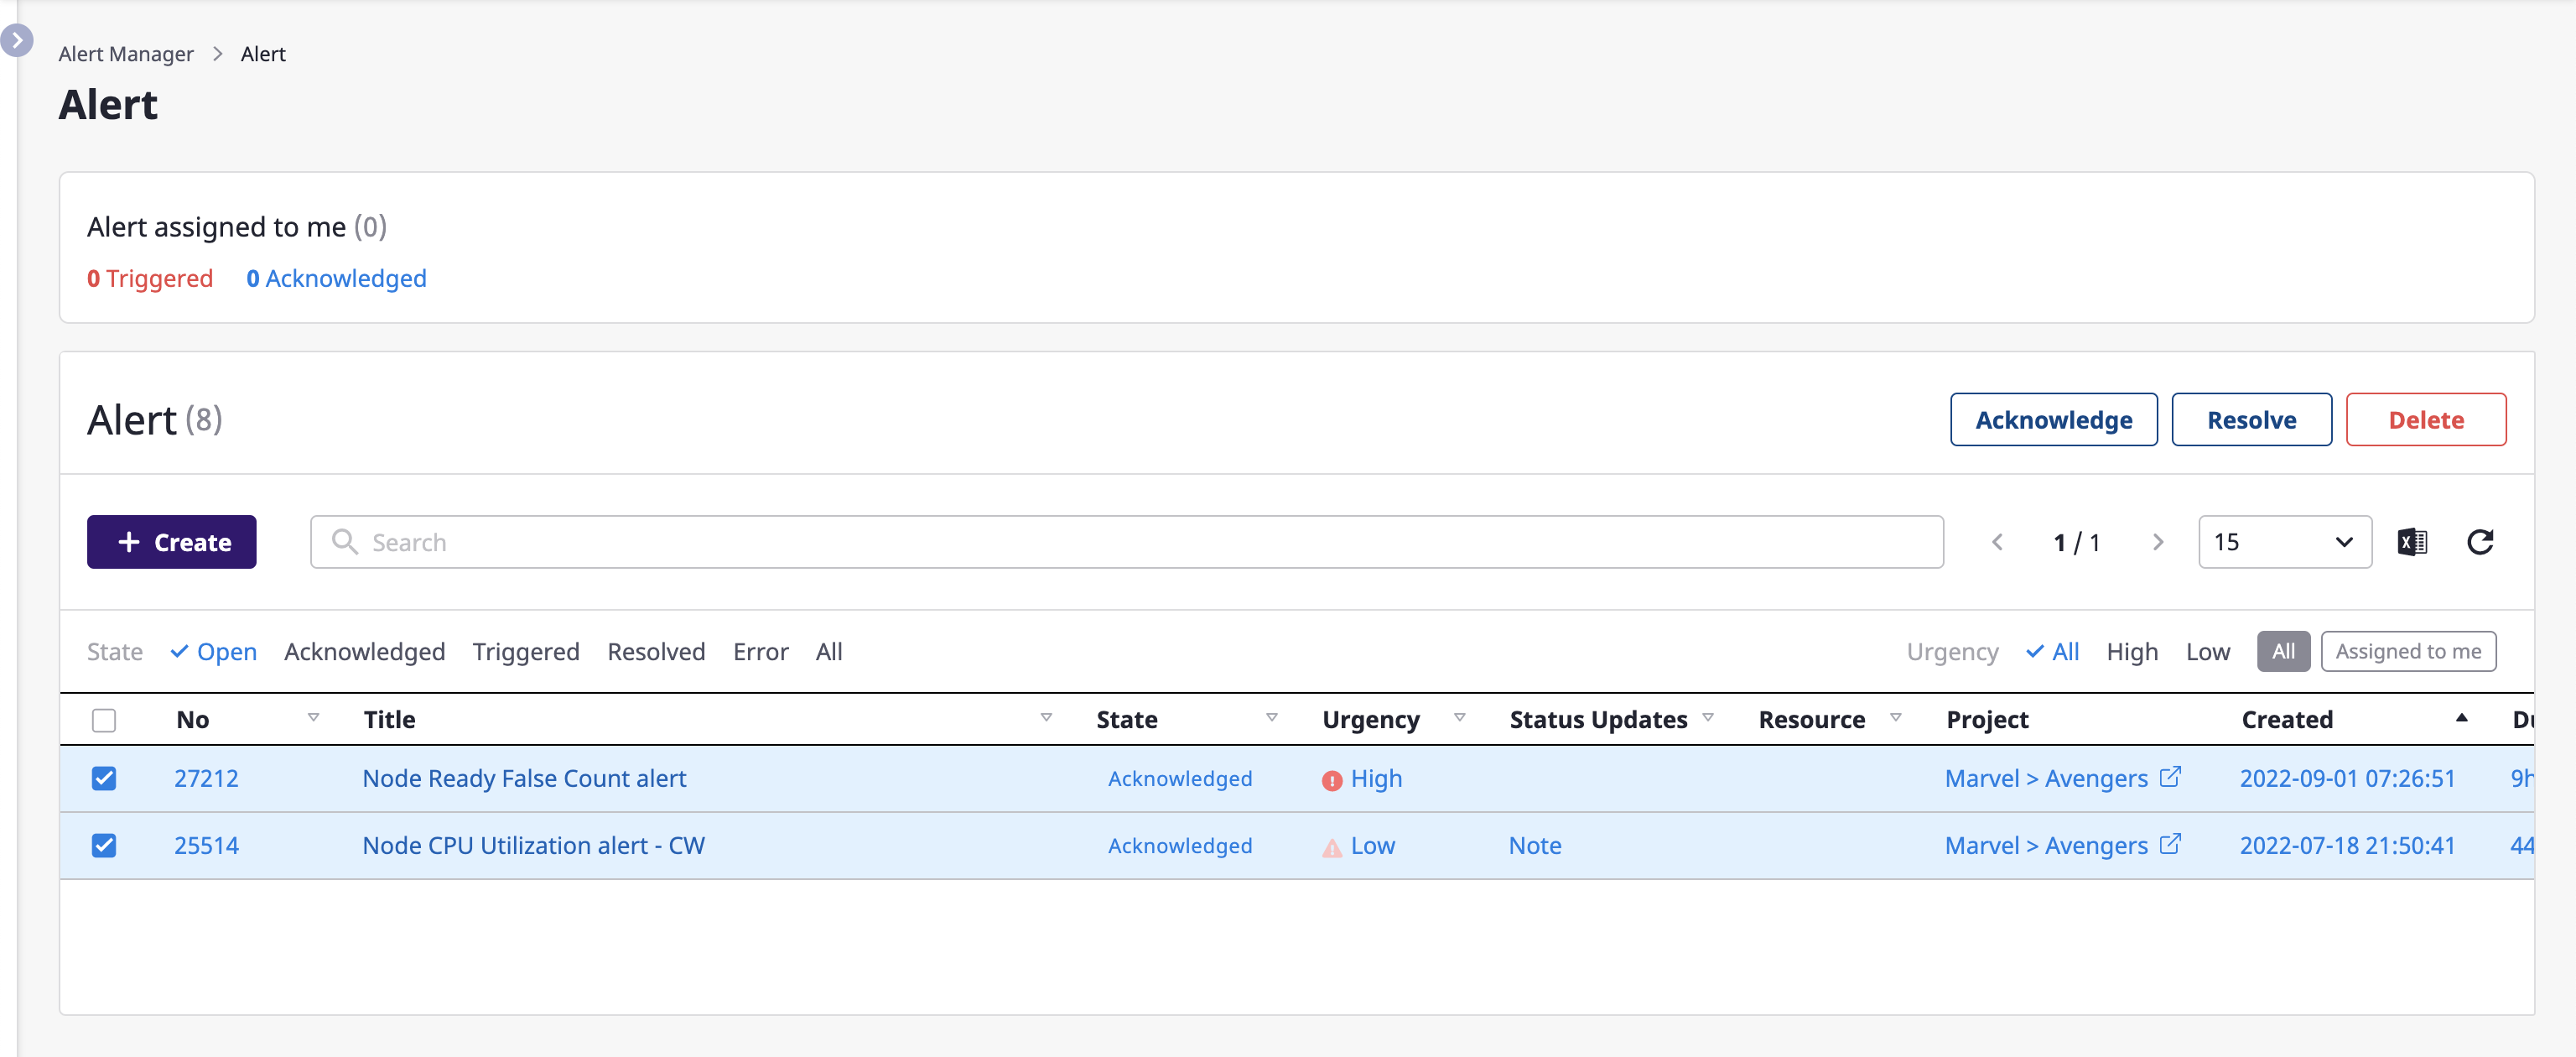
(1-1) Click the [OK] button to change the state to OK
The OK state is a state in which the alert has been assigned and is being processed by a person in charge.
As soon as you change the state, you can set the person in charge of the selected alert to yourself, and click the [OK] button to complete.
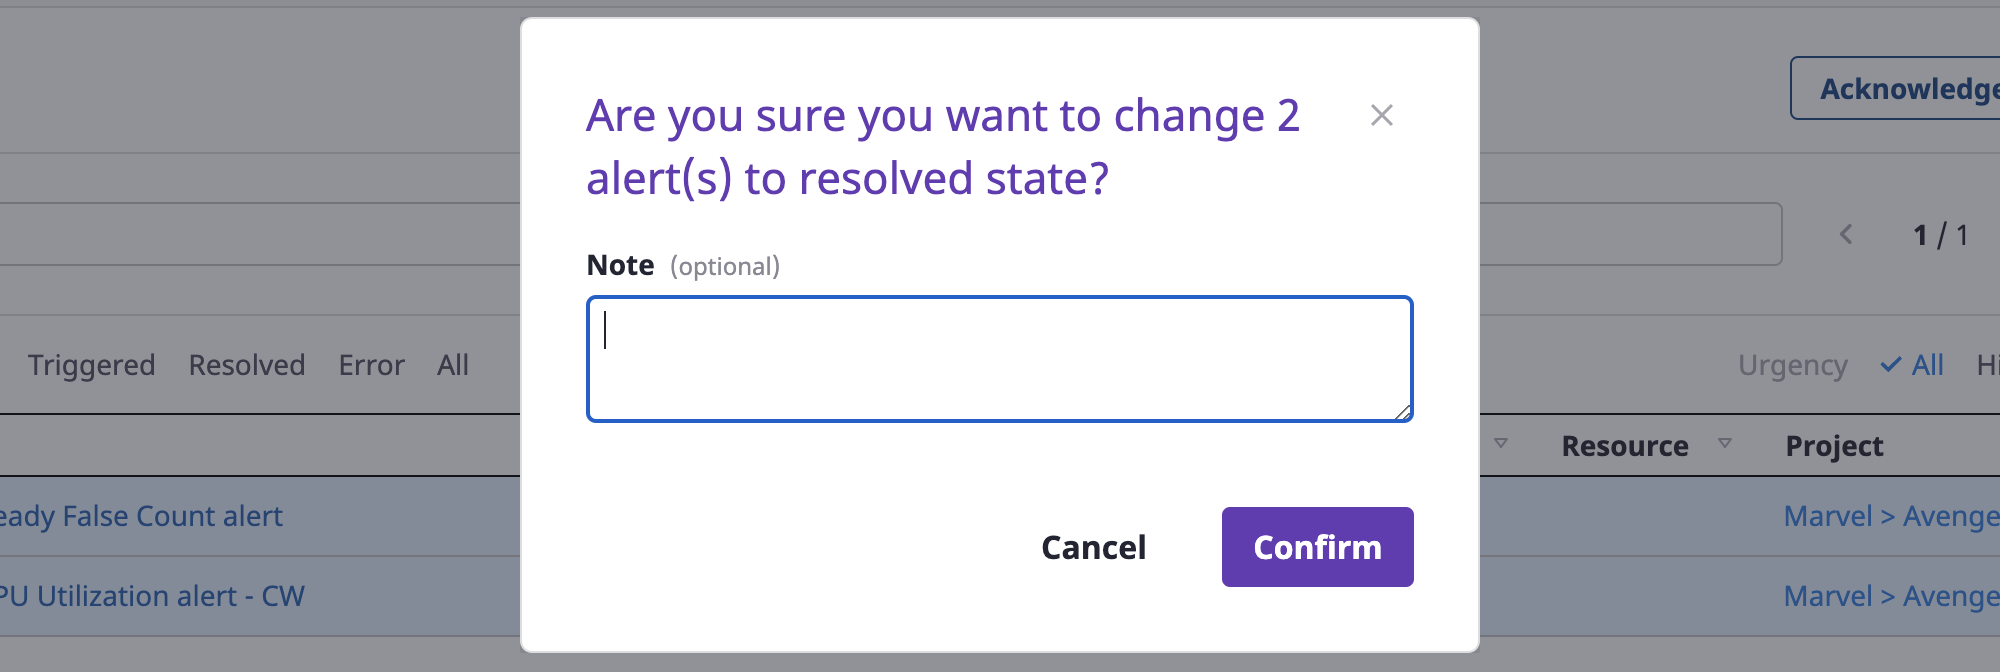
(1-2) Click the [Revolved] button to change the state to `resolved’
The resolved state means that the issue that caused the alert has been processed.
You can write a note as soon as the state changes, and click the [OK] button to complete.
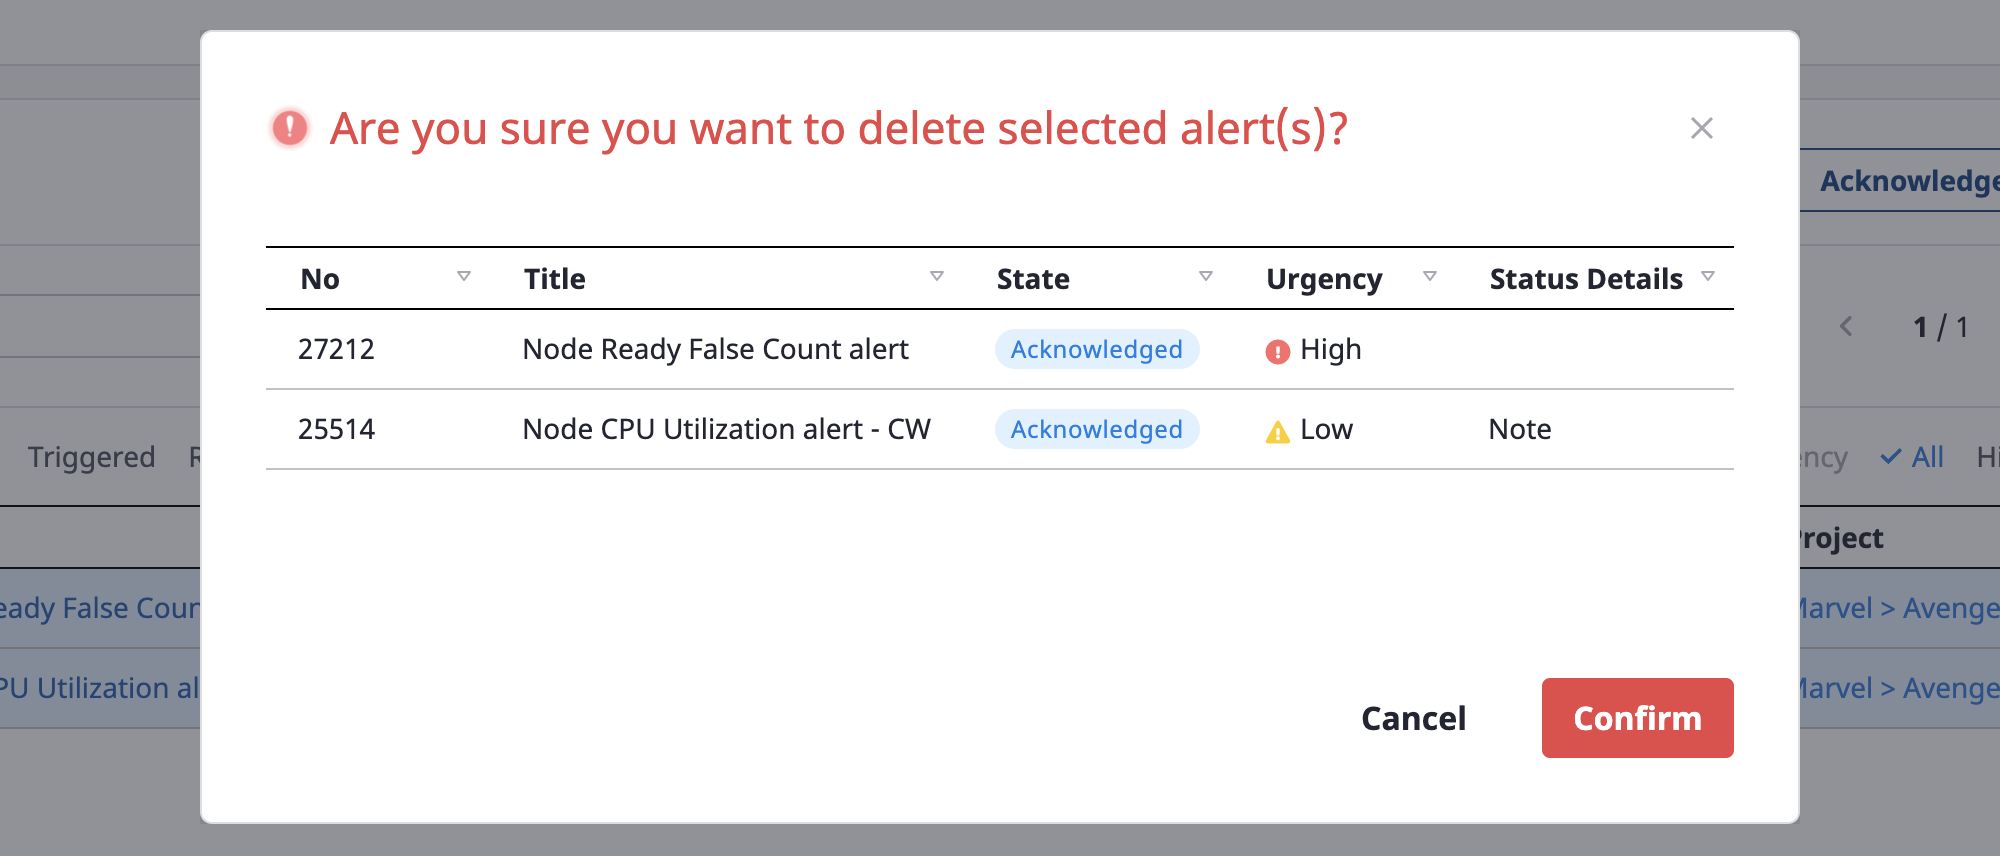
(1-3) Click the [Delete] button to delete an alert
You can check the alert list to be deleted once again, and click the [OK] button to delete it.
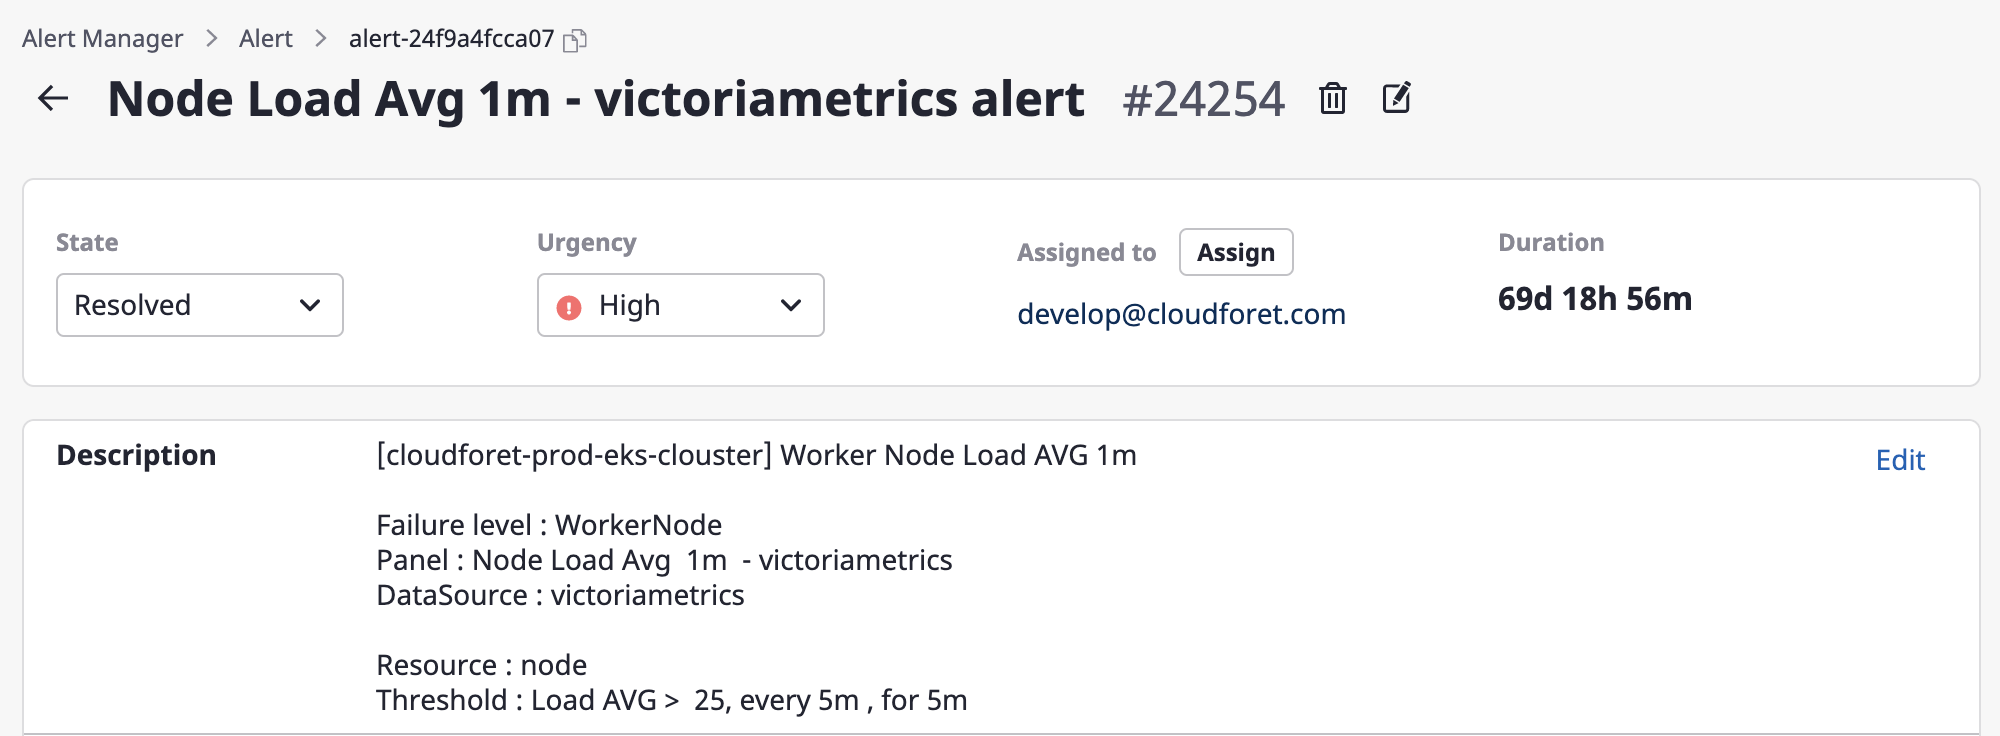
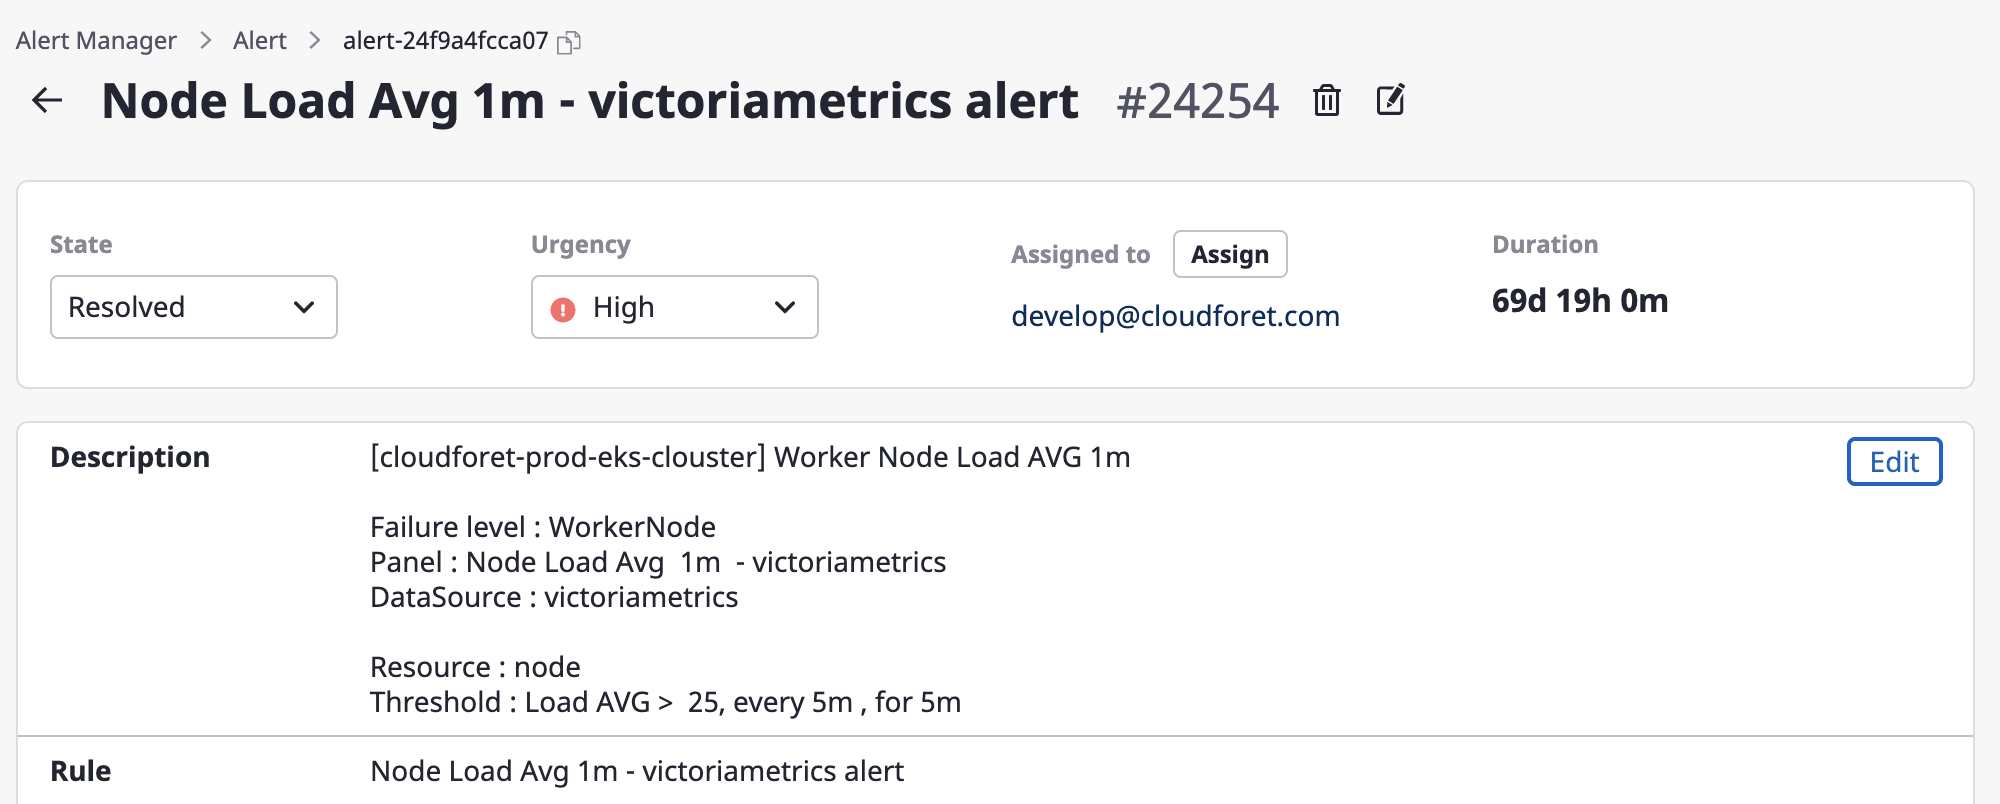
Viewing alerts
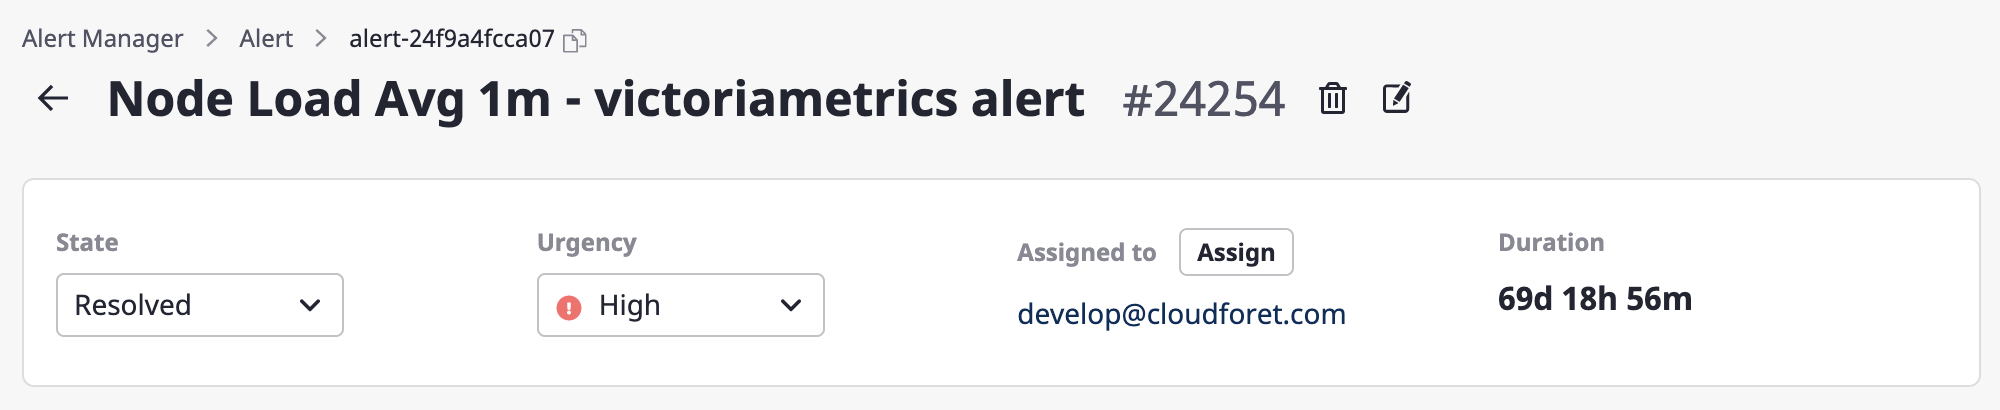
You can view and manage details and alert history on the alert detail page.

| Items | Description |
|---|---|
| Duration | Time during which an alert lasted |
| Description | As a description of an alert, the content written by a user or that of an event received from an external monitoring service |
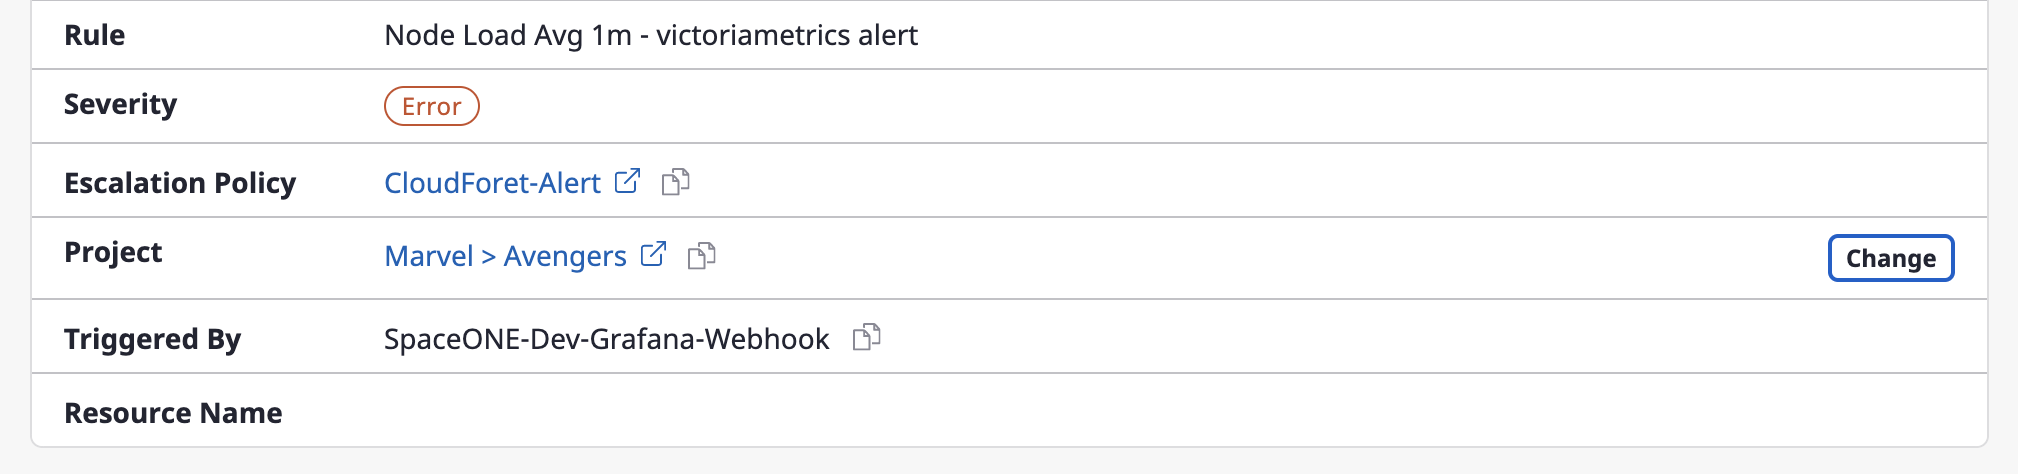
| Rules | Conditions alerted by an external monitoring service |
| Severity | Level of seriousness of data received from a webhook event |
| Escalation policy | Applied escalation policy |
| Project | Alerted project(s) |
| Create | Monitoring services that sent alerts |
| Resource name | Alert occurrence target |
Renaming and deleting alerts
You can change the name of an alert or delete an alert through the [Edit] and [Delete] icon buttons for each.
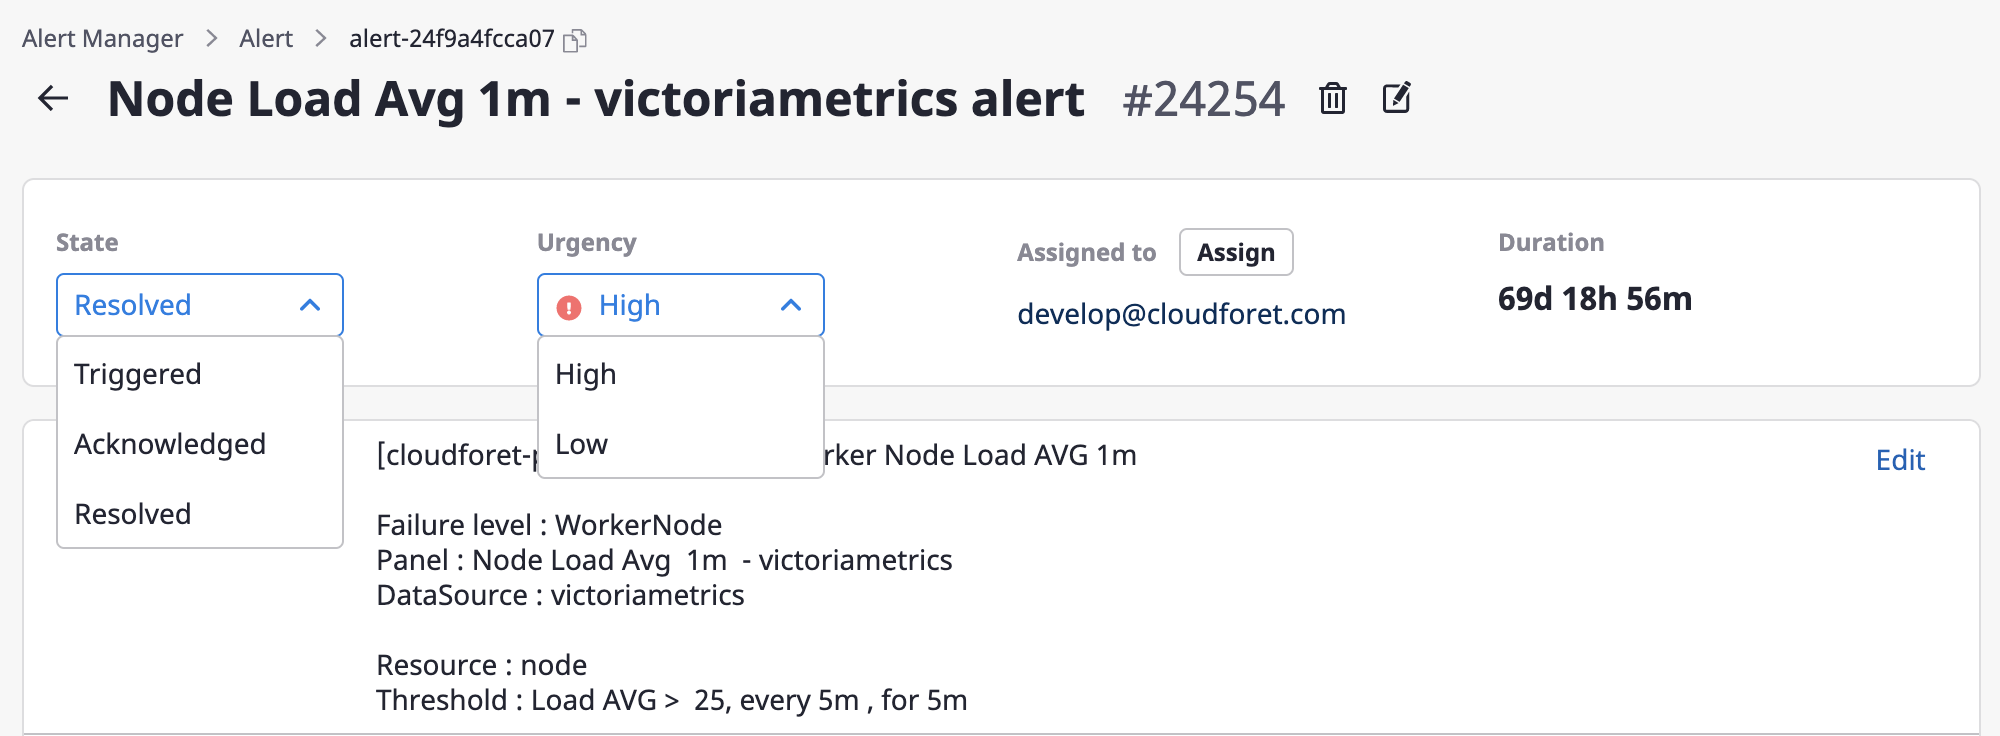
Changing state/urgency
State and urgency can be easily changed via the dropdown menus.
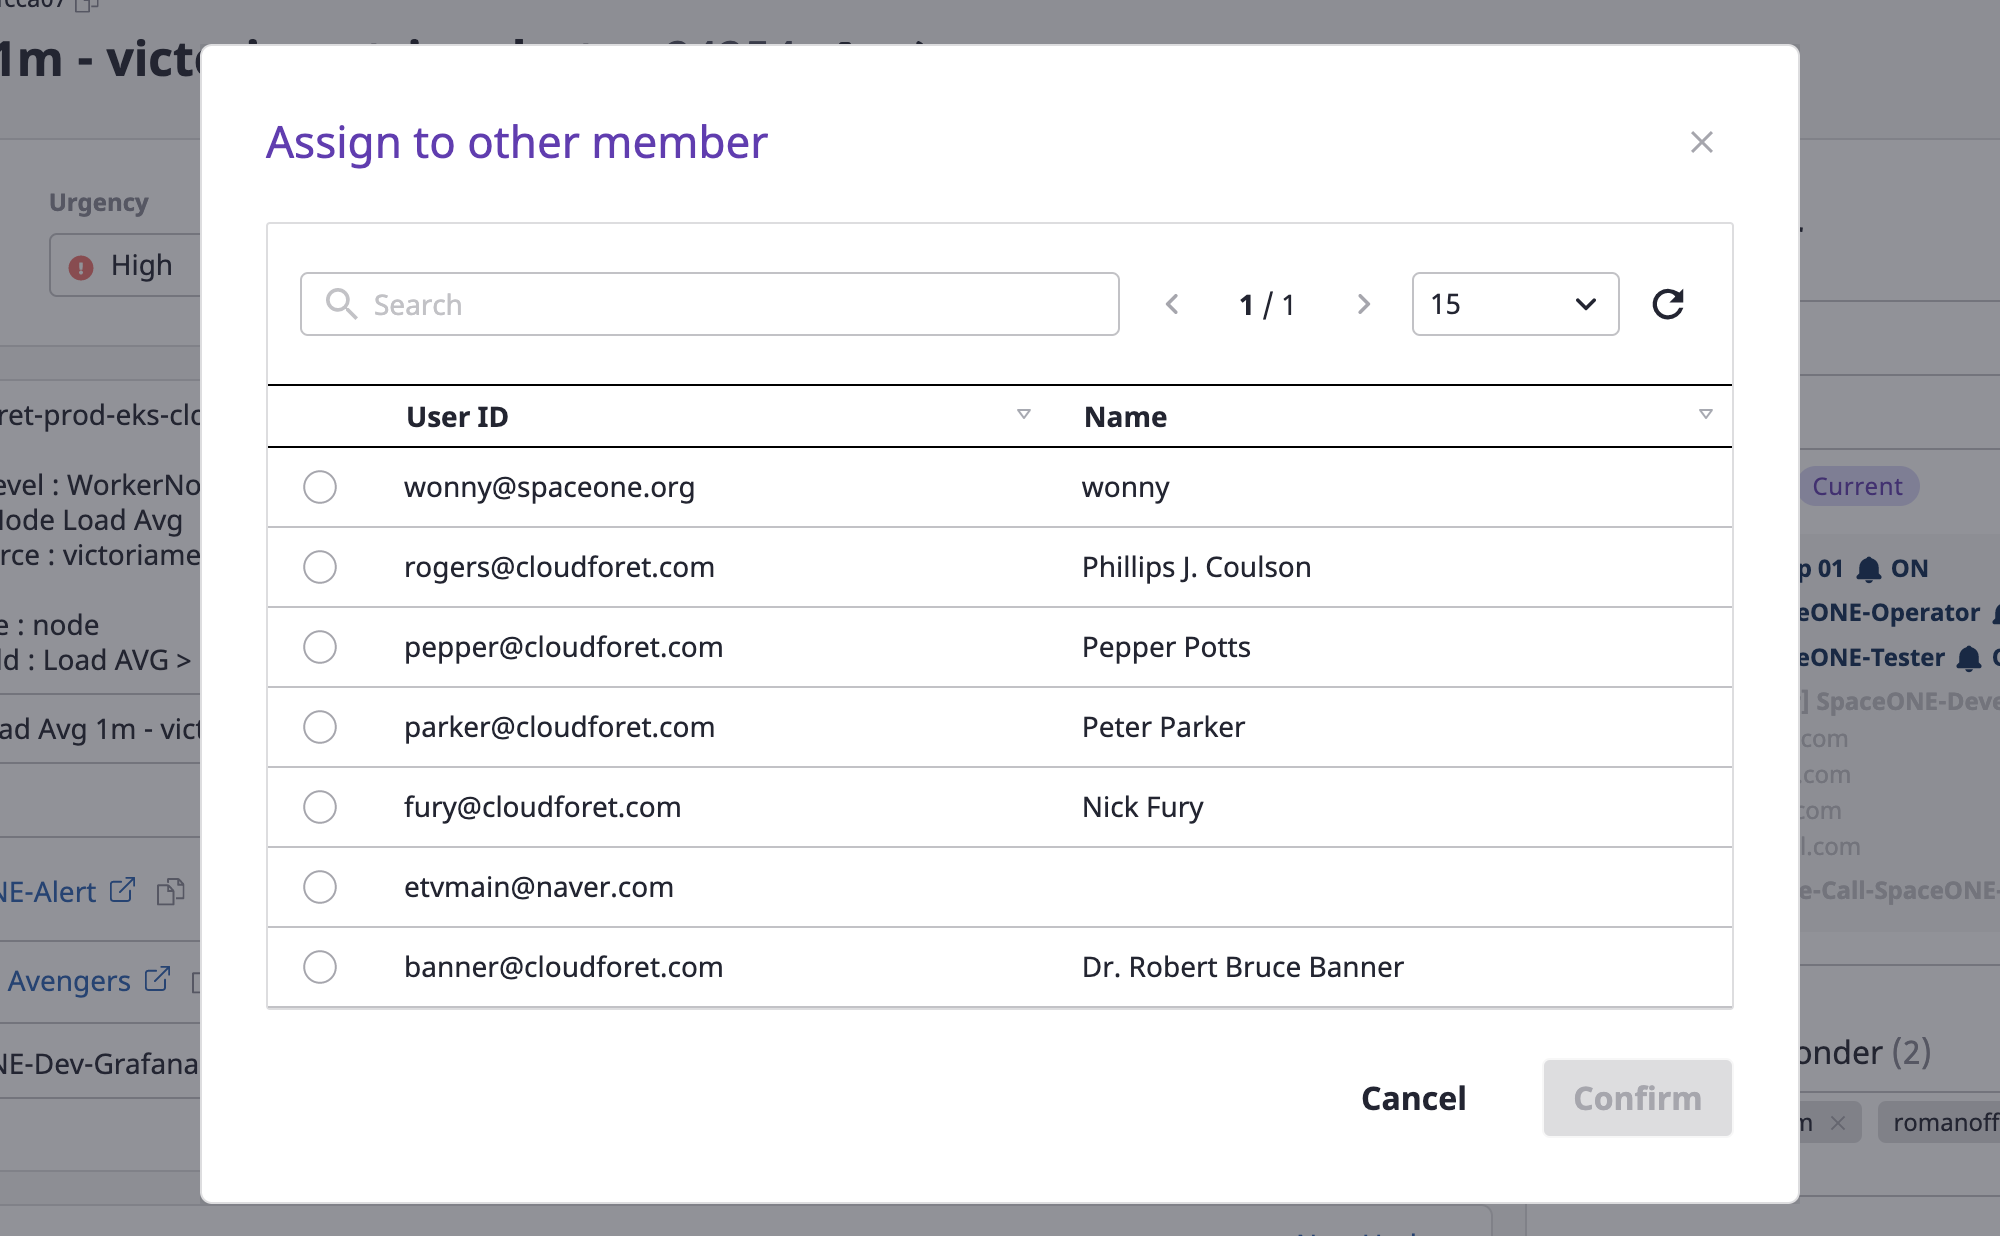
Changing the person in charge
(1) Click the [Assign] button.
(2) Select a person in mind and click the [OK] button to complete the assignment of the person in charge.
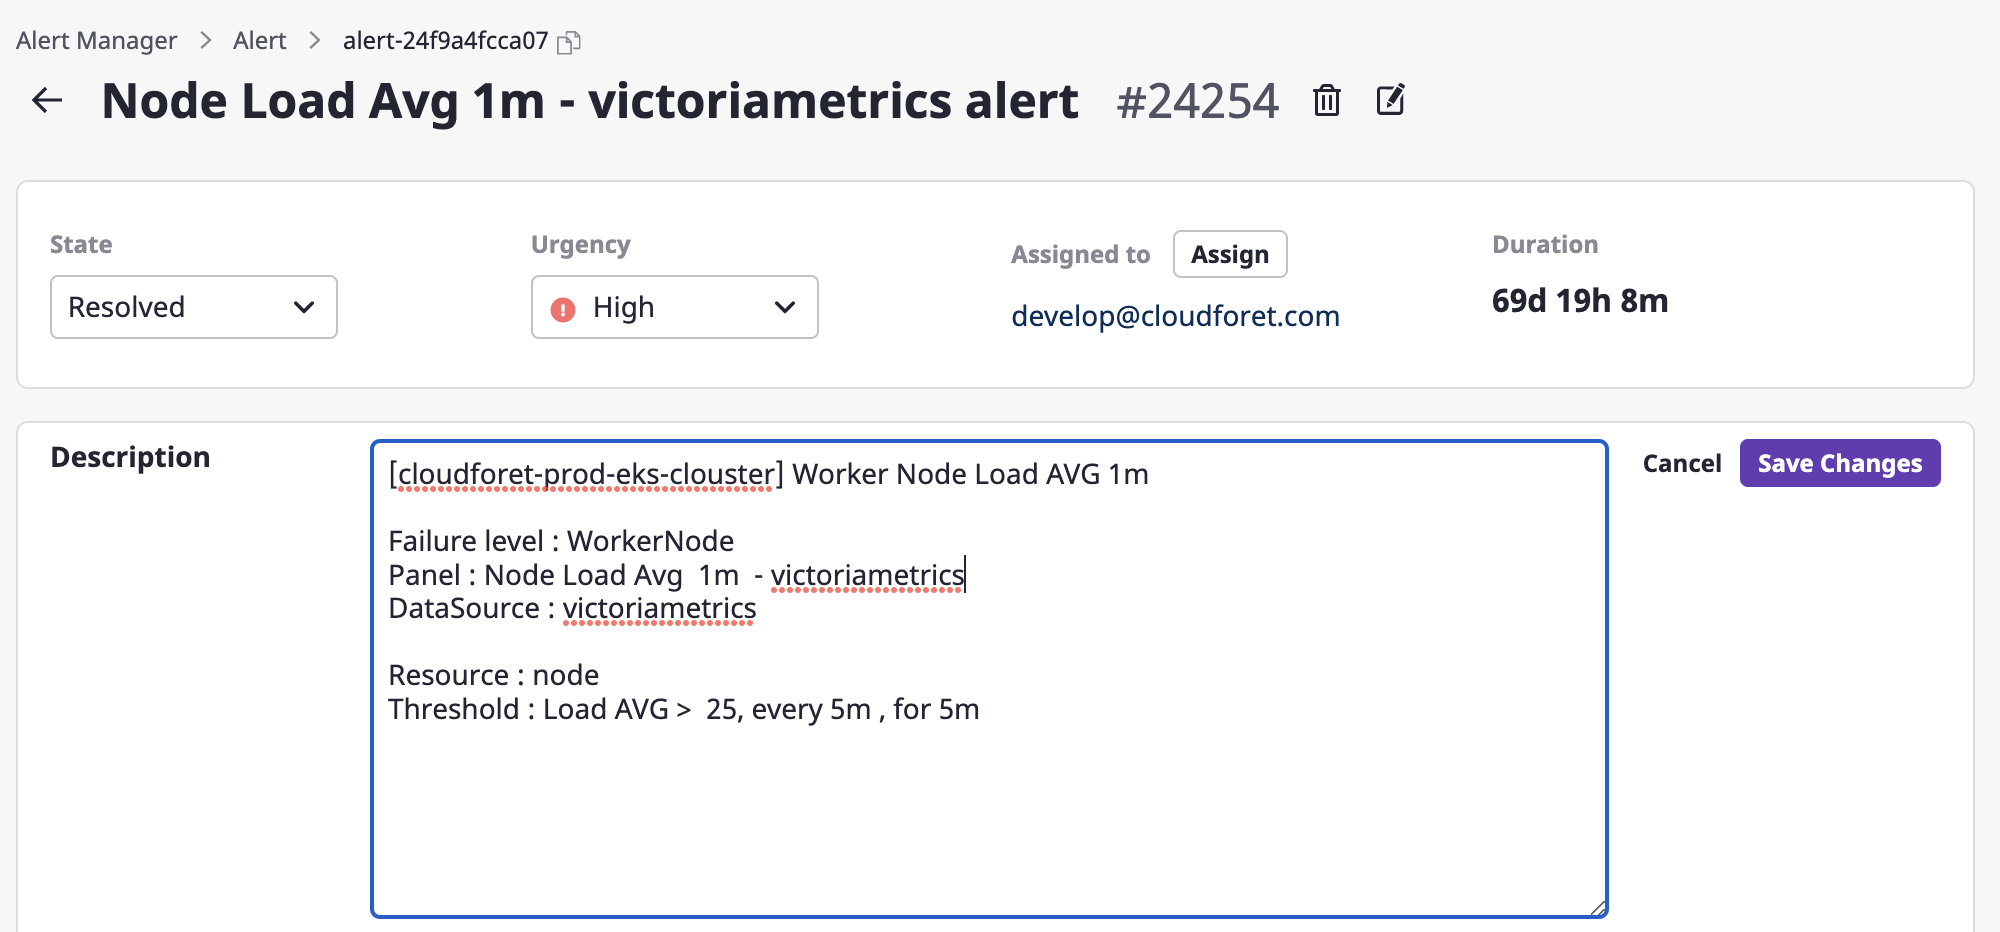
Editing description
Only users with an administrative role for the alert can edit it.
(1) Click the [Edit] button.
(2) Write changes through a form in an alert description field and click the [Save changes] button to complete such changes.
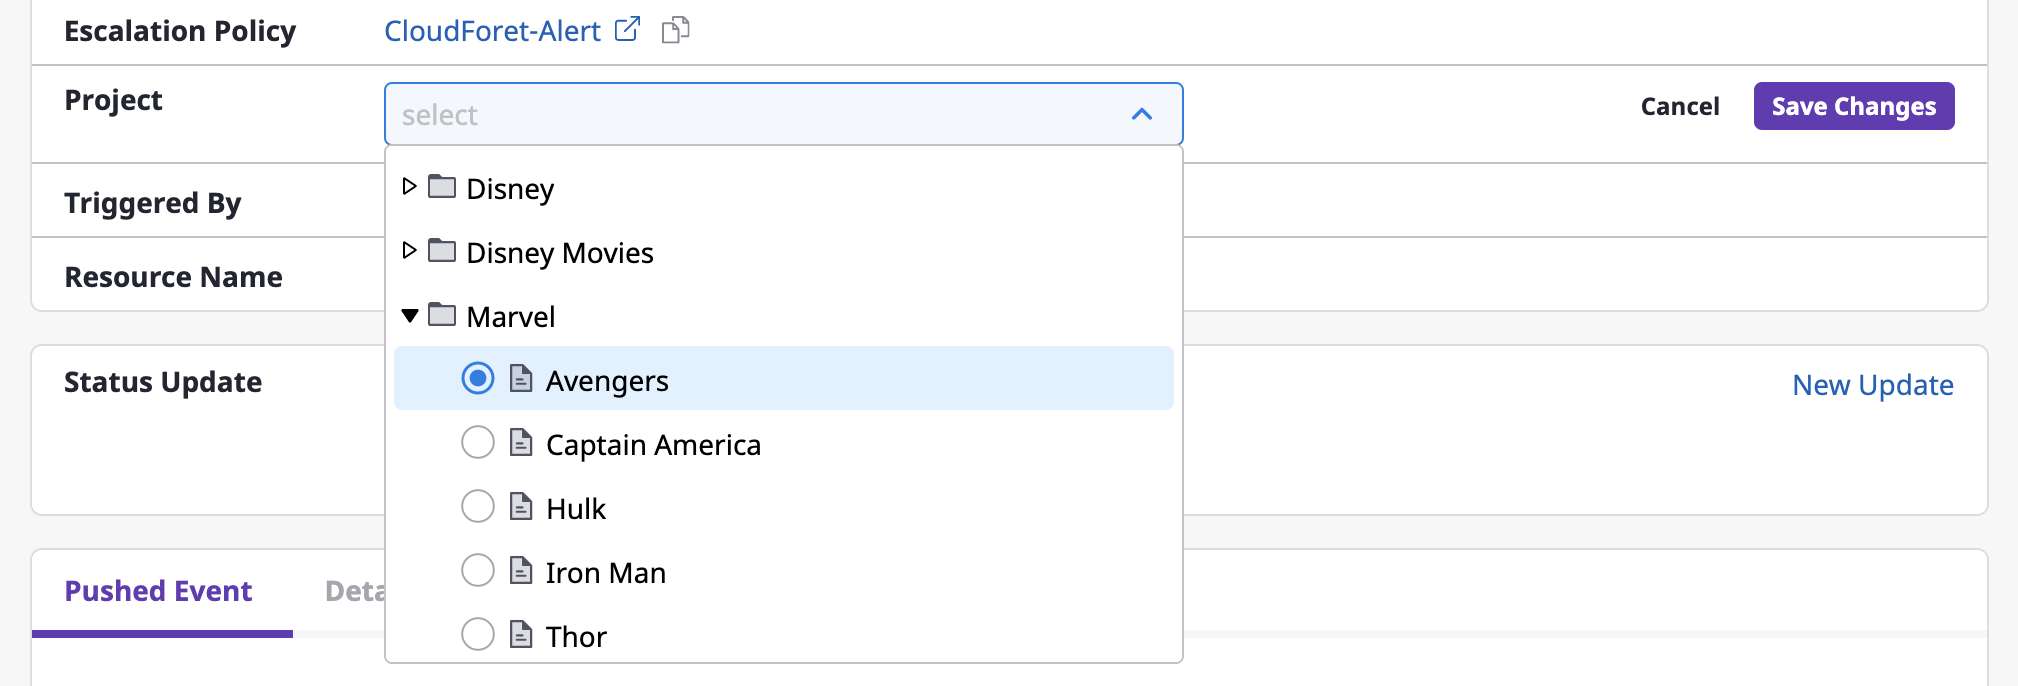
Changing a project
You can change the project linked with an alert.
(1) Click the [Change] button to change a project.
(2) After selecting a project from a [Select project] dropdown menu, click the [Save changes] button to complete the project change.
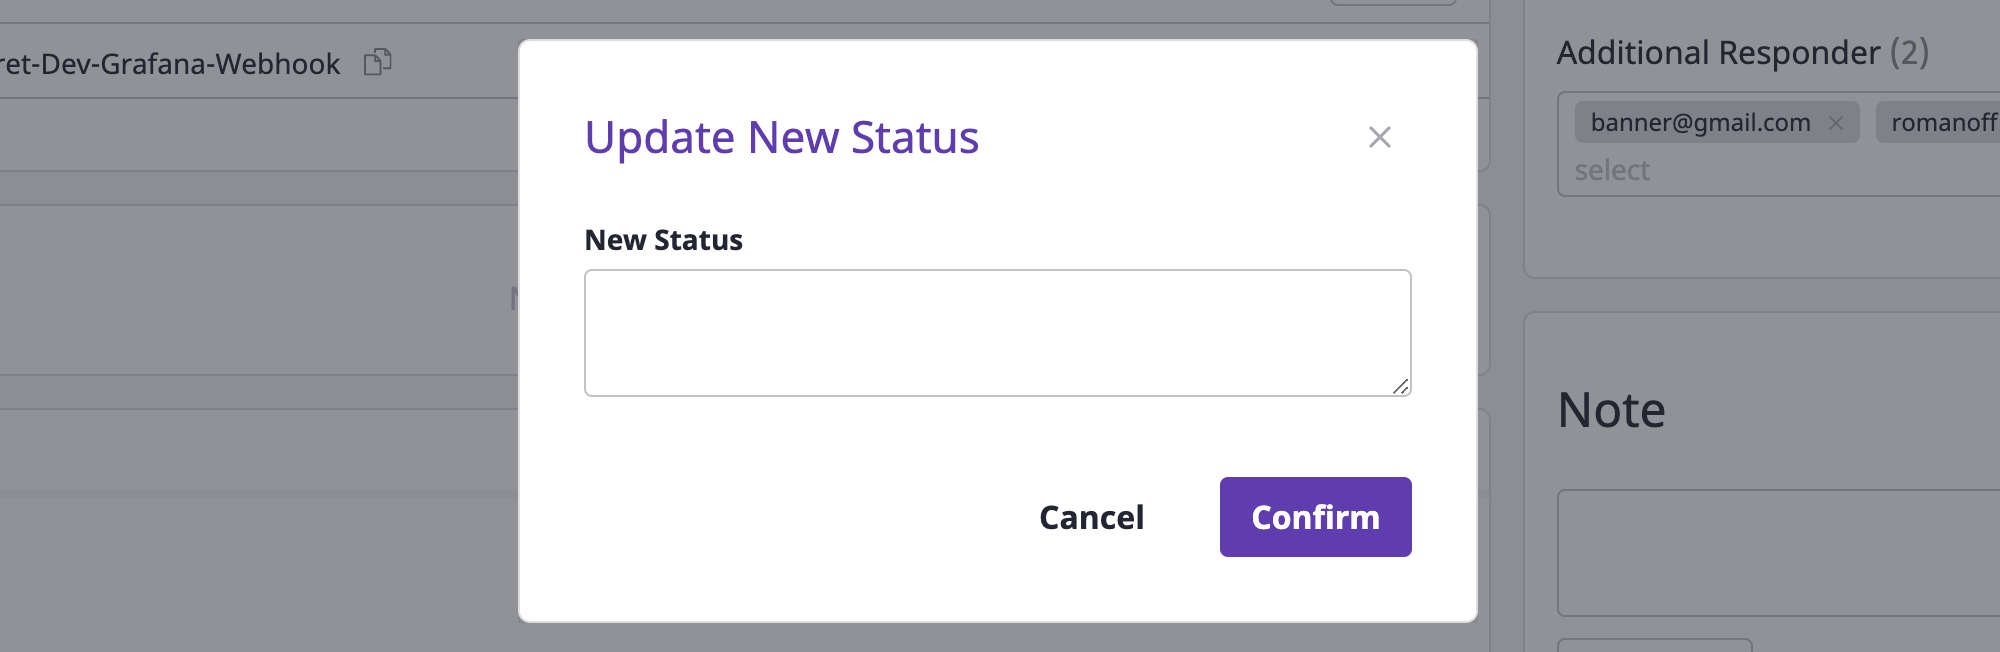
Updating to a new state
By recording the progress in the state of alerts field, you can quickly grasp their state.
If you change the content, the previous state history will be lost.
(1) Click the [New update] button.

(2) Input the state in the [New state update] modal dialog, and click the [OK] button to complete the state update.
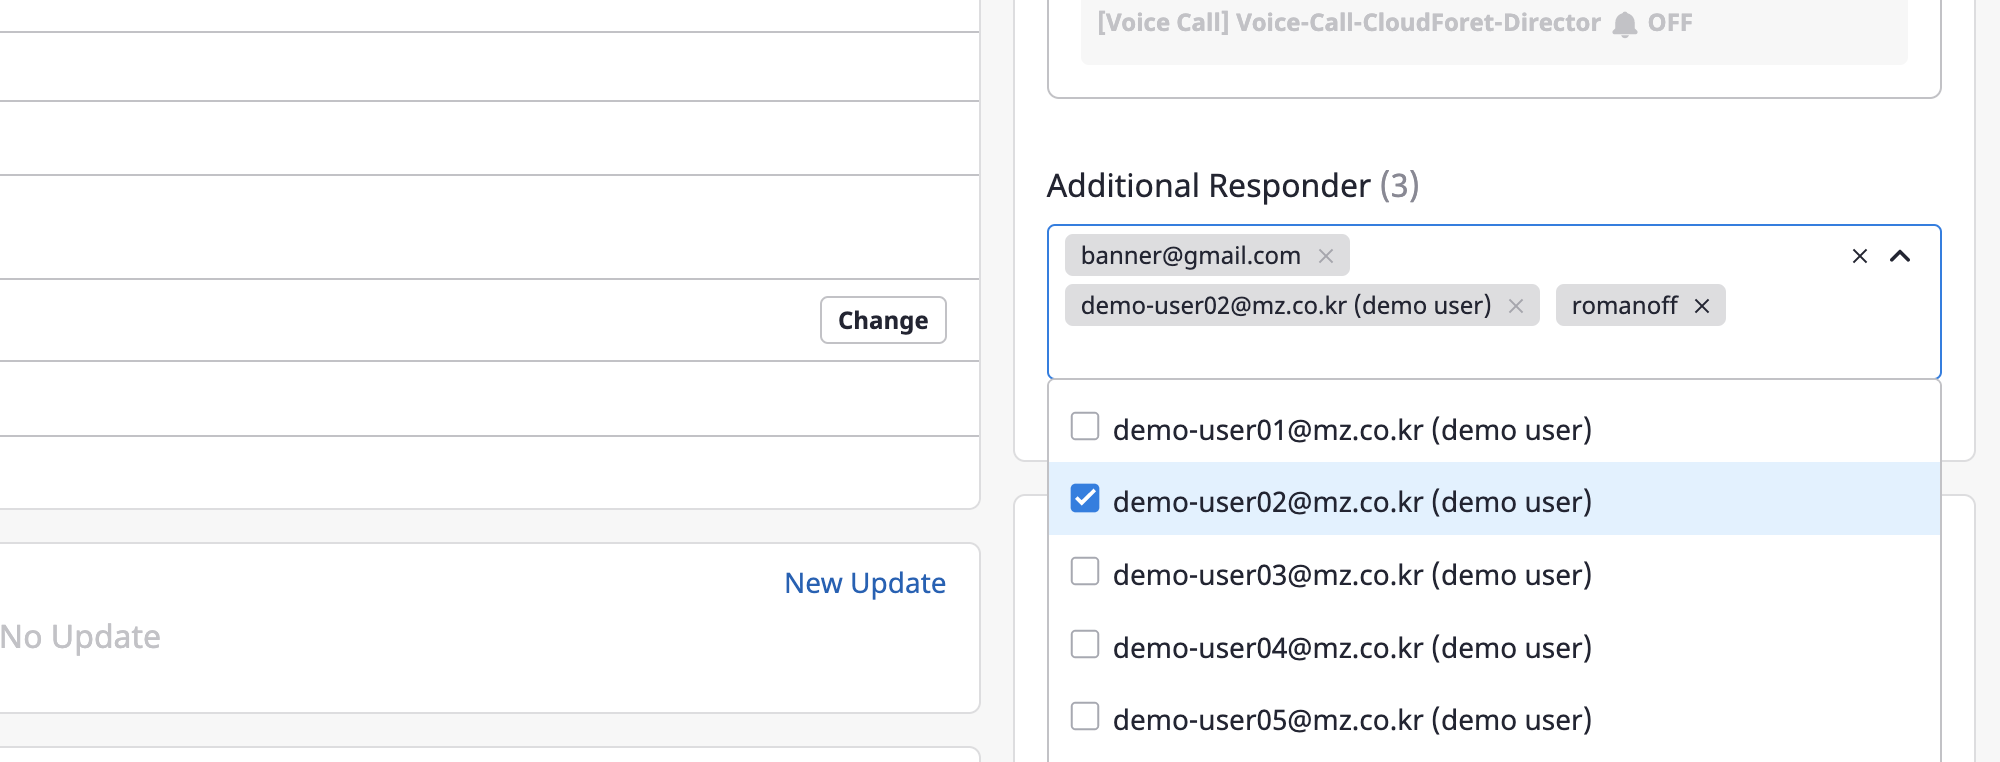
Adding recipients
Alerts are sent to recipients via Escalation policy.
If you need to send an alert to additional users for that alert, set up [Additional recipients].
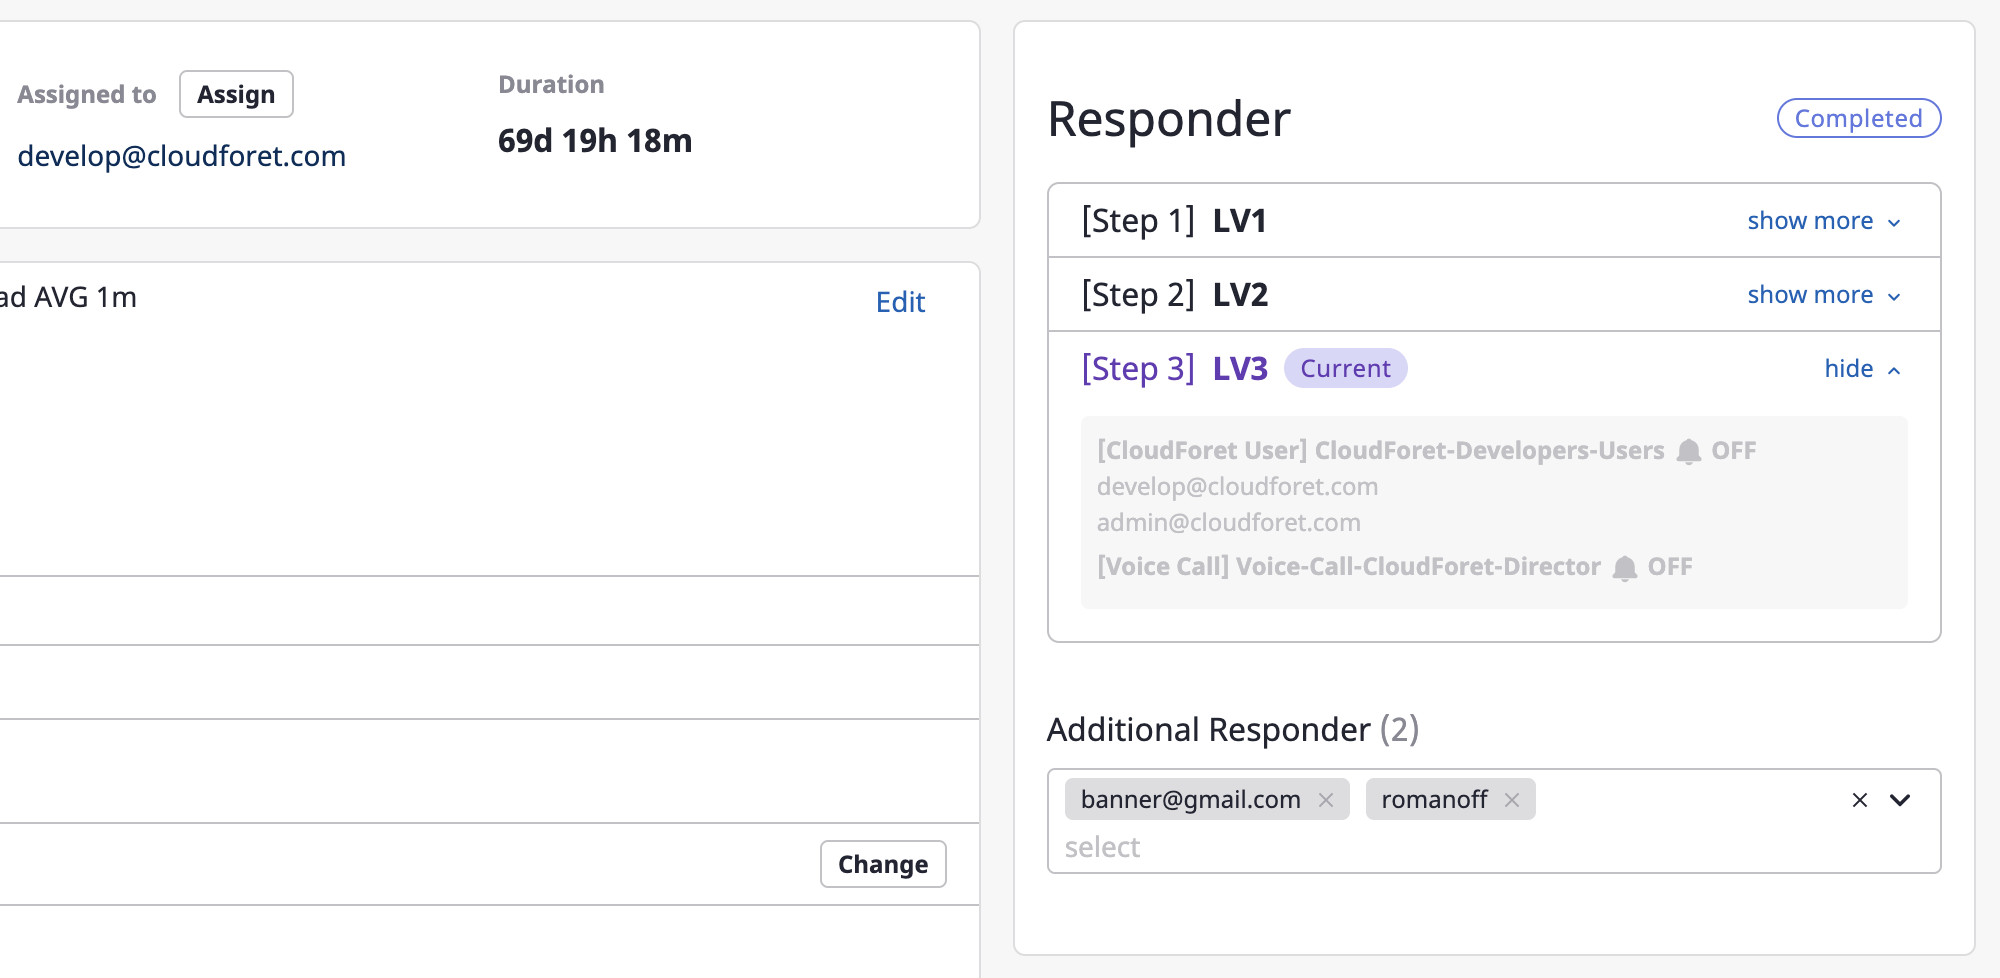
You can view and search a list of available users by clicking the search bar, where multiple selections are possible.
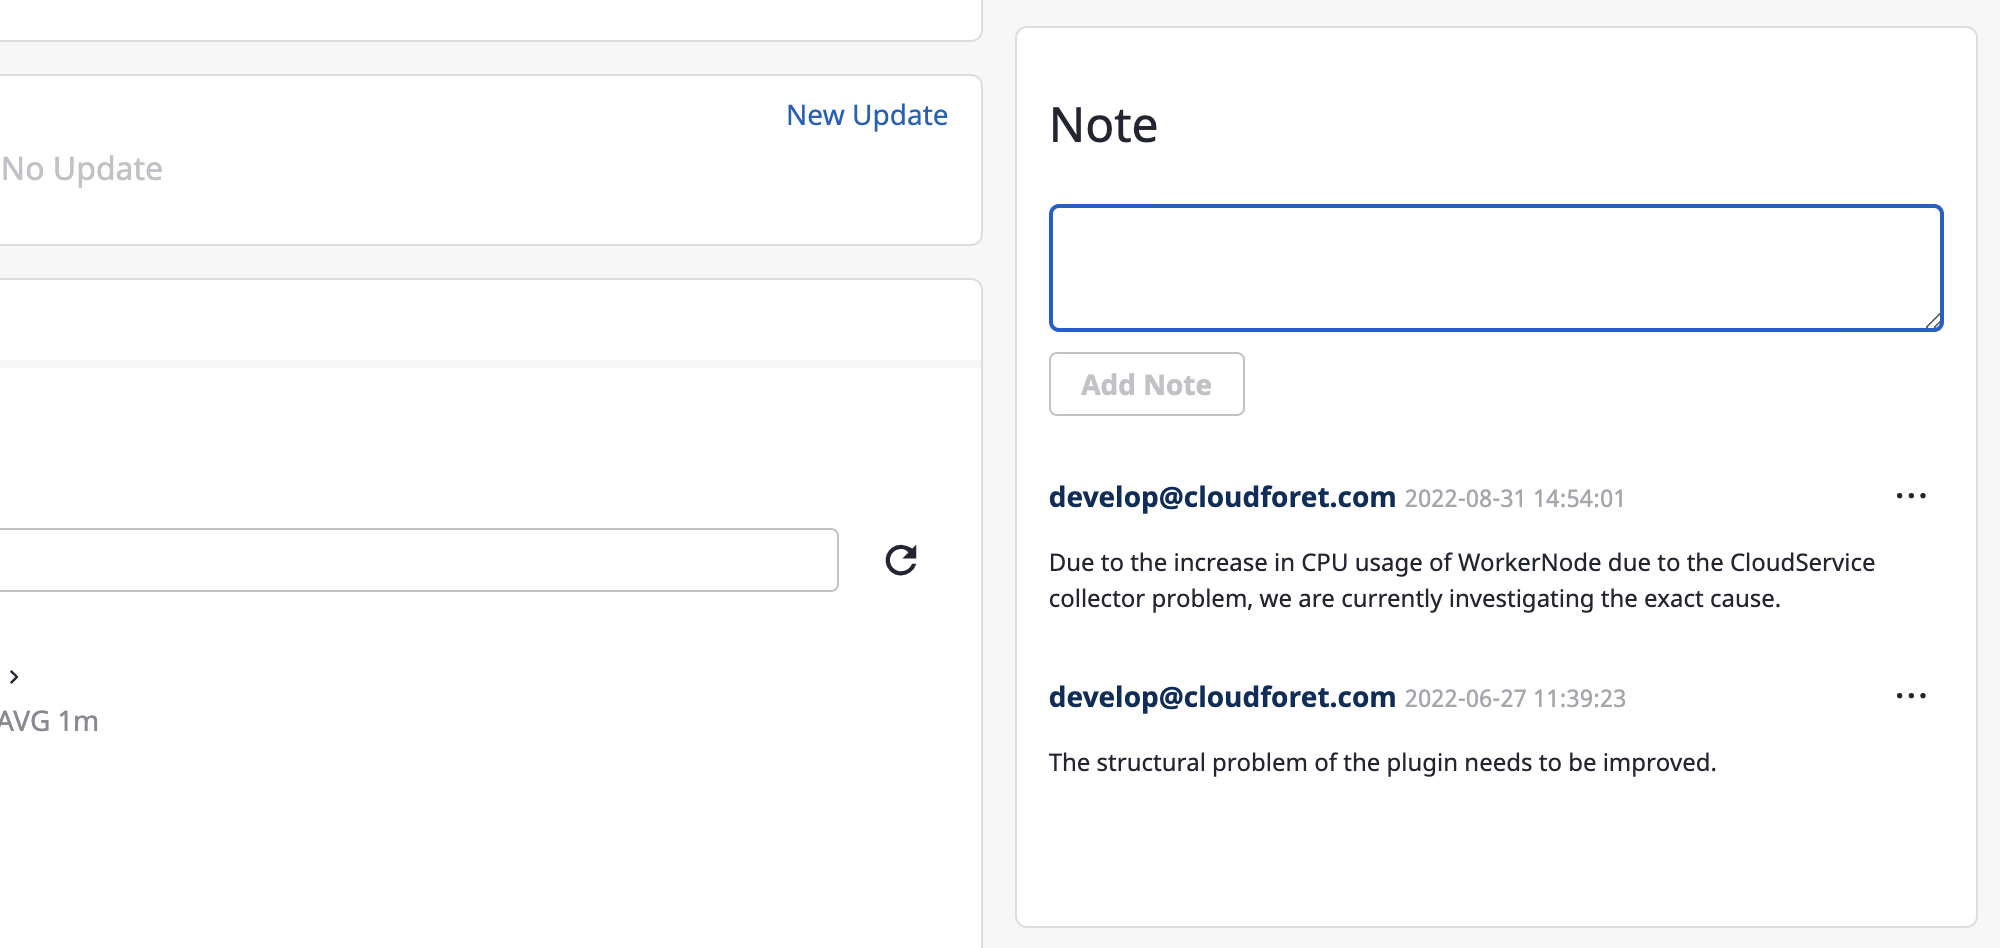
Adding notes
Members can communicate by leaving comments on alerts, registering inquiries and answers to those inquiries during processing.
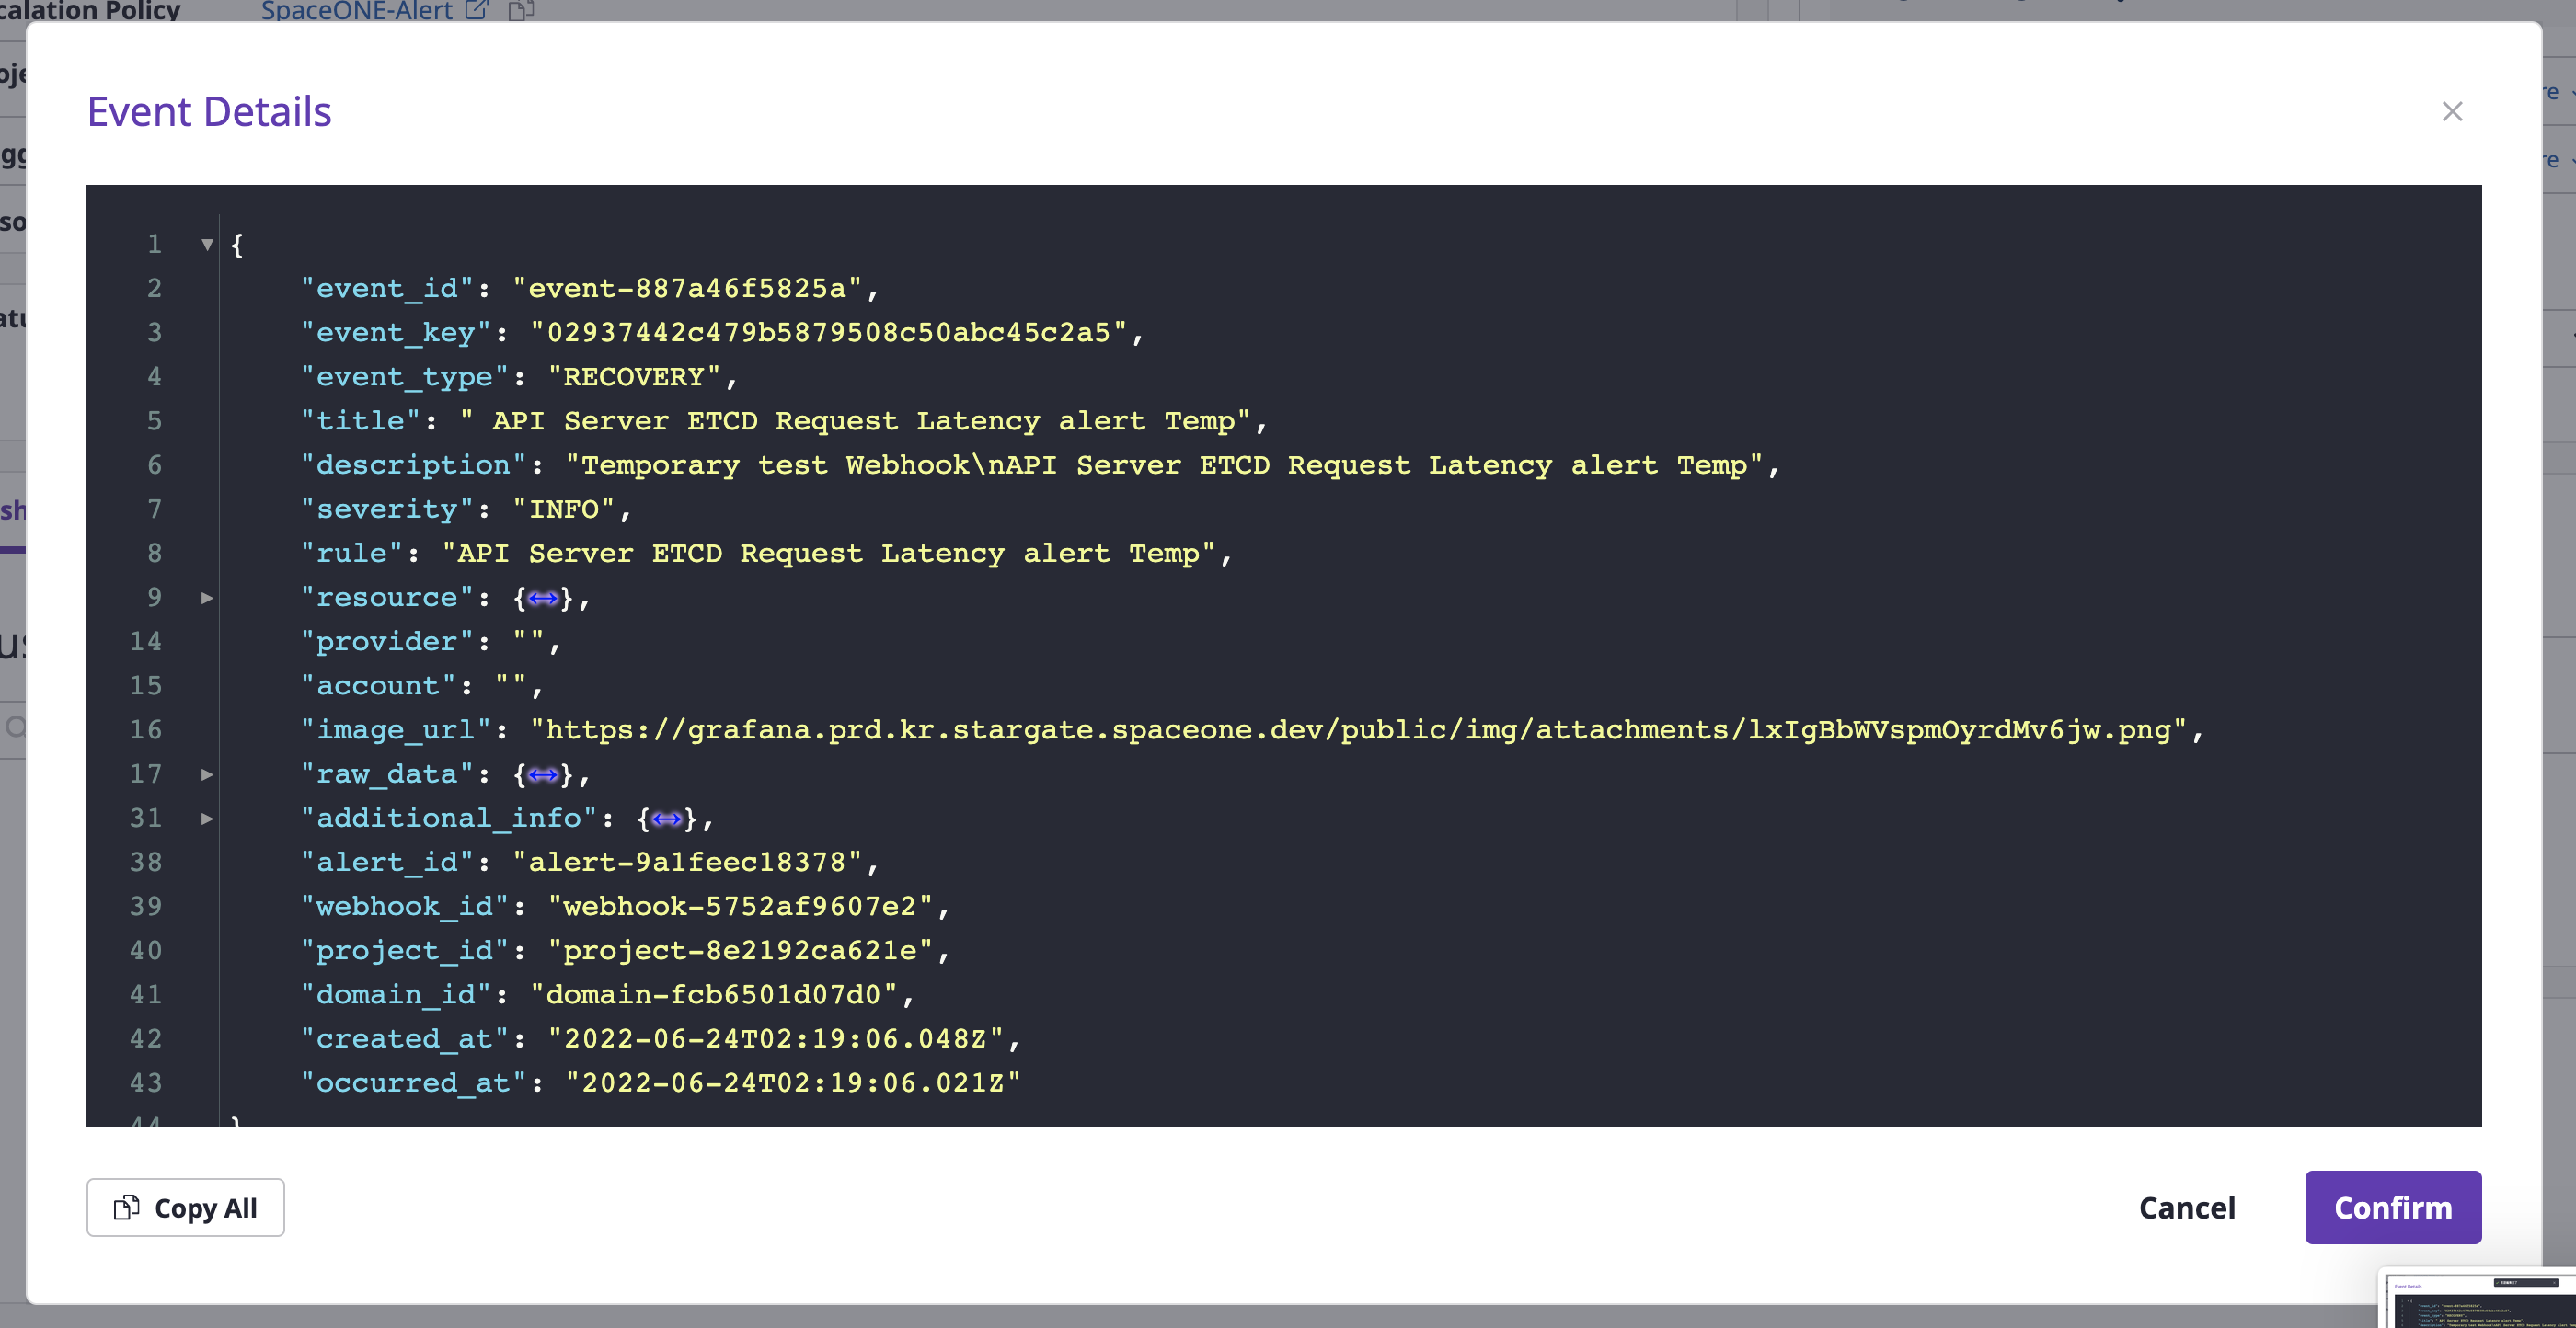
Viewing occurred events
You can view history by logging events that occurred in one alert.
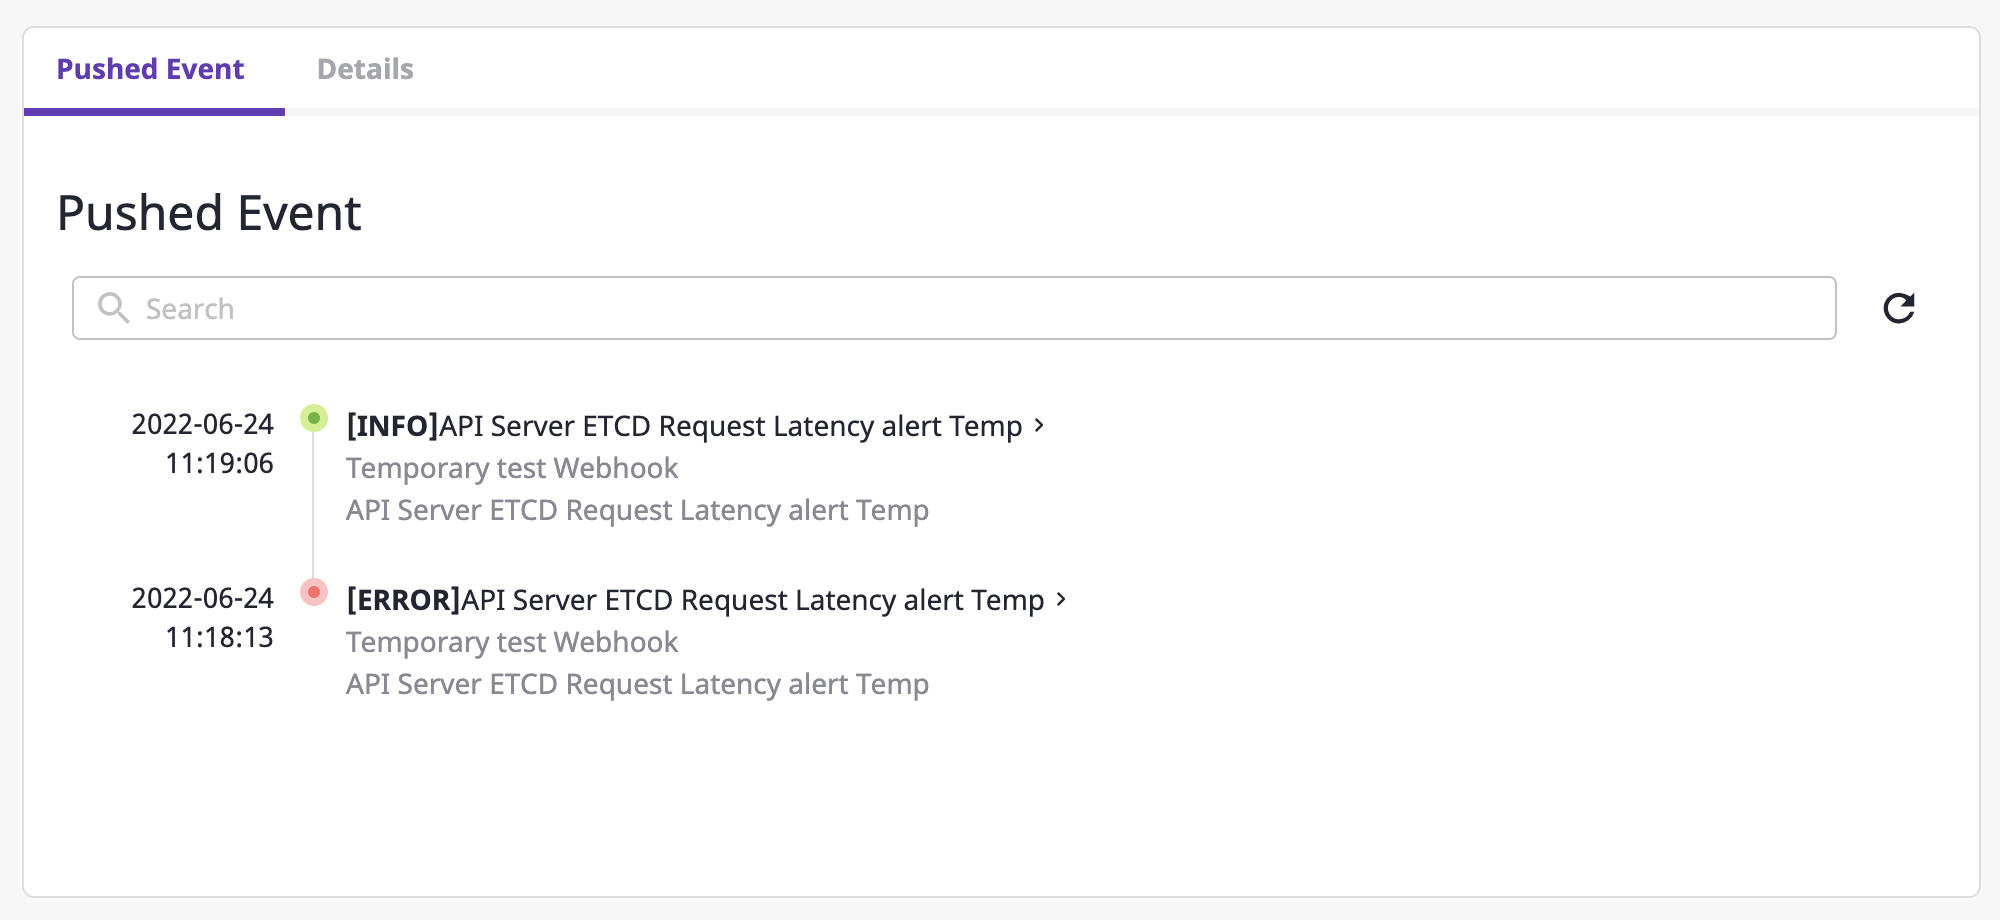
If you click one event from a list, you can view the details of that event.
Notification policy settings
You can set an alert to occur only when the urgency of the alert that has occurred in the project is urgent.
(1) Inside the [Alerts] tab of the project detail page, go to the [Settings] tab.

(2) Click the [Edit] icon button in the notification policy area.
(3) Select the desired notification policy.
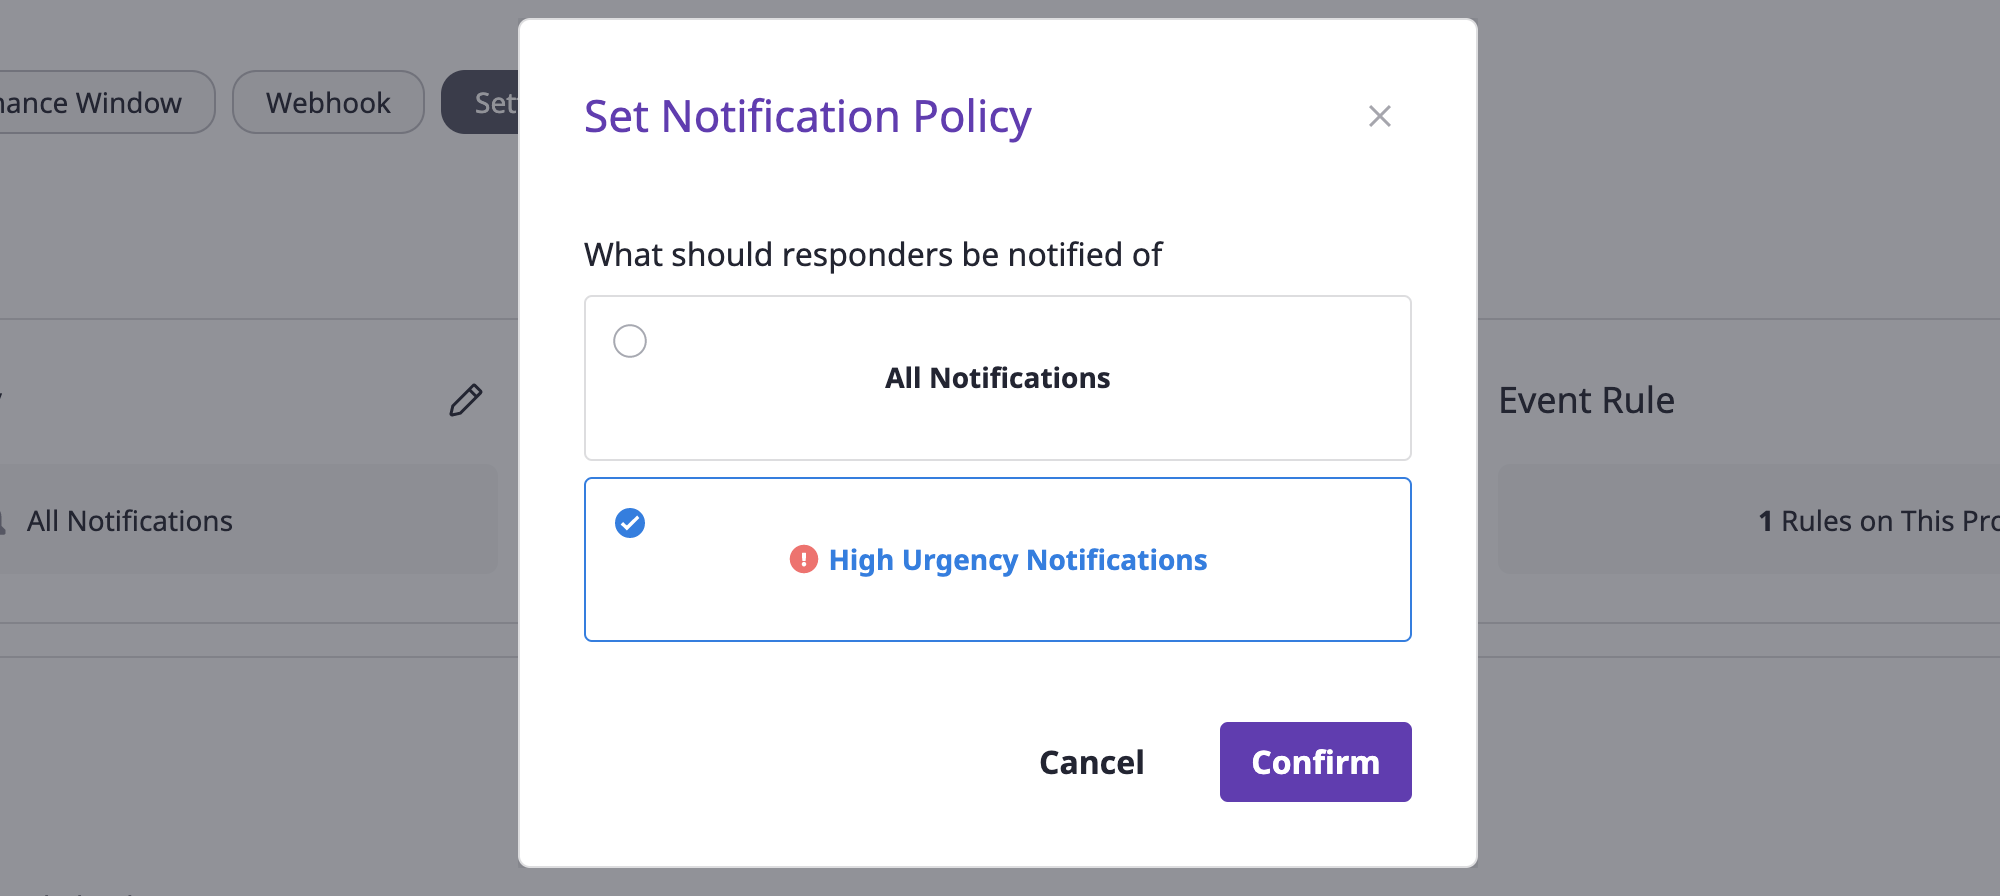
(4) Click the [OK] button to complete policy settings.
Auto recovery settings
The auto recovery feature automatically places the alert into a resolved state when the system crashes.
How auto recovery works
When an alert of the project for which the auto recovery is set receives an additional event, provided that the event type value of that event is recovery, the alert state is automatically switched to resolved.
(1) Inside the [Alerts] tab on the project detail page, move to the [Settings] tab.
(2) Click the [Edit] icon button in the auto recovery area.
(3) Select the desired auto recovery settings.
(4) Click the [OK] button to complete auto recovery settings